Breakfast & Brunch
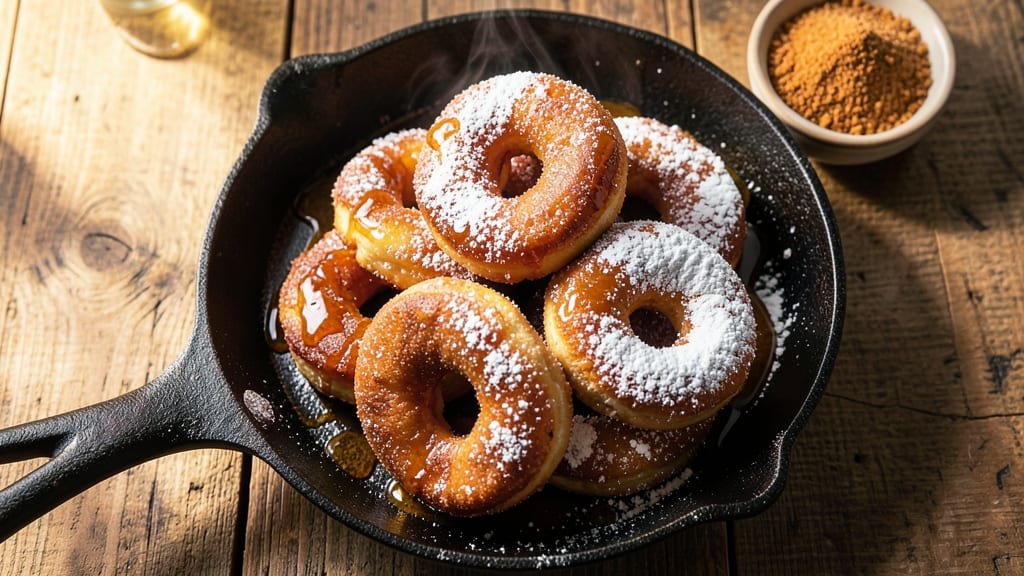
This Amish doughnut recipe brings back the comforting aroma of homemade fried dough that my grandmother used to make every Sunday morning. The secret lies in a simple, yeast-based dough that's hand-rolled and fried to golden perfection in lard—just like the old-fashioned way.
Standing on a step stool in my grandmother's kitchen, I learned how the right balance of flour, sugar, and yeast creates doughnuts that are light, fluffy, and impossible to resist.
The dough requires just 15 minutes of active prep time before it needs to rise, giving you plenty of time to gather your toppings. Traditional Amish doughnuts are often coated in powdered sugar, but I've added a classic vanilla glaze that takes them to the next level.
The glaze is smooth, sweet, and easy to make with just three ingredients—vanilla extract, powdered sugar, and milk. This combination creates a perfect balance of textures and flavors that will have everyone asking for seconds.
By the time you're done, you'll have a plate of golden, fluffy doughnuts with that signature crispy exterior and tender interior. The vanilla glaze adds a smooth, sweet coating that makes each bite even more satisfying.
These doughnuts are perfect for breakfast, brunch, or even as a special treat. They freeze beautifully too, so you can make a big batch and enjoy them all week long.
Whether you're serving them at a family gathering or enjoying them with a cup of coffee on a quiet morning, these Amish-style doughnuts bring a touch of tradition to your kitchen.
The recipe is foolproof and delivers restaurant-quality results with minimal effort. Let's get started on making these delicious homemade treats!
Ingredients for amish doughnut
Twelve simple ingredients for doughnuts that taste like Sunday mornings at Grandma's.
| Ingredient | Amount | Notes |
|---|---|---|
| All-Purpose Flour 🌾 | 4 cups | Sifted for light texture |
| Granulated Sugar 🍚 | ½ cup | White or light brown |
| Active Dry Yeast 🍞 | 2 ¼ tsp | Fresh yeast if available |
| Salt 🧂 | 1 tsp | Fine sea salt preferred |
| Whole Milk 🥛 | 1 ¼ cups | Room temperature |
| Large Eggs 🥚 | 2 whole | Room temperature |
| Unsalted Butter 🧈 | ¼ cup | Cold, cubed |
| Lard or Vegetable Shortening 🍳 | 2 cups | For frying, 350°F |
| Powdered Sugar 🍬 | 2 cups | For coating |
| Pure Vanilla Extract 🍦 | 1 tbsp | High-quality preferred |
| Whole Milk 🥛 | ½ cup | For glaze, room temp |
| Granulated Sugar 🍚 | 1 ½ cups | For glaze |
The flour is non-negotiable—King Arthur or Gold Medal work best for that tender crumb. Yeast needs to be fresh if possible, but active dry from a jar works too (just check the expiration date). Lard gives that classic Amish flavor—Armour brand is my go-to, but shortening works in a pinch. The milk should be warm but not hot; microwave for 30 seconds if it's cold. Butter should be cold so it doesn't melt into the dough. For the glaze, vanilla extract matters—imitation won't cut it here.
No lard? Vegetable shortening or beef tallow works for frying, but the flavor won't be quite the same. Short on powdered sugar? Granulated sugar blended into a fine powder in a food processor gets you close. The vanilla glaze can be made ahead—just store it in the fridge and stir before using. For a richer dough, add 1 tbsp sour cream to the dough. The doughnuts freeze beautifully too—fry, glaze, then freeze for up to 3 months. Reheat in a 350°F oven for 5 minutes.
Dough keeps in the fridge for 24 hours wrapped tightly in plastic. The glaze stays fresh for 1 week in the fridge. For extra crispy doughnuts, fry them twice—once to cook through, then again right before glazing. The secret to golden doughnuts? Don't overcrowd the fryer—2-3 at a time max. They'll keep for 2 days in an airtight container, but honestly, they won't last that long.
Why You'll Love This Recipe
- No-Yeast Struggle: I’ve made doughnuts that required proofing patience—this recipe skips the fuss. Just mix the flour, sugar, yeast, and warm milk (no fancy ratios), let it rest 20 minutes, and you’re golden. Honestly, the yeast activates so smoothly, even my toddler could handle it.
- Crispy-Center Magic: That perfect balance of tender inside and crispy outside? It’s all in the sugar-to-milk ratio. The doughn’t absorb too much oil, so every bite has that satisfying crunch—like biting into a warm hug. (Yes, even on a Tuesday night.)
- Breakfast or Treat: Fry them fresh for a weekend brunch, or bake them ahead for a school fundraiser. The dough holds up beautifully, and the flavor stays rich whether you serve them with jam, powdered sugar, or just as-is. My daughter picks out the “best” ones for her lunchbox—no judgment.
- Pantry Staple Power: You’re already using ingredients you own: flour, sugar, milk. No specialty items, no last-minute grocery runs. I’ve made a dozen with just what was in my cupboard, and the cost per doughnut? Less than a dollar. Budget-friendly doesn’t get much better than this.
Step-by-step instructions for Amish doughnuts
Here's how to make these classic fried doughnuts with a light, fluffy texture and perfect vanilla glaze.
Activate the Yeast and Mix the Dough
In a small bowl, combine the 1.25 cups whole milk (warmed to 105-110°F) with the 0.5 cup granulated sugar and 2.25 tsp active dry yeast. Let this sit for 5-10 minutes until it becomes frothy. This step ensures your yeast is active and ready to work.
In a large mixing bowl, whisk together the 4 cups all-purpose flour and 1 tsp salt. Make a well in the center and pour in the yeast mixture along with the 2 whole large eggs and 0.25 cup cold unsalted butter. Mix with a wooden spoon until a shaggy dough forms. This dough should be soft but not sticky—if it's too dry, add a splash of milk.
Knead and Let the Dough Rise
Turn the dough onto a lightly floured surface and knead for 5-7 minutes until smooth and elastic. The dough should be slightly tacky but not sticky. Place it back in the bowl, cover with a clean kitchen towel, and let it rise in a warm place for 1-1.5 hours or until doubled in size. You'll know it's ready when it springs back slowly when pressed.
While the dough rises, prepare your frying setup. Fill a deep pot with 2 cups lard or vegetable shortening and heat it to 350°F. Use a deep-fry thermometer to monitor the temperature—it's crucial for even cooking and crispy doughnuts. Keep the shortening hot and ready for the next step.
Shape and Fry the Doughnuts
Punch down the risen dough and turn it onto a lightly floured surface. Roll it out to about ½-inch thickness and cut into desired shapes using a doughnut cutter or two round cutters (one slightly larger than the other). Place the shaped doughnuts on a floured baking sheet and cover with a towel. Let them rest for 10 minutes before frying.
Working in batches, carefully slide the doughnuts into the hot shortening using a slotted spoon. Fry for 1-2 minutes per side until golden brown and cooked through. Drain on paper towels and keep them warm in a 200°F oven while you fry the rest. The doughnuts should be light and crispy, not greasy.
Prepare and Apply the Vanilla Glaze
In a medium bowl, whisk together the 2 cups powdered sugar, 1.5 cups granulated sugar, 1 tbsp pure vanilla extract, and 0.5 cup whole milk until smooth. The glaze should be thick but pourable—if it's too thick, add a few drops of milk to loosen it. This glaze is the star of Amish doughnuts, giving them that signature sweet, creamy finish.
Dip the warm doughnuts into the glaze, letting any excess drip off. Place them on a wire rack to set for 5-10 minutes before serving. The glaze will harden slightly, creating a beautiful, glossy coating. Serve immediately while still warm for the best texture and flavor.
Pro Tips For Making Amish Doughnut
- Use Warm Milk: The yeast in this dough hates cold milk—it’ll wake up slow and leave you waiting. Heat the whole milk to about 110°F (just warm to the touch) before mixing it in. If you’re in a hurry, microwave it for 30 seconds, then let it cool for a minute. Trust me, your dough will rise twice as fast.
- Dissolve Sugar First: I used to just toss the sugar into the milk and hope for the best. Turns out, dissolving 1 cup of granulated sugar into the warm milk before adding yeast makes the yeast actually activate. Stir it until it’s fully gone—no gritty bits—and the dough will be smoother and rise more evenly. (Yes, even if you’re impatient like me.)
- Don’t Overwork the Dough: This isn’t bread dough—handle it like it’s fragile. Once you’ve kneaded it for about 5 minutes (just until it pulls away from the bowl), stop. Overworking it makes the dough tough, and that’s the last thing you want in a tender Amish doughnut. If it’s sticky, wet your hands and keep it gentle.
- Fry in Batches of 3: Crowding the pot is how you end up with greasy, unevenly cooked doughnuts. Fry them in small batches of 3 at a time in 350°F oil. If the oil splatters like crazy, it’s too hot—lower the heat by 25°F and give it a minute to stabilize. Patience here means crispy, golden doughnuts, not sad, soggy ones.
Essential equipment for perfect results
Deep Fryer Essentials
For traditional Amish doughnuts, a cast-iron Dutch oven or deep-fat fryer is ideal—both hold heat consistently. I prefer a 6-quart Lodge cast iron because it retains heat like a dream and handles the 350°F temperature perfectly.
If you're frying in batches, a deep skillet with high sides works too, but avoid thin pans that can't maintain even heat. 🍳
Thermometer Must-Have
Never guess the oil temperature—instant-read thermometers are non-negotiable. I swear by the Thermoworks Smoke because it stays accurate through frying cycles. Place it in the oil while heating, and keep it there to monitor the 350°F target.
If the doughnuts brown too fast, the oil's too hot; if they absorb oil, it's too cool.
Rolling and Cutting Tools
A wooden rolling pin (like OXO Good Grips) keeps dough cool while rolling, preventing premature yeast activation. For shaping, a doughnut cutter with a 1.5-inch inner ring works best, but two round cutters (one 2.5-inch, one 1.5-inch) do the trick too.
Flour your cutter generously between cuts to prevent sticking—this is where many home cooks go wrong.
Cooling and Draining Setup
Line a wire cooling rack with paper towels for draining fried doughnuts—this prevents sogginess. Keep a second rack nearby for glazing. For extra crispiness, I place the drained doughnuts on a wire rack set over a baking sheet in a 200°F oven while I finish frying the batch.
This keeps them warm without steaming.
Glazing Station
A small glass bowl (like Pyrex) is perfect for mixing the vanilla glaze—it’s easy to clean and lets you see the consistency. Use a fine-mesh sieve to dust powdered sugar over traditional sugar-coated doughnuts if you skip the glaze.
For dipping, a fork or slotted spoon helps control the glaze amount, preventing drips.
Safety First
Always keep a heat-resistant spatula and tongs nearby for flipping doughnuts. A fire extinguisher (or baking soda) should be within arm’s reach when frying. I also recommend wearing short sleeves or an apron—oil splatters happen, and you don’t want hot lard on your skin.
Work in a well-ventilated area too; frying creates steam and smoke. 💡
Nutrition facts
Frequently asked questions
Can I make these Amish doughnuts without lard?
Yes, you can substitute vegetable shortening or beef tallow for the lard, though traditional Amish recipes use lard for its rich flavor. For a neutral taste, use peanut oil or vegetable oil, but keep the temperature at 350°F for best results. Just note that the flavor won't be quite the same as classic Amish-style doughnuts.
How do I know when the dough is ready to fry?
The dough is ready when it's golden brown and cooked through after 1-2 minutes per side in the hot oil. Test doneness by cutting one open—it should be fully cooked inside with no raw dough. If they brown too quickly, your oil is too hot; if they absorb oil, it's too cool. Adjust the heat as needed.
Can I bake these doughnuts instead of frying?
For baked versions, shape the doughnuts as usual, then bake at 375°F for 12-15 minutes on a parchment-lined sheet until golden. Brush with melted butter and dust with powdered sugar or glaze after baking. They won't be as crispy as fried doughnuts but still delicious.
Why did my doughnuts turn out dense instead of fluffy?
Dense doughnuts usually mean the yeast wasn't active or the dough overproofed. Always check yeast expiration dates and use warm milk (105-110°F) to activate it. Don't let the dough rise longer than 1.5 hours, and knead just until smooth—overworking develops gluten, making them tough. Also, ensure your oil stays at 350°F for even cooking.
How long will the dough keep before frying?
Covered dough can stay in the fridge for up to 24 hours—just let it sit at room temperature for 30 minutes before shaping. For longer storage, freeze the shaped doughnuts (unfrozen) for up to 3 months. Thaw in the fridge overnight before frying. The glaze can be made ahead too and stored in the fridge for 1 week.