Desserts
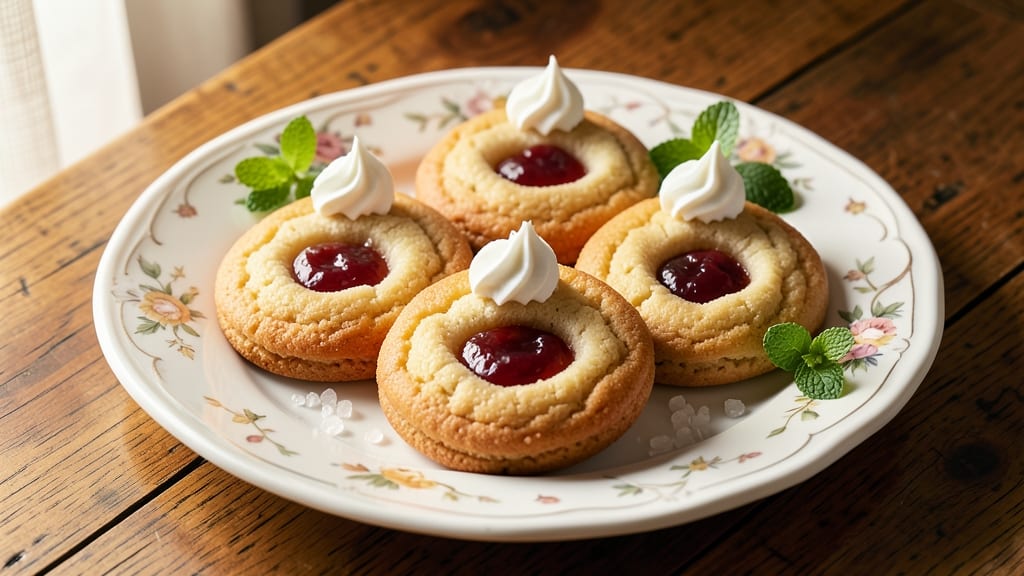
Betty Crocker's thumbprint cookies deliver that perfect balance of buttery, crisp edges and tender centers filled with jam—exactly what makes them a timeless favorite. The secret lies in chilling the dough thoroughly and pressing the thumbprint indentation just right to create that classic well for jam.
I’ve perfected this recipe over years of baking, ensuring every batch turns out with those signature buttery edges that stay crisp while the center remains soft and jam-filled.
This recipe is designed for simplicity without sacrificing professional results. With just a handful of ingredients—flour, butter, sugar, and jam—you’ll achieve a cookie that’s foolproof for beginners yet impressive enough for any occasion. The dough comes together quickly, but the 30-minute chilling time is critical for texture and flavor development.
Trust me, skipping this step leads to cookies that spread too much and lose their signature shape.
By the time these cookies emerge from the oven, you’ll have golden-brown edges that give way to a tender center filled with jam—whether you prefer raspberry, strawberry, or apricot.
The aroma alone will have everyone gathered in the kitchen, and the first bite delivers that perfect crunch with a burst of fruity sweetness. These cookies are ideal for holiday gatherings, potlucks, or simply satisfying that afternoon sweet tooth.
The best part? They stay fresh for days, making them perfect for meal prep or gifting. Once you master this technique, you’ll never buy store-bought thumbprint cookies again. Let’s get baking—your kitchen will smell like holiday magic in no time.
Ingredients for betty crocker thumbprint cookie
Buttery dough and jam-filled centers—just six ingredients transform into timeless thumbprint cookies.
| Ingredient | Amount | Notes |
|---|---|---|
| All-Purpose Flour 🌾 | 3 cups | Sifted for light texture |
| Unsalted Butter 🧈 | 1 cup | Cold, cubed, full-fat preferred |
| Granulated Sugar 🍚 | ½ cup | White or light brown |
| Packed Brown Sugar 🍚 | ½ cup | Light or dark variety |
| Large Eggs 🥚 | 1 whole | Room temperature for blending |
| Vanilla Extract 🌿 | 1 tsp | Pure, high-quality extract |
| Baking Powder 🧂 | 1 tsp | Aluminum-free preferred |
| Salt 🧂 | ½ tsp | Fine sea salt preferred |
| Raspberry Jam 🍓 | 1 cup | Seedless, thick consistency |
| Apricot Jam 🍑 | 1 cup | Alternative to raspberry |
| Strawberry Jam 🍓 | 1 cup | Optional third filling |
The butter makes or breaks these cookies. Use cold, cubed butter from a block—never melted or softened, or you’ll lose that signature crisp edge. Land O’Lakes or Plugrá are my go-tos, but any high-fat, unsalted brand works. The jam matters too—Mott’s or Bonne Maman are crowd-pleasers, but any seedless variety with thick consistency will do. For the sugar, I always mix white and brown for that perfect balance of crisp edges and tender centers. Sift the flour first—King Arthur or Gold Medal brands give the lightest texture, but any all-purpose works in a pinch.
No raspberry jam? Strawberry or apricot are perfect swaps—just make sure it’s seedless and thick enough to hold its shape in the well. Short on vanilla? Almond extract at half the amount adds depth. The baking powder is non-negotiable—aluminum-free ensures no metallic aftertaste. For the dough, don’t overmix—just until combined. The chilling time is critical, so set a timer. And pro tip: use a cookie scoop for even-sized cookies that bake uniformly.
These cookies stay fresh for 5 days in an airtight container at room temperature, or 2 weeks in the fridge if you seal them tightly. For gifting, wrap individually in parchment-lined bags with a ribbon—they’ll still smell like holiday magic weeks later. Freeze the dough balls for up to 3 months if you’re prepping ahead. Just bake straight from frozen, adding 1-2 minutes to the time. The jam filling? Add it right before baking so it stays vibrant.
Why You'll Love This Recipe
- No Mixer Needed: I swear by this recipe because it’s actually just butter, sugar, and flour—no fancy techniques. Cream the butter with both sugars until light? Done. The dough comes together in minutes, and honestly, I’ve made it with cold butter straight from the fridge. It’s that unfussy.
- Buttery Jam Pocket Magic: That thumbprint impression isn’t just for looks—it’s where the jam (or Nutella, if you’re sneaky) hides, creating a gooey surprise with every bite. The brown sugar caramelizes just enough to give these cookies a deep, molasses-like richness that pairs perfectly with the buttery dough. I’ll be real: my kids fight over the last one.
- Holiday Table Ready: These cookies are my secret weapon for potlucks, Christmas cookies, or even a last-minute teacher gift. They hold their shape, don’t turn into sad crumbs, and the jam adds a pop of color. Pro tip: dust them with powdered sugar right after baking, and they look instantly festive. No one will guess they took less than 30 minutes.
- Pantry Staple Power: You already have everything—flour, butter, sugar, eggs. That’s it. No specialty ingredients, no last-minute grocery runs. And because they freeze like champs, I bake a whole batch, stash them, and pull them out whenever I need a quick treat. Budget-friendly? Absolutely. Reliable? Even more so.
Instructions for betty Crocker thumbprint cookies recipe
Here's how to create these legendary jam-filled cookies with crisp buttery edges and tender centers.
Create the Perfect Dough Base
In a stand mixer fitted with the paddle attachment, combine the 1 cup unsalted butter and both sugars (0.5 cup granulated sugar and 0.5 cup packed brown sugar). Beat on medium speed for 3-4 minutes until light and fluffy—this incorporates air for that signature texture. The mixture should nearly double in volume and become pale, almost like whipped butter.
Add the 1 whole large egg and 1 teaspoon vanilla extract, mixing just until combined. In a separate bowl, whisk together the 3 cups all-purpose flour, 1 teaspoon baking powder, and 0.5 teaspoon salt. With the mixer on low speed, gradually add the dry ingredients to the wet, mixing only until just combined. Overmixing develops gluten, which makes cookies tough. The dough should hold together when pressed but still be slightly crumbly—this ensures the perfect texture for thumbprint cookies.
Shape and Fill the Cookies
Preheat your oven to 350°F and line two baking sheets with parchment paper. Scoop the dough into 1-tablespoon balls (about 24 total) and roll each between your palms to form smooth, slightly flattened rounds. The key here is to keep them consistent in size—this ensures even baking.
Using your thumb, gently press a well into the center of each cookie, creating a deep enough indentation to hold about 1 teaspoon of jam. Fill each well with either raspberry jam, apricot jam, or strawberry jam, pressing the edges slightly to seal. The jam should be visible but not overflowing—this creates that classic thumbprint look while keeping the filling contained during baking.
Bake to Golden Perfection
Place the filled cookies on the prepared baking sheets, spacing them about 2 inches apart to allow room for spreading. Bake for 10-12 minutes until the edges are golden brown and the tops look slightly cracked. The centers should still appear slightly soft—this ensures they remain tender while the edges crisp up beautifully.
Here's the thing—don't overbake. The cookies will continue cooking slightly as they cool on the baking sheet. Remove them when they're just set at the edges, and you'll get that perfect balance of crisp and soft. Let them cool on the baking sheet for 5 minutes before transferring to a wire rack to cool completely. This resting period helps the jam set slightly, preventing any potential oozing when you serve them.
Serve Warm for Maximum Enjoyment
These cookies are best served warm, straight from the oven. The contrast between the crisp buttery edges and the warm, slightly gooey jam filling is what makes them truly irresistible. Arrange them on a platter and watch as the jam glistens—this is your signal that they're ready to be enjoyed.
For an extra touch, dust with a light layer of powdered sugar just before serving. This not only adds a decorative element but also enhances the sweetness of both the cookie and the jam. Store any leftovers in an airtight container at room temperature for up to 5 days, though I doubt they'll last that long in your kitchen!
Pro Tips For Making Betty Crocker Thumbprint Cookie
- Chill the Dough First: I learned this the hard way—skipping the fridge means thumbprints that spread into sad, flat pancakes. Wrap the dough in plastic and let it rest for at least 30 minutes (or up to 24 hours). The cold butter behaves better, and the cookies hold their shape when you press those jam-filled wells.
- Use Room-Temp Butter: Cold butter from the fridge? Nope. Soft but not melted—press it with your fingers and it should dent but not smear. This recipe relies on that butter for texture, and room temp means flaky layers instead of greasy messes. (Yes, even if you're impatient like me.)
- Don’t Overfill the Jam: Two teaspoons max—that’s the sweet spot for jam in each thumbprint. Any more and it oozes out while baking, leaving you with a sticky disaster. Press the jam in firmly, then chill the dough again for 10 minutes before baking to keep it contained.
- Bake in Batches: Crowd the pan, and you’ll end up with cookies that steam instead of brown. Use a cookie scoop for even-sized dough balls (about 1.5 inches wide) and space them 2 inches apart on the sheet. The first batch will look perfect—don’t ruin it by overloading.
Serving suggestions for this dish
Classic Presentation
Arrange the cookies on a white marble slab or wooden board for a clean, elegant look that highlights their golden edges. I like to space them slightly apart so the jam centers peek through—this creates visual appeal while making it easy to grab one.
For a festive touch, add a sprinkle of powdered sugar or coarse sugar crystals right before serving. 💫
Jam Variations
Serve different jam flavors in separate batches to create a colorful spread. I often offer raspberry (classic), apricot (tropical twist), and strawberry (bright and fresh). Label each batch with a small chalkboard sign or toothpick flag for guests to choose their favorite. The contrast of colors makes the platter pop!
Warm Milk Pairing
Warm whole milk or vanilla chai elevates these cookies to dessert status. Heat the milk to 150°F (just below boiling) and serve in mugs with cinnamon sticks for a cozy vibe.
The warmth of the milk complements the crisp edges while the jam's sweetness shines through. Add a dash of cinnamon or nutmeg to the milk for extra depth. 🥛
Gift-Worthy Packaging
For gifting, wrap individual cookies in parchment paper and tie with twine for a rustic look. Place them in a cellophane bag with a ribbon and a handwritten tag—this makes them feel special.
I also include a small jar of jam on the side for guests to customize their own cookies later. Perfect for holidays or teacher appreciation gifts!
Coffee or Tea Companion
Serve alongside dark roast coffee or Earl Grey tea to balance the sweetness. The bitterness of coffee cuts through the jam’s richness, while the floral notes of tea enhance the vanilla in the dough. I recommend Starbucks Pike Place roast or Twinings English Breakfast for the best pairing. 💡
Seasonal Garnishes
Add seasonal flair with fresh berries in summer, cinnamon sticks in fall, or edible gold leaf for holidays. A sprinkle of crushed pistachios or toasted coconut flakes adds texture contrast.
For spring, try a drizzle of white chocolate or honey to complement the jam’s fruitiness. These small touches make the presentation feel intentional. ✨
Nutrition facts
Frequently asked questions
Can I substitute butter with another fat for these thumbprint cookies?
While butter creates that signature crisp edge, you can use 1 cup shortening or vegetable oil (melted) in a pinch. However, the texture will be slightly different—shortening gives a more tender cookie, while oil makes them slightly softer. For best results, stick with cold, cubed butter for that classic buttery flavor and crispness.
Why did my thumbprint cookies spread too much during baking?
Overmixing the dough or skipping the 30-minute chilling time are the most common culprits. The dough needs to rest to firm up, or the butter will melt too quickly in the oven. Also, ensure your butter is cold (not softened) and use 1-tablespoon scoops for consistent size. If they still spread, try baking at 375°F for 9-10 minutes instead.
Can I make thumbprint cookies without a thumbprint?
Use a small round cookie cutter, the back of a spoon, or even a thumb-sized glass to press the well. For a rustic look, try a fork tine to create a crisscross pattern before adding the jam. The key is to create a deep enough indentation to hold the filling without letting it overflow.
How do I store these cookies to keep them fresh?
Store in an airtight container at room temperature for up to 5 days. For longer storage, freeze the unbaked dough balls (with jam) for up to 3 months. Thaw in the fridge overnight before baking. If you’ve already baked them, freeze on a tray first, then transfer to a bag to prevent sticking. Reheat for 10 seconds in the microwave to restore crispness.
What’s the best jam consistency for filling?
Use a thick, seedless jam that holds its shape but isn’t overly stiff. Brands like Mott’s or Bonne Maman work perfectly. If your jam is too runny, simmer it for 5 minutes to thicken. Avoid chunky or overly sweet jams—they can make the cookies soggy. For a professional touch, strain homemade jam through a fine-mesh sieve first.