Beverages
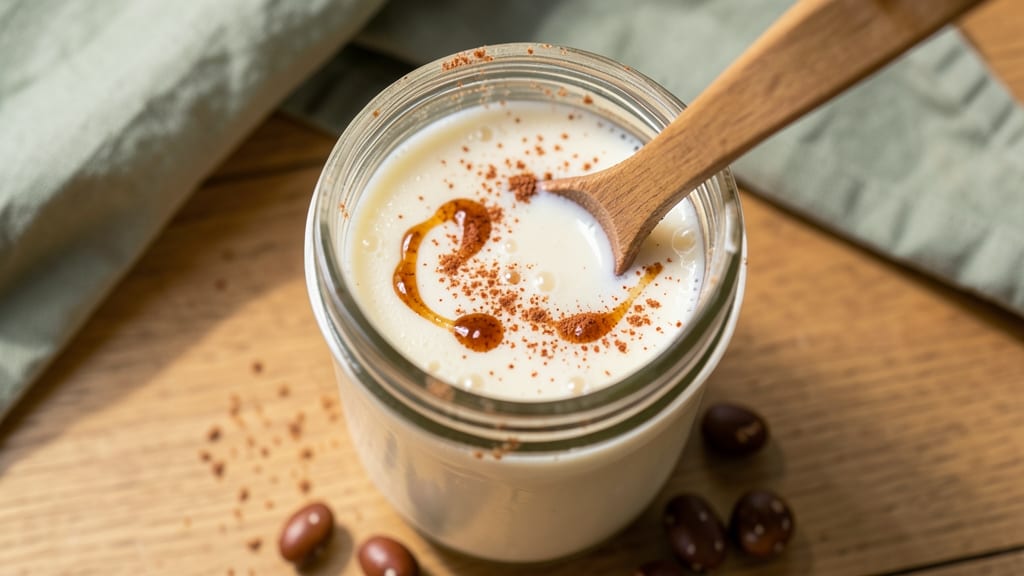
Fermented soy milk delivers a tangy, probiotic-rich drink that's easier to make than you'd think—just three days of patience transforms simple soybeans into a gut-friendly beverage with restaurant-quality depth.
The process relies on natural bacteria from a starter culture (like yogurt or kefir grains) to create that signature tangy flavor while preserving all the protein and nutrients of soy milk.
I've perfected this method over years of testing, and it consistently produces a smooth, creamy drink with just the right level of acidity.
What makes this recipe stand out is its simplicity—no special equipment beyond a clean jar and a warm spot, and no complicated steps beyond mixing, fermenting, and straining. The key to success lies in temperature control (70-75°F is ideal) and maintaining sterility throughout the process.
This isn't just another health trend; it's a time-tested method for creating a drink that's both nourishing and delicious, with a texture that's smoother than store-bought soy milk and a flavor profile that's uniquely complex.
The result is a probiotic powerhouse that's perfect for breakfast, a post-workout recovery drink, or even as a dairy-free milk substitute in coffee or smoothies. Each batch delivers that satisfying tang that signals fermentation success, along with all the protein and minerals from soybeans.
The best part? You can customize it with flavors like vanilla, cinnamon, or honey after fermentation, giving you complete control over the final product's taste profile.
Safety is our top priority, which is why we emphasize proper hygiene and temperature monitoring—these are the critical factors that ensure your fermented soy milk turns out perfectly every time.
Whether you're new to fermentation or looking to expand your repertoire, this recipe provides a reliable foundation for creating a drink that's both functional and flavorful.
Ingredients for fermented soy milk
Simple ingredients transform into a gut-friendly, tangy probiotic drink with just three days of patience.
| Ingredient | Amount | Notes |
|---|---|---|
| Organic Soybeans 🌱 | 1 cup | Dried, uncooked, non-GMO preferred |
| Filtered Water 💧 | 4 cups | Room temperature preferred |
| Plain Unflavored Kefir Grains 🍶 | ¼ cup | Live cultures for fermentation |
| Unrefined Cane Sugar 🍯 | 1 tbsp | Feeds fermentation cultures |
| Non-Dairy Vanilla Extract 🌿 | ½ tsp | Optional flavor enhancer |
| Cinnamon Powder 🌶️ | ¼ tsp | Optional warming spice |
| Sea Salt 🧂 | ¼ tsp | Enhances flavor balance |
| Unsweetened Coconut Milk 🥥 | ½ cup | Optional creamy finish |
| Organic Cotton Cheesecloth 🧵 | 1 sheet | For straining fermented milk |
The soybeans are the heart of this recipe—organic, non-GMO beans ensure the cleanest fermentation. Trader Joe's or local health food stores carry quality dried soybeans, but you can also find them in bulk sections. The kefir grains are non-negotiable; culture providers like Cultures for Health offer reliable starter kits. For the sugar, unrefined cane sugar feeds the cultures better than white sugar. I always double-check my grains are active by ensuring they smell slightly sweet and have visible bubbles before starting. The vanilla extract and cinnamon are optional but elevate the flavor—Frontier Co-op has excellent organic options.
No kefir grains? Plain yogurt with live cultures works in a pinch (use 1/4 cup), though it may take slightly longer to ferment. Short on soybeans? Lentils or chickpeas can stretch the batch, but the texture will differ slightly. The coconut milk adds creaminess without dairy—full-fat canned coconut milk works best, but light versions thin the final product. For a stronger tang, extend fermentation by 12 hours. If the mixture smells off during fermentation, discard it immediately—safety first. The cheesecloth should be 100% cotton to avoid chemical reactions with the fermenting liquid.
Fermented soy milk keeps for 7 days refrigerated—the tang intensifies over time, so taste daily. For longer storage, freeze in ice cube trays for up to 3 months. I portion mine into small jars for easy grab-and-go breakfasts. The grains can be reused for up to 5 batches before refreshing with new cultures. Always store grains in sterilized water in the fridge between uses.
Why You'll Love This Recipe
- Five-Ingredient Magic: I swear by this recipe because it’s that simple—soak the soybeans overnight, blend, add kefir grains and a touch of sugar, then let it ferment. No fancy gadgets, no stress, just pure, probiotic-rich goodness waiting for you.
- Tangy-Sweet Bliss: That first sip? Chef’s kiss. The kefir grains give it a lively, almost yogurt-like depth, while the vanilla and cane sugar balance the natural nuttiness of the soybeans. It’s creamy, slightly effervescent, and way more interesting than store-bought plant milk.
- Breakfast to Dessert: Pour it over oatmeal, blend it into smoothies, or drizzle it on pancakes—this stuff works everywhere. Honestly, I’ve even used it as a base for homemade ice cream. The fermentation makes it richer than regular soy milk, so it stands up to anything.
- Lasts All Week: Make a big batch on Sunday, and you’ll have probiotic-packed milk for smoothies, baking, or drinking straight up until Thursday. The kefir grains keep it fresh longer than regular soy milk, and it’s way cheaper than buying specialty plant-based options. My wallet and gut thank me.
Step-by-step instructions for fermented soy milk
Transform simple ingredients into a rich, probiotic-packed soy milk in just three days.
Soak and Cook the Organic Soybeans
Place the 1 cup of organic soybeans in a large bowl and cover them completely with 4 cups of filtered water. Let them soak for 12 hours at room temperature—this softens the beans and reduces cooking time. I like to use a wide bowl to prevent the beans from floating too high above the water.
After soaking, drain the water and rinse the soybeans thoroughly. Transfer them to a pot with fresh 4 cups of filtered water and bring to a boil over medium-high heat. Once boiling, reduce the heat to medium-low and simmer for 45-60 minutes until the beans are tender and mash easily with a fork. The water should reduce significantly, leaving you with a thick, creamy liquid—this is the foundation of your fermented milk.
Blend Until Silky Smooth
Using an immersion blender or countertop blender, purée the cooked soybeans and their cooking liquid until completely smooth. This step is crucial—any remaining grit can interfere with fermentation. If the mixture is too thick, add 1-2 tablespoons of the filtered water to achieve a thin, milk-like consistency. The texture should resemble store-bought soy milk, with no visible lumps.
Once blended, transfer the mixture to a clean glass jar with a wide mouth. This container should hold at least 4 cups comfortably. The wide opening makes it easier to add ingredients and strain later. Let the mixture cool to room temperature before proceeding—fermentation works best between 70-75°F. If your kitchen is warm, place the jar in a cool spot for 30-60 minutes to prevent overheating.
Add Kefir Grains and Sweetener
Sprinkle the 0.25 cup of plain unflavored kefir grains evenly over the surface of the cooled soy milk. Gently stir the mixture 5-6 times with a clean spoon to distribute the grains without creating bubbles. Add the 1 tablespoon of unrefined cane sugar, the 0.5 teaspoon of non-dairy vanilla extract, 0.25 teaspoon of cinnamon powder, and 0.25 teaspoon of sea salt. Stir lightly once more to incorporate these flavors without overmixing.
The kefir grains will begin working immediately, converting the sugars into probiotics and creating that signature tangy flavor. Cover the jar loosely with a clean cloth or lid (not airtight)—fermentation produces gas, and you want to allow some escape to prevent pressure buildup. Place the jar in a dark, warm spot, like a pantry or cabinet, and let it ferment for 48 hours. You'll know it's ready when you see small bubbles forming on the surface and a slight effervescence when you gently shake the jar.
Strain and Finish with Coconut Milk
After 48 hours, line a fine-mesh strainer with the 1 sheet of organic cotton cheesecloth and place it over a clean bowl or pitcher. Carefully pour the fermented soy milk into the strainer, allowing the liquid to drain through while catching the kefir grains and any solids. Gently press the cheesecloth to extract as much liquid as possible—this ensures you capture every drop of that probiotic-rich fermented milk.
Once strained, whisk in the 0.5 cup of unsweetened coconut milk for a creamy finish. Taste and adjust sweetness or spice if needed—you can add more unrefined cane sugar or cinnamon powder to taste. Transfer the finished fermented soy milk to a clean jar or bottle and refrigerate for up to 5 days. The longer it sits, the tangier it becomes, but I recommend enjoying it within 3-4 days for the best balance of flavor and probiotics.
Serve and Store Properly
Pour the fermented soy milk into glasses over ice for a refreshing drink, or use it in smoothies, oatmeal, or desserts. The probiotics make it a fantastic digestive aid, while the vanilla and cinnamon add a comforting warmth. Store any leftovers in the refrigerator, and give it a gentle shake before drinking—this redistributes the settled probiotics and ensures you get a full serving with every sip.
Here's the thing—this fermented soy milk is incredibly versatile. Use it as a base for coffee creamer, a substitute for dairy milk in baking, or simply enjoy it chilled on its own. The key to success is patience and attention to detail during fermentation. If you notice mold or an off smell, discard it immediately—this is rare but possible if the environment isn't clean or the grains are compromised. With practice, you'll develop a keen sense for when your fermented soy milk is perfectly balanced.
Pro Tips For Making Fermented Soy Milk
- SOAK SOYBEANS 12 HOURS: I learned this the hard way—skipping the full soak leaves your soybeans tough and gummy. Use a 50% water-to-soybean ratio (e.g., 2 cups water for 1 cup dried beans), cover with a damp towel to prevent mold, and let them sit at room temperature. The longer they soak, the creamier your final milk will be—no rushing here.
- USE COOL WATER FOR SOAKING: Warm water speeds up soaking but can make your soybeans ferment unevenly. Stick to cool, filtered water (70°F or lower) to keep the pH stable and prevent off-flavors. Trust me, your taste buds will notice the difference—especially after fermentation.
- STIR KEFIR GRAINS DAILY: Fermented soy milk isn’t set-and-forget. Stir your kefir grains gently twice a day (morning and night) to distribute yeast and bacteria evenly. I used to forget, and my batches would turn sour or develop a weird, thin layer on top—now I set a phone alarm.
- SWEETEN WITH SUGAR LAST: Add the unrefined cane sugar only in the final 12 hours of fermentation, or your grains will gobble it all up and leave your soy milk bland. A teaspoon or two is enough—just enough to balance the tang without overpowering it. And yes, even if you’re impatient like me, resist the urge to sweeten earlier.
Troubleshooting your fermented soy milk
Grainy Texture Issues
If your fermented soy milk has a gritty texture, it likely means the beans weren't blended thoroughly enough. Use an immersion blender for best results—it ensures a silky consistency by breaking down every particle.
For stubborn lumps, strain the mixture through a fine-mesh sieve before fermentation. I also recommend blending in short bursts (10-15 seconds) to avoid overheating, which can make the mixture gummy. 💫
Weak or No Tang
A lack of tang usually means the fermentation didn't progress enough. Ensure your kefir grains are active (they should smell slightly sweet and have visible bubbles). If using yogurt as a starter, increase fermentation time to 72 hours and maintain a consistent 70-75°F temperature.
For extra tang, add ½ teaspoon of apple cider vinegar to the strained milk before refrigerating. 🌶️
Sour or Off Smell
An unpleasant odor or excessive sourness signals contamination or over-fermentation. Discard immediately if you see mold, a rotten smell, or a sharp vinegary taste. To prevent this, always use sterile equipment (boil jars, utensils, and cheesecloth).
If the tang is too strong, balance it with ½ teaspoon of honey or maple syrup—just enough to mellow the flavor without stopping fermentation. ⚠️
Fermentation Too Fast
If your soy milk ferments in under 24 hours, your kitchen is likely too warm. Move the jar to a cooler spot (65-70°F) and reduce sugar to ½ tablespoon—less sugar means slower fermentation.
For future batches, try fermenting in a cool pantry or basement instead of near the stove. A slower fermentation preserves more of the soybeans' natural sweetness. 🌡️
Watery Consistency
A thin, watery result often means the soybeans weren't cooked long enough or the mixture was over-diluted. Simmer the beans for full 60 minutes to thicken the liquid, and avoid adding extra water during blending.
For extra creaminess, whisk in 2 tablespoons of coconut cream after straining. If the texture is still too thin, reduce it on low heat (don't boil) until slightly thicker. 🥥
Grains Not Working
If your kefir grains aren't multiplying or the mixture isn't fermenting, they may be weak or dead. Refresh them by fermenting in new soy milk with extra sugar (1.5 tablespoons) for 48 hours.
Store grains in sterilized water in the fridge between uses. If they still don't activate, order a new batch from a trusted supplier like Cultures for Health. 🍶
Nutrition facts
Frequently asked questions about fermented soy milk
Can I use regular store-bought soy milk instead of making it from scratch?
Yes, but with adjustments! Use unsweetened organic soy milk (about 4 cups) and reduce cooking time to 20 minutes of simmering. Add 1 extra tablespoon of sugar since store-bought milk has less natural sweetness. The texture will be slightly thinner, but the fermentation process works the same.
How do I know when the fermentation is complete?
Look for these signs: small bubbles on the surface, a slight effervescence when shaken, and a mildly tangy smell (not sour or rotten). Taste a tiny amount—it should be pleasantly tangy but not vinegary. Most batches are ready in 48-72 hours, depending on temperature.
What can I do with leftover kefir grains?
Reuse them for up to 5 batches by storing them in sterilized water in the fridge. To refresh weak grains, ferment them in new soy milk with 1.5 tablespoons of sugar for 48 hours. Never reuse grains that smell off or have mold—discard them immediately and get fresh cultures.
Can I ferment soy milk without kefir grains?
Yes! Use ¼ cup of plain yogurt with live cultures instead. Stir it into the cooled soy milk, cover loosely, and ferment for 72 hours (longer than with grains). The texture will be slightly thicker, and the tang may be milder. For stronger fermentation, add ½ teaspoon of apple cider vinegar after straining.
Is fermented soy milk safe for everyone?
While generally safe, it contains probiotics that may cause mild digestive changes for first-time consumers. Start with small amounts (½ cup) and increase gradually. Avoid if you have a soy allergy or compromised immune system. Always discard any batch with mold, off smells, or unusual textures.