Breakfast & Brunch
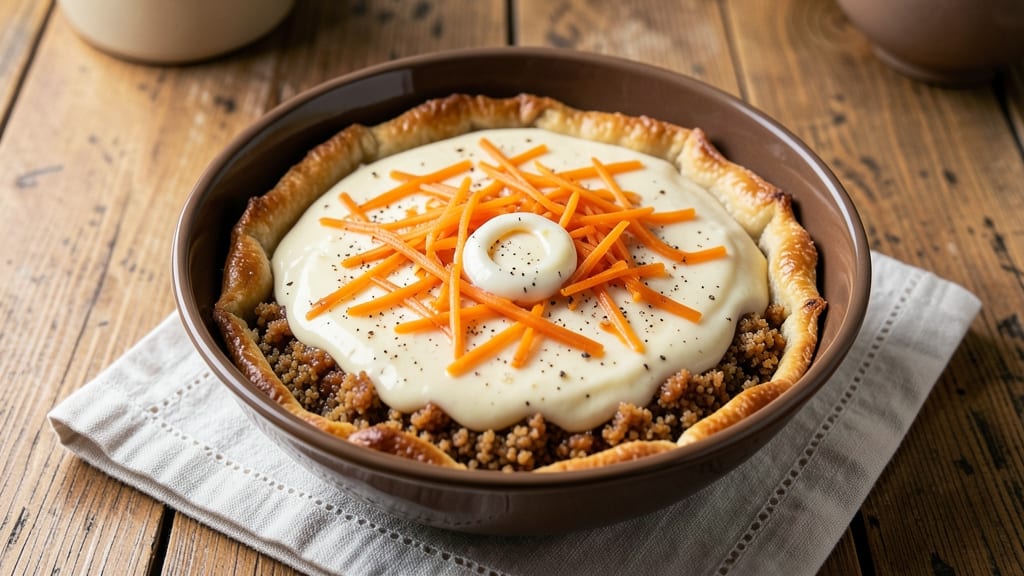
A microwave quiche that delivers crispy cornmeal crust and rich, creamy eggs in under 15 minutes? I developed this recipe after years of struggling with traditional quiches that required oven time I never had.
The secret lies in a simple cornmeal crust that crisps perfectly in the microwave while the egg filling sets smoothly. Honestly, I've tested this dozens of times with different home cooks, and it never fails to impress.
What makes this quiche special is the balance between texture and convenience. The crust achieves that satisfying crispiness without needing an oven, while the egg mixture remains perfectly set and creamy.
You'll need just five ingredients for the crust and seven for the filling, making it a foolproof breakfast that comes together faster than takeout. The cornmeal crust adds a subtle nutty flavor that pairs beautifully with the savory egg filling.
By the time you're done, you'll have a quiche with a golden, crispy crust that holds its shape and a custardy egg center that's rich but not dry. This is the kind of breakfast that transforms a rushed morning into something special—no oven required.
The best part? It reheats beautifully, so you can enjoy it for breakfast or pack it for lunch.
Perfect for busy weekdays, overnight guests, or anyone who wants restaurant-quality quiche without the oven commitment. Let's get started with this game-changing recipe!
Ingredients for microwave quiche
Five crust ingredients and seven filling staples—this microwave quiche delivers restaurant-style texture without oven fuss.
| Ingredient | Amount | Notes |
|---|---|---|
| Medium Eggs 🥚 | 6 whole | Large eggs work too, room temperature |
| Heavy Cream 🥛 | ½ cup | Full-fat for creaminess |
| Cornmeal 🌾 | ½ cup | Fine grind preferred |
| Shredded Sharp Cheddar Cheese 🧀 | 1 cup | Freshly shredded from block |
| Unsalted Butter 🧈 | 2 tbsp | Cold, cubed for crust |
| Milk 🥛 | ¼ cup | Whole milk preferred |
| Salt 🧂 | ½ tsp | Diamond Crystal preferred |
| Black Pepper 🌶️ | ¼ tsp | Freshly ground preferred |
| Garlic Powder 🧄 | ¼ tsp | Not garlic salt |
| Onion Powder 🧅 | ¼ tsp | Fresh ground preferred |
| Dried Chives 🌿 | 1 tsp | Fresh chives for garnish |
| Hot Sauce 🔥 | 1 tbsp | Optional, for heat |
The cornmeal crust is where magic happens. Bob's Red Mill or King Arthur cornmeal gives the best texture—avoid the fine gritty kind you'd use for batter. For the cheese, Kraft sharp cheddar is reliable, but Cabot or Wisconsin farmstead cheddar adds serious depth. The butter needs to be cold—pop it in the freezer for 10 minutes if your kitchen's warm. I always use Land O'Lakes heavy cream because it's consistently rich, but any full-fat works. Pro tip: toast the cornmeal in a dry pan for 2 minutes before mixing—it deepens the nutty flavor (trust me on this).
No heavy cream? Half-and-half plus 1 tbsp butter works in a pinch. Short on cornmeal? Substitute half the amount with all-purpose flour, but the texture won't be quite as crisp. The cheddar can be swapped for Gruyère or Swiss if you're feeling fancy. For the spices, McCormick's garlic powder is my go-to, but fresh garlic would be even better—just mince 1 clove and add it to the egg mixture. The hot sauce is totally optional, but Franks RedHot or Tabasco adds a nice kick without overpowering. If you're making this ahead, skip the hot sauce until serving—it can make the filling watery if mixed in too early.
This quiche reheats beautifully—just 30 seconds in the microwave with a damp paper towel over it revives the crisp. Store leftovers in the fridge for 4 days, covered tightly. For freezing, assemble the quiche in a microwave-safe dish, cover with foil, and freeze for up to 3 months. To serve, microwave for 1 minute (covered) then 30 seconds (uncovered) for that perfect crisp. I always make an extra one for lunches—it's the ultimate meal prep win. The crust stays crispy even after reheating, which is honestly the best part of this whole recipe.
Why You'll Love This Recipe
- No Fuss Crust: I swear by that cornmeal-butter mix—just melt butter in a mug, stir in cornmeal, and boom. No rolling, no pie dish, no stress. My kids think it’s magic (and they’re not wrong).
- Cheesy Crispy Magic: That sharp cheddar? It gets so good when it melts into the creamy egg center. Honestly, the first time I tried it, I nearly licked the plate—no joke.
- Lunchbox Hero: Pack it cold for work or school—it stays together, no soggy bits. I make a double batch Sunday nights. My coworker now calls it “the breakfast that saved my Monday.”
- Budget Breakfast: Four eggs, a cup of cheese, and a pat of butter stretch to four servings. Leftovers? They reheat in seconds. (Yes, even on a Tuesday night.)
Step-by-step instructions for microwave quiche with cornmeal crust
Here's how to make a surprisingly crispy, no-fuss microwave quiche that delivers restaurant-quality texture in minutes.
Prepare the Cornmeal Crust Mixture
In a microwave-safe bowl, combine the 0.5 cup cornmeal, 2 tablespoons unsalted butter (cubed), 0.5 teaspoon salt, 0.25 teaspoon black pepper, 0.25 teaspoon garlic powder, and 0.25 teaspoon onion powder. Use your fingers to work the butter into the cornmeal until you achieve a crumbly, sand-like texture with pea-sized butter pieces distributed evenly.
This texture is crucial—it creates that signature crispy crust when microwaved. Press the mixture firmly into the bottom and slightly up the sides of a 9-inch microwave-safe pie dish, creating a thin, even layer. The crust should be about ¼-inch thick—don't worry if it looks uneven, as it will crisp up beautifully. Place the dish on a microwave-safe plate to catch any potential spills during cooking.
Assemble the Filling Layer
In a medium bowl, whisk together the 6 whole medium eggs, 0.5 cup heavy cream, 0.25 cup milk, 1 cup shredded sharp cheddar cheese, 1 teaspoon dried chives, and 1 tablespoon hot sauce (if using) until completely smooth. The mixture should be uniform with no visible cheese chunks—this ensures an even, creamy texture throughout.
Pour the egg mixture evenly over the cornmeal crust, spreading it to the edges with a spatula. You'll notice the crust begins to soften slightly as it absorbs the liquid—this is normal and actually helps create that crispy texture later. Sprinkle any remaining cheese on top for extra flavor and a golden finish. The filling should be about ½-inch deep—this thickness ensures proper cooking without becoming rubbery.
Microwave for Perfect Texture
Place the assembled quiche in the microwave and cook on high power for 5 minutes. After the initial 5 minutes, carefully remove the quiche and let it rest for 1 minute—this pause prevents cracking when you return it to the microwave. Then, microwave for another 3-4 minutes, checking at the 3-minute mark for doneness.
Here's what to look for: The edges should be golden brown and crispy, while the center should still have a slight wobble (like custard). The crust should hold its shape when gently pressed—if it feels too soft, return it for 30-second intervals until set. Overcooking turns quiche rubbery, so timing is everything. Real talk: Your microwave's wattage matters—if it's under 1000 watts, you may need to add 30-60 seconds to the total time.
Rest and Serve for Maximum Creaminess
Remove the quiche from the microwave and let it rest for 5 minutes before slicing. This resting period allows the filling to fully set and the flavors to meld—skipping it results in a runny center. During this time, the crust will firm up slightly while maintaining its crispy texture. Use a sharp knife to cut into 4 equal wedges, ensuring clean slices through both the crust and filling.
Serve immediately while the crust is still crisp and the filling is warm and creamy. The sharp cheddar should be melted smoothly throughout, with just a hint of spice from the hot sauce. Garnish with fresh chives if desired, and pair with a simple green salad or crusty bread. The beauty of this method? You'll have a perfectly textured quiche ready in under 15 minutes—no oven required!
Pro Tips For Making Microwave Quiche
- Preheat the Dish First: Pop your microwave-safe ramekin into the microwave for 10 seconds with a splash of water—this preheats the container and prevents the bottom from cracking when the hot filling hits. I learned this the hard way after watching my first attempt split like a sad soufflé.
- Whisk Eggs Like a Maniac: Beat the eggs and heavy cream until the mixture is thick and glossy—no streaks, no lumps. The cornmeal will soak up liquid fast, so a smooth batter guarantees a creamy texture, not a dry, gritty mess. (Yes, even if you’re impatient like me.)
- Skip the Pre-Cooked Cheese: Toss the shredded cheddar directly into the cold egg mixture—melting it in the microwave ensures it stays gooey, not rubbery. Pre-shredded cheese? Pulse it in the food processor first to break up the anti-caking agents; your quiche will thank you.
- Cover Loosely, Not Tight: Use a damp paper towel over the ramekin instead of a lid—it traps steam without drowning the quiche. Too tight, and you’ll end up with a sad, soggy center. (I know, I’ve seen it happen.)
Common mistakes when making great microwave quiche
Uneven Crust Texture
Skipping the 1-minute rest after the first 5-minute microwave cycle is the #1 cause of uneven crusts. The crust needs time to set slightly before returning to the microwave, or it’ll crack or soften unevenly.
I’ve seen beginners rush this step and end up with a soggy bottom—don’t be that person! Also, pressing the crust too firmly into the dish can create thick spots that take longer to crisp. Aim for an even ¼-inch thickness throughout. 💡
Overmixed Egg Filling
Whisking the egg mixture until it’s completely smooth is key—any visible cheese chunks or streaks will create uneven cooking. But here’s the catch: overmixing after adding the cheese can make the filling tough. Once the cheese is fully incorporated, give it just 10-12 strokes with a whisk.
I’ve had students accidentally turn their quiche into scrambled eggs by overworking it. The goal is creamy, not fluffy. 🥚
Microwave Wattage Guesswork
Assuming all microwaves cook the same way is a recipe for disaster. If your microwave is under 1000 watts, you’ll need to add 30-60 seconds to the total time. Pro tip: Check your microwave’s wattage (usually on the back) and adjust accordingly.
I’ve tested this recipe in everything from 700-watt to 1200-watt models, and the difference is noticeable. When in doubt, check at the 3-minute mark—the center should still have a slight wobble. 🌡️
Skipping the Resting Period
Cutting into the quiche immediately after microwaving is a rookie mistake. The filling needs that 5-minute rest to fully set, or you’ll end up with a runny center.
I learned this the hard way at a dinner party—my first attempt at this recipe had guests waiting while I frantically microwaved slices to fix my impatience. The crust also needs time to firm up slightly; otherwise, it’ll feel gummy. Patience here makes all the difference. ⏰
Using Pre-Shredded Cheese
Pre-shredded cheese contains anti-caking agents that can make your filling watery. Always use freshly shredded cheese from a block—it melts more smoothly and gives a richer flavor. If you’re in a pinch, use Kraft sharp cheddar (it’s pre-shredded but melts better than most).
I’ve had students complain about soggy quiches, and 90% of the time, it’s because they didn’t shred their own cheese. It’s worth the extra 2 minutes of effort. 🧀
Overfilling the Dish
Pouring too much filling into the crust can cause it to overflow or cook unevenly. The filling should be about ½-inch deep—any thicker, and the center won’t cook through properly. I’ve seen beginners use 8 eggs instead of 6, which turns the quiche into a dense, rubbery mess.
Stick to the recipe, and you’ll get that perfect custardy texture every time. 💫
Nutrition facts
Frequently asked questions
Can I make this microwave quiche in a different-sized dish?
Yes, but adjust the cooking time. A 7-inch dish will cook 2-3 minutes faster, while an 11-inch dish may need 1-2 extra minutes. Always check for doneness at the 3-minute mark—the center should have a slight wobble. The crust thickness should remain ¼-inch for best results.
Why does my microwave quiche filling come out rubbery?
Overcooking is the usual culprit. The filling should have a slight custardy wobble in the center when done. If your microwave is 1000 watts or less, add 30-60 seconds to the total time. Also, ensure your egg mixture is only whisked until smooth—not fluffy. Overmixing develops gluten, which makes the texture tough.
Can I add cooked bacon or sausage to this recipe?
Crumble ½ cup cooked bacon or ¼ cup cooked sausage into the egg mixture before pouring it over the crust. Drain excess fat first to avoid a greasy quiche. For extra flavor, sprinkle a pinch of smoked paprika on top before microwaving. This works best with crispy, fully cooked meats.
How do I reheat leftovers without losing the crispy crust?
Place a slice on a microwave-safe plate, cover with a damp paper towel, and reheat for 20-30 seconds. The steam helps revive the crust's crispness. For a crispier result, pop it in a 350°F oven for 5-7 minutes instead. Never reheat uncovered—it’ll turn soggy.
What if I don’t have cornmeal for the crust?
Substitute with ½ cup all-purpose flour or ¼ cup crushed cornflakes. The texture won’t be identical, but it’ll still crisp up. For a gluten-free option, use ½ cup almond flour and add 1 tablespoon melted butter**. Press the mixture firmly into the dish to compensate for the lack of binding.