Breakfast & Brunch
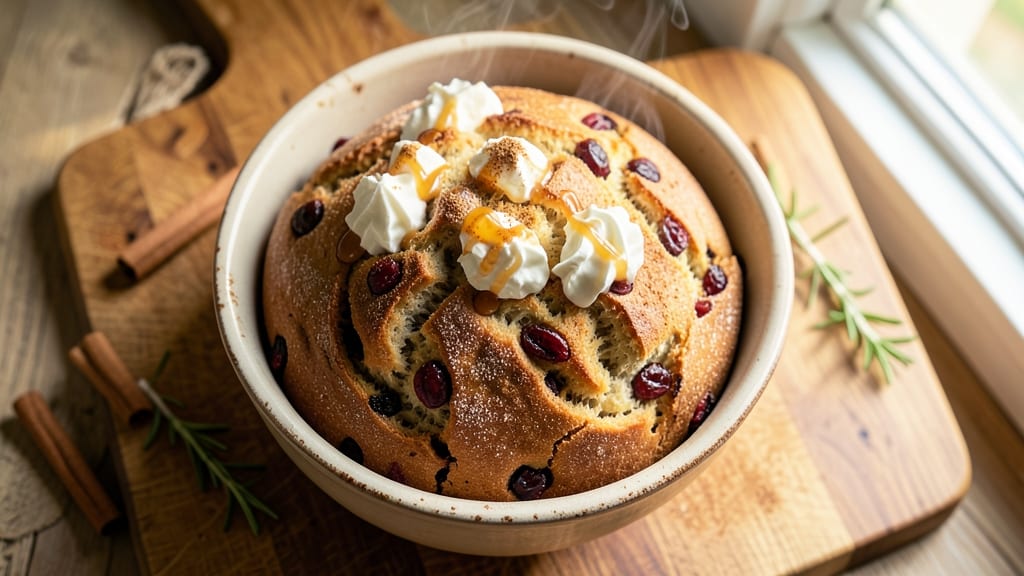
This Amish cinnamon raisin bread recipe delivers the perfect balance of tender crumb and rich, spiced raisin filling that pulls apart with every bite. The secret lies in a simple, no-knead dough enriched with butter and milk, which creates a moist, flavorful loaf that stays fresh for days.
I developed this recipe after years of baking traditional Amish breads, and it’s become a family favorite for breakfast or dessert.
The dough rises overnight, allowing flavors to develop deeply while requiring minimal effort from you. When you bake it, the warm vanilla swirls and buttery crust create a pull-apart texture that’s impossible to resist.
This recipe uses traditional techniques—like a slow rise and gentle shaping—to ensure a loaf that’s both rustic and refined.
By the time it emerges from the oven, you’ll have a golden-brown loaf with a tender crumb and pockets of sweet, spiced raisin filling. The aroma alone will fill your kitchen with warmth, making it perfect for morning toast, afternoon snacks, or paired with coffee or tea.
The best part? It’s simple enough for beginners but delivers restaurant-quality results.
For extra indulgence, add a streusel topping or brush the crust with egg wash for a glossy finish. This bread keeps well for up to five days, making it ideal for meal prep or gifting. Let’s get started on creating your own homemade loaf!
Ingredients for amish cinnamon raisin bread
Buttery dough, spiced raisins, and vanilla swirls—just 15 ingredients for a loaf that tastes like nostalgia.
| Ingredient | Amount | Notes |
|---|---|---|
| All-Purpose Flour 🌾 | 4 cups | Sifted for light texture |
| Granulated Sugar 🍚 | ½ cup | White or light brown |
| Instant Yeast 🍞 | 2 tsps | Single-use packet preferred |
| Unsalted Butter 🧈 | ½ cup | Cold, cubed for dough |
| Whole Milk 🥛 | ½ cup | Room temperature |
| Large Eggs 🥚 | 1 whole | Room temperature |
| Ground Cinnamon 🌶️ | 2 tbsps | Freshly ground preferred |
| Vanilla Extract 🍯 | 1 tsp | Pure vanilla extract |
| Raisins 🍇 | 1 ½ cups | Plump, seedless preferred |
| Salt 🧂 | ½ tsp | Fine sea salt |
| Ground Nutmeg 🌿 | ½ tsp | Freshly grated nutmeg |
| Brown Sugar 🍚 | ¼ cup | Packed for filling |
| Butter (for filling) 🧈 | ¼ cup | Melted, cooled slightly |
| Egg Wash 🥚 | 1 whole | 1 egg + 1 tbsp milk |
| Coarse Sugar 🍚 | ¼ cup | For topping (optional) |
The flour is your foundation—King Arthur or Gold Medal are my go-tos for that perfect tender crumb. Raisins should be plump, not dried out—soak them in warm water for 10 minutes if they look shriveled. Butter matters here: Land O'Lakes or Plugrá work best, but any unsalted butter in a cold block will do. For the yeast, Fresh Start or Bob's Red Mill are reliable, but check the expiration date—old yeast is the #1 reason bread fails. The nutmeg? Freshly grated makes all the difference—pre-ground tastes like sawdust.
No vanilla extract? 1 tsp vanilla sugar works in a pinch (mix 1 tsp sugar + 1/4 tsp vanilla powder). Raisins too expensive? Chopped dried apricots or dates add a similar chewy texture. Brown sugar hard to find? White sugar + 1 tsp molasses mimics the flavor. For the filling, if you're feeling fancy, add 1/4 tsp cinnamon and 1/8 tsp cardamom—trust me, it's next-level. And if your butter melts too fast, chill the filling mixture for 10 minutes before adding it to the dough.
This dough is a dream to prep—mix it, let it rise overnight, and bake when you wake up. Wrap the dough in plastic and refrigerate for up to 24 hours if you're not baking it right away. Once baked, let it cool completely on a wire rack—at least 1 hour—or the crust will get soggy. Store wrapped at room temp for 3 days or freeze the whole loaf for up to 3 months. Slice it thin for toast or thick for sandwiches—either way, it's pure comfort in every bite.
Why You'll Love This Recipe
- No Yeast Struggles: I swear by this dough—just mix, let it rise once, and bake. No kneading, no waiting all day, no failed attempts. That instant yeast works magic in under an hour, and the milk keeps it tender without fuss.
- Warm Spice Hug: The butter and sugar caramelize into something ridiculously good—like a hug in bread form. Raisins soak up the cinnamon-sugar mix, turning every bite into a cozy, sweet surprise. (Yes, even on a Tuesday night.)
- Breakfast to Brunch: Freeze half the loaf and pull it out for toast in the morning, or slice it for French toast on weekends. It’s my go-to for guests—no one leaves a crumb behind, and it’s cheaper than buying a bakery loaf.
- Budget-Friendly Staple: Flour, sugar, butter—these are pantry basics that stretch far. One batch feeds my family for days, and the leftovers? Perfect for sandwiches or crumbled over oatmeal. Frugal doesn’t mean boring.
Step-by-step instructions for Amish cinnamon raisin bread
This recipe delivers that perfect pull-apart texture with warm vanilla swirls and buttery crust—just like homemade.
Mix the Dough for a Light, Airy Base
In a large mixing bowl, combine the 4 cups all-purpose flour, 0.5 cup granulated sugar, 0.5 tsp salt, 2 tsps instant yeast, 2 tbsps ground cinnamon, and 0.5 tsp ground nutmeg. Whisk everything together until evenly distributed—this ensures the spices are fully incorporated into the dough.
Next, cut in the 0.5 cup cold unsalted butter using a pastry cutter or your fingers until the mixture resembles coarse crumbs with pea-sized butter pieces scattered throughout. This cold butter creates flaky layers when baked. Add the 0.5 cup room-temperature whole milk and 1 whole large egg, then mix with a wooden spoon until a shaggy dough forms.
Turn the dough out onto a lightly floured surface and knead gently for 5-7 minutes until smooth and elastic. You're looking for a dough that springs back slightly when pressed—this indicates proper gluten development. If it feels too sticky, add a little more flour 1 tablespoon at a time. Shape into a ball, place in a greased bowl, cover with a damp towel, and let rise in a warm place for 1 hour or until doubled in size.
Prepare the Filling for Maximum Flavor
While the dough rises, make the cinnamon raisin filling. In a small bowl, mix together the 1.5 cups raisins, 0.25 cup packed brown sugar, and 1 tsp vanilla extract. Let this mixture sit for 5 minutes—this allows the raisins to plump up slightly and absorb the sweet flavors.
Next, melt the 0.25 cup butter for filling in a microwave-safe bowl for 20-30 seconds until just melted, then let it cool slightly. Stir in 1 tbsp of the reserved whole milk from earlier to create a smooth, spreadable consistency. This butter mixture will create those beautiful, gooey swirls when baked.
Roll, Fill, and Shape the Loaf
Once the dough has risen, punch it down gently to release air, then roll it out on a lightly floured surface into a 12x18-inch rectangle about ¼-inch thick. This is where the magic happens—spread the melted butter mixture evenly over the dough, leaving a ½-inch border around the edges. Sprinkle the cinnamon raisin mixture evenly over the butter.
Starting from the long side, tightly roll the dough into a log, pinching the seam to seal. This creates those beautiful swirls when sliced. Place the log seam-side down in a greased 9x5-inch loaf pan, then cover loosely with a towel and let rise for another 30-45 minutes until it reaches the top of the pan.
Bake to Golden Perfection
Preheat your oven to 375°F. Brush the risen dough with the egg wash (1 egg + 1 tbsp milk) and sprinkle the 0.25 cup coarse sugar on top if desired—this creates a beautiful caramelized crust. Bake for 35-40 minutes until the bread is deep golden brown and sounds hollow when tapped on the bottom.
Remove from the oven and let cool in the pan for 10 minutes before transferring to a wire rack. This resting period prevents the bread from falling apart when sliced. For the best texture, slice while still warm—each pull-apart bite should reveal those gooey cinnamon raisin swirls and a tender, buttery crumb.
Serve Warm for Maximum Enjoyment
Slice the bread into ½-inch thick pieces and serve warm. The contrast of the warm, pull-apart crust with the cool, sweet raisin filling makes every bite irresistible. This bread is perfect for breakfast with butter, jam, or even as a dessert with a dollop of whipped cream. Store leftovers wrapped in plastic at room temperature for up to 3 days or freeze for longer storage.
Pro Tips For Making Amish Cinnamon Raisin Bread
- Measure Butter Cold: Grab the butter straight from the fridge—no softening needed. I learned this the hard way after kneading a dough that turned into a greasy mess because I used room-temperature butter. The cold pieces will melt into the flour just enough to create pockets, but won’t make your bread dense.
- Bloom Yeast in Warm Milk: Dump that instant yeast into the warm milk (110°F) first, then wait 5 minutes until it’s frothy before mixing it into the dry ingredients. Skipping this step means your bread might rise slower or unevenly—especially in cooler kitchens. (Yes, even if you’re impatient like me.)
- Avoid Over-Kneading: Stop mixing once the dough pulls away from the bowl and looks slightly tacky, not stiff or elastic. I used to think more kneading = better bread, but this dough gets tough fast. Overwork it, and you’ll end up with a chewy brick instead of a tender loaf.
- Rest Dough Twice: Let the dough rise once after mixing, then punch it down and let it rest another 10 minutes before shaping. This second rest relaxes the gluten, so your swirls stay pretty and the crumb stays soft. (Your future self will thank you.)
Essential equipment for amish cinnamon raisin bread
Mixing Bowl Essentials
Start with a large stainless steel mixing bowl (I recommend OXO Good Grips or Cuisinart)—its smooth surface prevents dough from sticking, especially when handling the buttery, sticky dough. A 9-inch round bowl works best for the initial mixing and first rise.
For the filling prep, use a small glass bowl (like Pyrex) to mix raisins and spices—glass keeps everything warm while you work. 🥣
Dough Tools
A wooden dough scraper (like West Bend) is a game-changer for cleaning dough off surfaces and dividing it evenly. For kneading, I use a Kitchenaid stand mixer on low speed (dough hook attachment) to save time, but hand-kneading works too—just be patient.
A lightly floured silicone mat (such as Amazon Basics) replaces a dusty countertop for rolling out the dough. 🍞
Measuring & Precision
Invest in a digital kitchen scale (like OXO Good Grips) for accurate measurements—especially for flour and butter. A spoon rest (I use OXO’s) keeps utensils clean while scooping flour.
For the filling, a small offset spatula (like Cuisinart) helps spread melted butter evenly. A fine-mesh strainer ensures your cinnamon and nutmeg are evenly distributed in the dough. ✨
Rising & Shaping
A greased 9x5-inch loaf pan (I prefer Wilton’s nonstick) is essential for shaping the loaf. For the first rise, place your bowl in a warm oven (turned off with a pan of hot water inside) to create the ideal 80°F environment.
A damp kitchen towel keeps dough from drying out during rises. For rolling, a rolling pin with silicone handles (like OXO’s) gives better control. 🌡️
Baking & Cooling
Preheat your oven with a baking stone (I use Lodge’s) for even heat distribution—it mimics a brick oven and gives that perfect crust. A wire cooling rack (like OXO’s) prevents soggy bottoms.
For the egg wash, a small pastry brush (such as Cuisinart’s) ensures even coating. A digital meat thermometer (like ThermoWorks) verifies the bread’s doneness at 190°F internal temp. 🔥
Optional Extras
For a streusel topping, a fork or potato masher crushes ½ cup old-fashioned oats with 2 tbsp brown sugar and 1 tbsp melted butter. A fine-mesh sieve helps dust the loaf with powdered sugar after baking for a snowy finish.
Store leftovers in an airtight container (like Rubbermaid’s) to keep the bread fresh for days. 💫
Nutrition facts
Frequently asked questions
Can I make this bread without a stand mixer?
This recipe is designed for hand-mixing. Simply use a wooden spoon to combine ingredients in a large bowl, then knead the dough by hand on a floured surface for 5-7 minutes until smooth. The dough should be slightly tacky but not sticky—add flour 1 tablespoon at a time if needed. Hand-kneading works perfectly for this tender, buttery dough.
How do I know when the dough has risen enough?
The dough is ready when it has doubled in size and leaves a slight indentation when gently pressed with your finger. For the first rise, this should take about 1 hour in a warm environment (like a turned-off oven with a pan of hot water). The second rise in the loaf pan takes 30-45 minutes—it’s done when the dough reaches the top of the pan and springs back slowly when touched.
Can I substitute raisins with something else?
Yes! Try chopped dried apricots, dates, or even dried cranberries for a different flavor profile. If using dried fruit, soak it in warm water for 10 minutes first to plump them up. For a nutty twist, swap raisins for chopped walnuts or pecans—just reduce the butter in the filling by 1 tablespoon to balance moisture levels.
Why did my bread turn out dense instead of pull-apart?
Dense bread usually means the dough didn’t rise enough or was over-kneaded. Make sure your yeast is fresh (test it by mixing with warm water and sugar—it should foam in 5 minutes). Also, avoid over-handling the dough after shaping—gently press it into the pan to prevent collapsing. For extra tenderness, let the dough rise in a warm (80°F) environment and don’t skip the second rise.
How long should I let the bread cool before slicing?
Let the bread cool in the pan for 10 minutes first to set the crust, then transfer to a wire rack for at least 1 hour before slicing. This prevents the raisin filling from oozing out and keeps the crumb tender. Slicing too soon can make the bread gummy—patience pays off for that perfect pull-apart texture!