Side Dishes
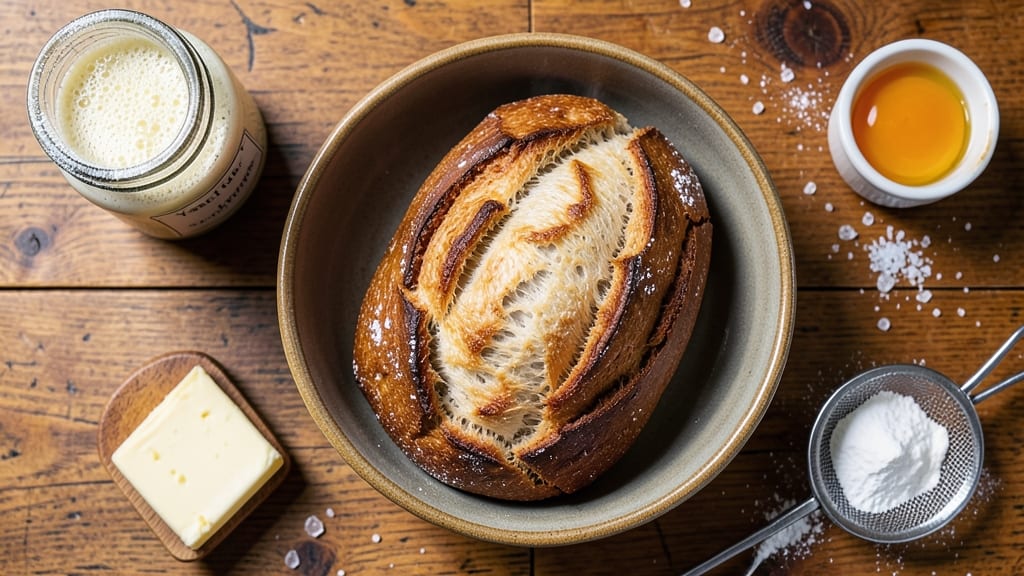
Creating Angelo's bread recipe transforms your kitchen into an Italian bakery with its signature chewy texture and fragrant garlic-herb crust. This traditional sweet bread delivers restaurant-quality results at home, perfect for holidays or everyday indulgence.
The secret lies in precise kneading and proofing techniques that develop its signature chewy pull-apart magic.
What sets this recipe apart is the balance of sweet and savory flavors—soft, tender crumb with a crisp, aromatic crust infused with garlic and herbs. Unlike dense bread loaves, this version stays light yet substantial, making it ideal for serving alongside soups or as a standalone treat.
The dough requires patience but rewards with a loaf that's impossible to resist.
By following this method, you'll achieve golden-brown crust with a crackly exterior that gives way to tender, moist interior. The garlic-herb crust adds depth without overpowering the bread's natural sweetness. Whether you're baking for a family gathering or treating yourself, this recipe delivers professional results every time.
Optional variations include adding citrus zest for brightness or nuts for texture, while proper storage keeps the bread fresh for days. Let's get started on creating your perfect Angelo's bread.
Ingredients for angelo's bread
Transform your kitchen into an Italian bakery with these quality ingredients for Angelo's bread.
| Ingredient | Amount | Notes |
|---|---|---|
| Active Dry Yeast 🍞 | 2 ¼ tsp | Ensure yeast is fresh and active |
| Warm Water 💧 | 1 ¼ cups | 110°F (43°C) for optimal activation |
| Granulated Sugar 🍚 | 2 tbsp | For yeast activation and sweetness |
| Unsalted Butter 🧈 | ½ cup | Cold, cubed for easier incorporation |
| Large Eggs 🥚 | 2 whole | Room temperature for even mixing |
| All-Purpose Flour 🌾 | 6 cups | Bread flour preferred for chewier texture |
| Diamond Crystal Kosher Salt 🧂 | 1 ½ tsp | Adjust to taste, enhances flavor |
| Granulated Sugar 🍚 | ½ cup | For sweetness and crust development |
| Fresh Garlic Cloves 🧄 | 4 cloves | Minced finely for aromatic infusion |
| Fresh Rosemary 🌿 | 2 tbsp | Finely chopped, stems removed |
| Fresh Thyme Leaves 🌿 | 1 tbsp | Finely chopped, stems removed |
| Extra-Virgin Olive Oil 🫒 | ¼ cup | For dough enrichment and crust |
| Coarse Cornmeal 🌽 | ½ cup | For dusting and pan preparation |
| Coarse Sea Salt 🧂 | 1 tbsp | For crust enhancement |
The yeast is the foundation—always check the expiration date and use King Arthur or Saf-Instant for reliability. For the butter, Plugrá or Land O'Lakes unsalted in cold cubes ensures proper incorporation without melting prematurely. Fresh herbs are non-negotiable here; Whole Foods or local farmers' markets offer the most vibrant rosemary and thyme. The garlic should be firm and free of sprouts—Organicville or Trader Joe's carry excellent options. Bread flour is critical for that signature chewy texture, but King Arthur all-purpose works in a pinch if you're short on time.
No fresh rosemary? Dried rosemary at one-third the amount suffices, though it lacks the same aromatic depth. Substituting dried thyme for fresh works similarly, but fresh herbs elevate this bread to restaurant-quality. For the sugar, turbinado adds a subtle caramel note if you prefer a more complex sweetness. The olive oil should be extra-virgin with a fruity aroma—California Gold or Colavita are excellent choices. If you're making this ahead, store the dough in the fridge for up to 24 hours to develop more flavor.
The dough requires patience—allow it to rise in a warm, draft-free environment for optimal development. Once baked, let the bread cool completely on a wire rack to prevent a gummy crumb. For storage, wrap the cooled loaf in parchment paper and place in a bread bag, where it stays fresh for 3-4 days. For longer storage, freeze the bread in 1-slice portions for up to 3 months. Reheat slices in a 350°F (175°C) oven for 5-7 minutes to restore crispness.
Why You'll Love This Recipe
- No-Fuss Rising: I swear by the simplicity of this dough—just yeast, water, and a pinch of sugar to wake it up. No fancy mixers or waiting around; the butter and eggs handle the heavy lifting while I prep whatever else is on the menu.
- Buttery Gold Magic: That first pull-apart bite? Rich, tender crumb with a crust that’s crisp enough to stand up to jam or soup. The butter and eggs make it taste like a bakery’s secret, not a weeknight hack.
- Weeknight Workhorse: I keep a batch in the fridge for days—great for breakfast toast, sandwiches, or even garlic bread. Honestly, I’ve fed it to my picky teenager and my foodie friends, and no one’s complained yet.
- Budget-Friendly Luxury: A few eggs and a stick of butter stretch this dough into a whole loaf that feels indulgent. I’ve made it for holiday dinners and lazy Sunday mornings—same recipe, different occasions, zero guilt.
Step-by-step instructions for Angelo's bread recipe
Mastering Angelo's bread requires patience and precision—here's how to achieve that signature chewy texture and aromatic garlic-herb crust.
Activate the Yeast for Maximum Rise
In a small bowl, combine the 2.25 tsp active dry yeast with the 1.25 cups warm water (tested at 110°F—it should feel warm to your wrist but not hot). Add the 2 tbsp granulated sugar and stir gently until fully dissolved. Let it sit for 5-10 minutes until frothy—this confirms the yeast is alive and ready to work. If it doesn't bubble, your yeast may be inactive, and you'll need to start over.
I always use a clean bowl for this step to avoid any contamination that could inhibit fermentation. The sugar not only feeds the yeast but also adds subtle sweetness to the final loaf. Once you see consistent bubbles forming, you're ready to proceed—this active mixture is the foundation of your dough's structure.
Mix the Dough and Knead for Optimal Gluten Development
In the bowl of a stand mixer fitted with the dough hook attachment, combine the yeast mixture with the 6 cups all-purpose flour and 1.5 tsp diamond crystal kosher salt. Mix on low speed until the flour is incorporated, then add the 2 whole large eggs, 0.5 cup unsalted butter (cold and cubed), and 0.25 cup extra-virgin olive oil. Increase the speed to medium and knead for 5-7 minutes until the dough forms a smooth, elastic ball that pulls away from the sides of the bowl.
During kneading, the gluten strands develop, giving the bread its signature chewy texture. If the dough feels too sticky, add flour 1 tablespoon at a time until it comes together. Avoid over-kneading—once it passes the "windowpane test" (stretch a small piece and it should be thin enough to see light through without tearing), you're ready for the next step. The dough should be slightly tacky but not wet.
Incorporate the Garlic-Herb Infusion
While the mixer runs on low speed, add the 4 cloves fresh garlic cloves (minced), 2 tbsp fresh rosemary, and 1 tbsp fresh thyme leaves to the dough. Mix just until the herbs are evenly distributed—overmixing can break down their delicate flavors. The dough will become slightly darker and more aromatic. Transfer the dough to a lightly floured surface and shape it into a round loaf, about 10 inches in diameter.
Here's where the magic happens: the garlic and herbs will infuse the dough during the rise, creating that unmistakable aromatic crust. Wrap the dough tightly in plastic wrap and let it rest at room temperature for 1 hour. This resting period allows the gluten to relax, making it easier to shape later. If your kitchen is cold, place the dough in a slightly warm spot to encourage even fermentation.
Shape and Proof the Dough for Maximum Flavor
After the rest, turn the dough onto a lightly floured surface and shape it into a 12-inch round loaf, about 2 inches thick. Place it seam-side up in a 9-inch cast-iron skillet (or similar oven-safe pan) dusted with 0.5 cup coarse cornmeal to prevent sticking. Sprinkle the top evenly with 1 tbsp coarse sea salt and the remaining 0.5 cup granulated sugar for that signature caramelized crust.
Cover the skillet loosely with plastic wrap and let the dough proof at room temperature for 1-2 hours, or until it has nearly doubled in size and feels light when pressed gently. The edges should pull away from the pan slightly, and you should see gentle bubbles forming on the surface. This proofing step is critical—it develops the bread's airy, pull-apart texture. If your kitchen is humid, reduce proofing time to avoid overproofing.
Bake to Golden Perfection with a Crispy Crust
Preheat your oven to 375°F with a baking stone or inverted baking sheet on the middle rack. Once the oven is fully heated, carefully transfer the skillet to the oven and bake for 35-40 minutes, until the crust is deep golden brown and the internal temperature reaches 190°F when measured with an instant-read thermometer. The bread should sound hollow when tapped on the bottom.
During the last 10 minutes of baking, you'll notice the crust developing a beautiful caramelized color from the sugar and salt. If it browns too quickly, loosely tent the skillet with aluminum foil to prevent over-browning. Remove the bread from the oven and let it cool in the skillet for 10 minutes before transferring to a wire rack. Serve warm, pulling apart with your hands to reveal the chewy, flavorful interior.
Pro Tips For Making Angelo'S Bread
- Bloom the Yeast: Mix that yeast with warm water (110°F) and sugar first—let it sit for 5-10 minutes until frothy before adding anything else. I learned this the hard way: skipping this step means your dough will rise slower or unevenly, and you’ll end up with dense bread instead of that light, airy texture Angelo’s is known for.
- Use Room-Temp Butter: Take your unsalted butter out of the fridge 30-45 minutes before using it—just soft enough to press with a finger, not melt. Cold butter creates pockets in the dough that won’t break down properly, leaving you with tough bread. (Yes, even if you’re impatient like me.)
- Don’t Over-Knead: Stop kneading once the dough pulls cleanly away from the bowl and springs back slowly when poked—usually around 8-10 minutes by hand. Overworking it develops too much gluten, and your bread will turn out chewy instead of tender. I used to go for 15 minutes, thinking more was better—wrong.
- Proof in a Warm Spot: Place your shaped dough in a lightly oiled bowl, cover it with a damp towel, and let it rise in a warm spot (like a turned-off oven with the light on) until it’s nearly doubled—about 1-1.5 hours. A cold kitchen slows this down, and you’ll end up with a sad, flat loaf. (Your future self will thank you.)
Make-ahead tips for angelo's bread
Dough Prep Ahead
Prepare the dough up to 24 hours in advance for deeper flavor development. After kneading, shape the dough into a ball, place it in an airtight container, and refrigerate. The cold slows fermentation, allowing the yeast to work gradually—this creates a more complex, aromatic crust.
When ready to bake, let the dough sit at room temperature for 1-2 hours to warm up before shaping and proofing. 🌱
Proofing Shortcuts
For a quicker proof, use the oven's pilot light or a proofing box set to 80°F. This maintains consistent warmth without requiring a warm kitchen. If you don’t have one, place the dough near the oven’s lightbulb (if your model has one) for gentle, even rising.
Avoid direct heat—it can cause uneven expansion.
Baked Storage Secrets
Once baked, let the bread cool completely before storing. Wrap it in parchment paper followed by a cotton towel to lock in moisture. Place in a bread box or sealed container at room temperature for 3-4 days.
For longer storage, freeze individual slices in ziplock bags for up to 3 months. Reheat frozen slices in a 350°F (175°C) oven for 5-7 minutes to restore crispness. ❄️
Freezer-Friendly Dough
Shape the dough into a loaf, wrap tightly in plastic wrap, then place in a freezer bag for up to 3 months. Thaw overnight in the fridge before proofing and baking.
This method preserves the dough’s structure, ensuring a perfect rise even after freezing. Label the bag with the date to track freshness—trust me, you’ll forget otherwise! 📅
Reviving Stale Bread
If your Angelo’s bread loses its crispness, revive it by wrapping in aluminum foil and reheating at 350°F (175°C) for 10-15 minutes. For extra crunch, brush the crust with melted butter or olive oil before reheating.
This works wonders for slices that have gone slightly soft—like a fresh-baked miracle. 🔥
Batch Baking Tips
Double the recipe for gatherings, but divide the dough into two 9-inch skillets for even baking. Use a digital kitchen scale for precise measurements—this ensures consistency across batches.
Label each loaf with the bake date to track freshness. For large groups, bake one loaf ahead and freeze it while you prepare the second fresh. 💡
Nutrition facts
Frequently asked questions
What makes Angelo's bread different from regular bread?
This recipe combines sweet and savory elements with a garlic-herb crust that sets it apart. The dough develops a signature chewy, pull-apart texture thanks to proper kneading and proofing, while the caramelized sugar-salt topping creates a crisp exterior. Unlike dense loaves, it stays light yet substantial—perfect for tearing by hand.
Can I substitute fresh herbs with dried ones?
Yes, but use one-third the amount of dried herbs (e.g., 1 tsp dried rosemary instead of 2 tbsp fresh). Fresh herbs provide better aroma and flavor, but dried work in a pinch. For best results, finely chop dried herbs before adding to the dough.
Why did my dough not rise properly?
Common causes include inactive yeast (test water temperature at 110°F), cold kitchen (proof in a warm spot like near the oven), or overproofing (dough rises too long). Ensure your yeast is fresh and the dough doubles in size during proofing. If it doesn't, try a second rise or use a proofing box for consistent warmth.
How do I store leftover Angelo's bread?
Wrap cooled bread in parchment paper and a cotton towel to retain moisture. Store at room temperature for 3-4 days or freeze slices in ziplock bags for up to 3 months. Reheat frozen slices at 350°F (175°C) for 5-7 minutes to restore crispness. For extra crunch, brush with melted butter before reheating.
Can I make this bread without a stand mixer?
Knead the dough by hand on a floured surface for 8-10 minutes until smooth and elastic. Work in short bursts to avoid overheating the dough. The windowpane test (stretch a small piece—it should be thin enough to see light through) confirms proper gluten development. Patience is key!