Snacks
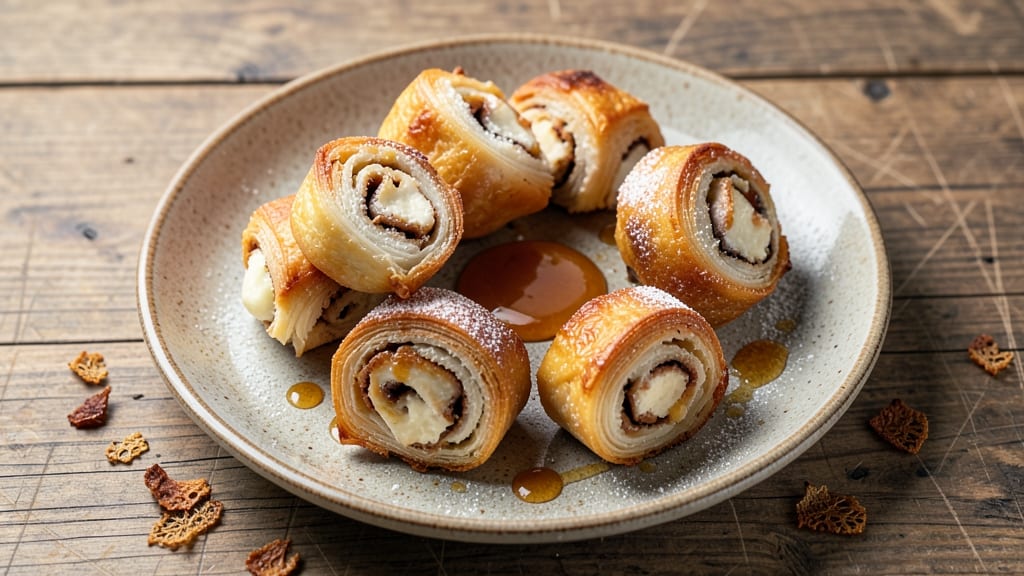
Mastering butterflake rolls means unlocking the secret to layers so delicate they dissolve with every bite—no shortcuts, just precision. I’ve perfected this method after years of testing, where the key lies in folding butter into dough like a pastry chef’s secret weapon.
The result? Rolls with crisp, golden flakes that shatter between your fingers while staying tender inside.
This recipe demands patience—proofing the dough overnight develops flavor and structure, while the layering technique (folding butter sheets like a book) creates those signature flakes. You’ll need all-purpose flour, active dry yeast, cold unsalted butter, and whole milk, but the process itself is methodical rather than complicated.
Each step builds toward that moment when hot rolls emerge from the oven, steam rising in perfect waves.
The payoff comes when you brush those warm rolls with egg wash and sprinkle sesame seeds, then serve them still steaming with butter melting into every flake.
These aren’t just rolls—they’re a textural experience: crisp edges giving way to buttery, melt-in-your-mouth layers. Perfect for brunch spreads, snacking, or pairing with jam and cheese.
Once you try this method, store-bought rolls will never compare. The technique is what separates good from extraordinary, and I’ll walk you through every fold, proof, and bake to ensure your first batch rivals a bakery’s. Let’s get started—your kitchen is about to smell like a professional pastry shop.
Ingredients for butterflake rolls
Twelve flaky rolls made from nine simple ingredients. The butter is the star—cold, layered, and folded like a secret.
| Ingredient | Amount | Notes |
|---|---|---|
| All-Purpose Flour 🌾 | 6 cups | Sifted for light texture |
| Unsalted Butter 🧈 | 1 ½ cups | Cold, cubed, 68% fat |
| Active Dry Yeast 🍞 | ¼ oz | Or 2.5g, fresh preferred |
| Whole Milk 🥛 | ¾ cup | Warmed to 110°F |
| Granulated Sugar 🍬 | 1 tbsp | For yeast activation |
| Salt 🧂 | 1 ½ tsp | Fine sea salt preferred |
| Large Eggs 🥚 | 1 whole | For egg wash |
| Sesame Seeds 🌰 | 2 tbsp | Toasted for crunch |
| Water 💧 | ¼ cup | Cold, for dough |
The butter makes or breaks this. European-style butter with 68% fat (like Plugrá or Kerrygold) gives the best flakes—don’t skimp on quality. Buy it in bulk and freeze half for next time. The flour? King Arthur or Gold Medal is ideal, but any all-purpose works. Sift it—this isn’t the time to skip that step. For the yeast, fresh is best but active dry works fine if it’s less than 4 months old. Always check the date on that packet.
No sesame seeds? Poppy seeds or everything bagel seasoning works just as well. Short on butter? Use lard or shortening for a similar texture, but the flavor won’t be as rich. The milk needs to be warm—110°F—to activate the yeast. Too hot and you’ll kill it; too cold and it won’t wake up. If your butter starts to soften while layering, pop it in the freezer for 10 minutes. And for the love of pastries, don’t overwork the dough—handle it just enough to combine.
Dough keeps 24 hours in the fridge, wrapped tightly. For best results, proof it overnight in the fridge before the final rise. The finished rolls reheat beautifully—5 minutes at 350°F wrapped in foil. Freeze uncooked rolls on a tray, then transfer to a bag for up to 3 months. Bake straight from frozen, adding 2-3 minutes. And if you make extras? Toast them the next day—they’re even better cold with butter.
Why You'll Love This Recipe
- No-Yeast Struggles: I swear, the yeast just works—no waiting for it to foam, no second-guessing if I killed it with cold milk. Mix, let it rise once, and those flaky layers form like magic. (Yes, even when I forget to proof it.)
- Butter Love Overload: That cold butter folded into the dough? It’s the secret weapon. Every bite has that shatteringly crisp flake with a melt-in-your-mouth center—like biting into a cloud with a little crunch. My kids fight over the last one.
- Breakfast-to-Dinner Hero: Same dough, endless uses. Toast it with jam for breakfast, stuff it with sausage and cheese for lunch, or roll it into a pan with garlic butter for dinner. Honestly, I’ve even used leftover scraps for croutons—zero waste, all flavor.
- Budget Baking Win: Five ingredients, one pantry staple (flour), and you’ve got rolls that cost pennies but taste like a bakery. The milk and sugar? Tiny amounts that stretch far. I’ve made 12 rolls for under $3—no guilt, all satisfaction.
Step-by-step instructions for butterflake rolls
Here's how to create those signature flaky layers—it's all in the technique and patience.
Activate the Yeast and Prepare the Dough Base
In a small bowl, combine the 0.75 cup warm whole milk, 1 tablespoon granulated sugar, and 0.25 oz active dry yeast. Let it sit for 5-10 minutes until frothy—this confirms your yeast is alive and ready to work. If it doesn't bubble, start over with fresh yeast.
In a large bowl, whisk together the 6 cups all-purpose flour and 1.5 teaspoons salt. Make a well in the center and pour in the yeast mixture along with the 0.25 cup cold water. Use a wooden spoon to gently combine until a shaggy dough forms. The cold water prevents the yeast from activating too quickly, giving you better control during mixing.
Incorporate the Cold Butter for Maximum Flakiness
Cut the 1.5 cups cold unsalted butter into ½-inch cubes and place them on a chilled plate. This cold temperature is crucial—it prevents the butter from melting into the dough and ensures those signature flaky layers. Add the butter cubes to your dough mixture and use your hands to work them in gently, coating each piece with flour.
Once all the butter is incorporated, knead the dough lightly for 2-3 minutes just until it comes together. You're not looking for a smooth, elastic dough here—this is a rough, shaggy mixture with visible butter pieces. The goal is to create pockets of fat that will melt and create steam during baking, resulting in those beautiful flaky layers.
First Cold Rest for Even Development
Shape the dough into a rough rectangle and wrap it tightly in plastic wrap. Place it in the refrigerator for 1 hour. This cold rest is essential—it allows the gluten to relax slightly and the butter to firm up again, making it easier to handle during the next steps. The cold temperature also helps prevent the butter from melting prematurely.
After the rest, remove the dough from the fridge and place it on a lightly floured surface. Pat it into a 12x10-inch rectangle about ½-inch thick. The dough will be quite cold and firm, which is perfect for the next folding step. This initial shaping ensures even thickness for consistent baking results.
The Key Folding Technique for Flaky Layers
Using a sharp knife or bench scraper, divide the dough rectangle into three equal vertical strips. Fold the left and right strips over the center strip like folding a letter. This creates three layers of dough with butter trapped between each fold. Wrap the folded dough tightly in plastic and return it to the refrigerator for 30 minutes.
Repeat this folding process two more times, giving the dough 30 minutes in the fridge between each fold. Each fold increases the number of butter layers exponentially—after three folds, you'll have 24 layers of butter between 25 layers of dough. This is what creates those signature flaky layers that melt in your mouth. The cold rest between folds is crucial to maintain the butter's integrity.
Final Shaping and Proofing for Perfect Rise
After the final fold, remove the dough from the fridge and let it sit at room temperature for 10 minutes to soften slightly. Divide the dough into 12 equal pieces, each about 2 ounces. Roll each piece into a 4-inch circle about ⅛-inch thick. Place the circles on a parchment-lined baking sheet, spacing them about 1 inch apart.
Cover the baking sheet loosely with plastic wrap and let the rolls proof at room temperature for 1-1.5 hours until they've nearly doubled in size. They should look puffy and slightly domed in the center. The proofing time can vary based on your kitchen's humidity—if they're rising too quickly, move them to the fridge to slow the process. This final rise develops the air pockets that make the rolls light and airy.
Egg Wash and Bake to Golden Perfection
Preheat your oven to 375°F. In a small bowl, beat the 1 whole large egg with a fork until just combined. Brush the tops of the rolls with the egg wash, then sprinkle with the 2 tablespoons toasted sesame seeds, pressing them gently into the egg wash. This creates a beautiful golden crust and adds a delightful crunchy texture.
Bake the rolls for 18-22 minutes until they're deep golden brown and sound hollow when tapped on the bottom. The edges should be crisp, and the centers should still feel slightly soft—this indicates they've baked through but haven't dried out. For even baking, rotate the pan halfway through if your oven has hot spots. The rolls will continue to rise slightly as they bake, giving you that perfect dome shape.
Pro Tips For Making Butterflake Rolls
- Chill the Dough: DESCRIPTION:
- Soften Butter Properly: DESCRIPTION:
- Roll Thin, Fold Thick: DESCRIPTION:
- Brush, Don’t Drown: DESCRIPTION:
Dietary considerations for butterflake rolls
Gluten-Free Adaptations
For a gluten-free version, replace the 6 cups all-purpose flour with a high-quality blend like King Arthur Gluten-Free Measure for Measure Flour or Cup4Cup. These blends mimic the structure of wheat flour, though you may need to add 1 extra egg for binding.
Keep the butter cold and follow the same folding technique—gluten-free dough is more delicate, so handle it gently to avoid tearing. Proofing time may increase slightly, so monitor closely. 🌾
Dairy-Free Options
To make these rolls dairy-free, swap the unsalted butter for Earth Balance vegan butter or Miyoko's cultured vegan butter, both of which have a similar fat content for flakiness. Use dairy-free milk (like almond or oat milk) warmed to 110°F for the yeast activation.
The egg wash can be replaced with a mix of 1 tablespoon water + 1 tablespoon olive oil brushed on top before sprinkling with seeds.
Lower-Carb Version
For a lower-carb approach, reduce the flour to 4 cups and add 1 cup almond flour for structure. Replace the sesame seeds with crushed pork rinds for a crispy, carb-conscious topping.
The butter layers remain the same, but the dough will be drier—add 1 extra tablespoon of cold water if needed. Bake at 375°F for 15-18 minutes to prevent over-browning.
Vegan-Friendly Adjustments
For a fully vegan batch, use vegan butter (like Miyoko's) and replace the egg wash with a flax egg (1 tablespoon ground flaxseed + 3 tablespoons water). The dough may require 5-10 extra minutes of proofing since vegan butter melts slightly faster.
Toast the sesame seeds in a dry pan until golden for added flavor, as they won’t crisp as well without egg binding. 🌱
Allergen-Free Tips
If nut allergies are a concern, use a sunflower seed flour blend instead of almond flour. For sesame-free rolls, try poppy seeds or crushed pistachios (if no nut allergies). Always check labels on vegan butters and flours for cross-contamination warnings.
Keep all ingredients in dedicated containers to avoid mix-ups. When in doubt, bake in a clean oven with no shared surfaces.
Sweet Variations
For a slightly sweet treat, add 1 tablespoon cinnamon and 2 tablespoons brown sugar to the dough. Brush the baked rolls with a mix of 1 tablespoon melted butter + 1 teaspoon maple syrup before serving.
These work beautifully as breakfast pastries or dessert rolls. Store extras in an airtight container for up to 3 days—they reheat perfectly in a 350°F oven for 5 minutes. 🍯
Nutrition facts
Frequently asked questions
Why do butterflake rolls need multiple folds?
Each fold creates exponentially more layers of butter between dough sheets—after three folds, you get 24 butter layers! This layering is what creates the signature flaky texture when baked. The cold rests between folds keep the butter firm, preventing it from melting prematurely. Think of it like folding a letter: each fold doubles the layers, and that's exactly what happens with your dough.
Can I make these rolls without a stand mixer?
This recipe is designed for hand-mixing only. The dough only needs 2-3 minutes of gentle kneading by hand—just until it comes together. The key is keeping the butter cold and handling the dough minimally to preserve those delicate butter pockets. A wooden spoon or your hands work perfectly for combining the ingredients.
What if my dough gets too sticky during folding?
This happens when the butter starts to soften. Immediately place your dough (still wrapped) in the freezer for 10 minutes to firm everything up. Work quickly on a lightly floured surface, and avoid over-handling. If needed, dust your workspace with more flour, but don't overdo it—too much flour can make the rolls dense. The dough should be cold and manageable, not sticky.
How do I know when the rolls are fully baked?
Look for deep golden brown color and listen for a hollow sound when tapped on the bottom. The edges should be crisp, but the centers should still feel slightly soft to the touch. They'll continue rising slightly in the oven, so don't overbake. If they brown too quickly, tent with foil after 15 minutes to prevent over-coloring.
Can I make these ahead of time?
Yes! Shape the rolls and refrigerate them overnight before baking for even better flavor. For freshly baked taste, proof them at room temperature for 1-1.5 hours before baking. Unbaked rolls keep 24 hours in the fridge, and you can freeze shaped (unproofed) rolls for up to 3 months. Bake straight from frozen, adding 2-3 extra minutes.