Desserts
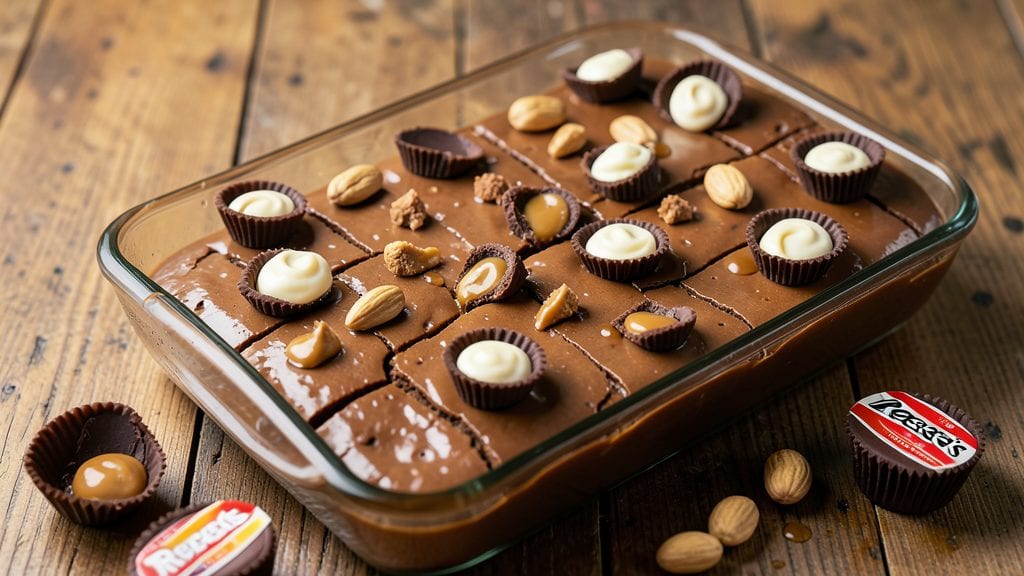
Creating Reese’s peanut butter cup fudge at home delivers that nostalgic candy bar experience in rich, velvety layers—no store-bought shortcuts needed. The secret lies in balancing melted chocolate with creamy peanut butter and a precise baking technique that yields a perfectly set, swirled dessert.
I’ve perfected this recipe over years of testing, ensuring every bite captures that iconic peanut butter cup flavor with a smooth, melt-in-your-mouth texture.
This recipe combines just five core ingredients—chocolate, peanut butter, butter, sugar, and milk—to create a decadent fudge that’s easier to make than you’d expect. The process involves melting the chocolate and peanut butter together, then baking the mixture in a water bath for even heat distribution.
This method guarantees a creamy yet firm finish, with those signature peanut butter swirls cutting through the chocolate like a classic candy bar.
What you’ll end up with is a professional-quality dessert that’s rich, fudgy, and packed with peanut butter flavor in every bite. The swirls stay distinct, the texture holds together when cut, and the aroma alone will have your kitchen smelling like a candy shop.
Once set, it’s perfect for gifting, holiday tables, or satisfying a late-night sweet tooth without the guilt.
Ready in about 45 minutes from start to finish, this fudge requires minimal effort but delivers maximum indulgence. Whether you’re a baking novice or a seasoned chocolatier, this recipe is foolproof and adaptable—just adjust the baking time slightly if your kitchen runs hot or cold.
Let’s get started on creating your own homemade Reese’s-inspired treat.
Ingredients for reese's peanut butter cup fudge
Five ingredients transform into decadent Reese’s-inspired fudge—rich, velvety, and packed with nostalgic flavor.
| Ingredient | Amount | Notes |
|---|---|---|
| Semi-Sweet Chocolate Chips 🍫 | 12 oz | High-quality chocolate for rich flavor |
| Creamy Peanut Butter 🥜 | 1 cup | Natural, unsweetened preferred |
| Unsalted Butter 🧈 | ½ cup | Cold, cut into small cubes |
| Granulated Sugar 🍚 | 1 cup | White or light brown preferred |
| Whole Milk 🥛 | ¼ cup | Warmed for smooth texture |
| Vanilla Extract 🌸 | 1 tsp | Pure, high-quality extract |
| Diamond Crystal Kosher Salt 🧂 | ¼ tsp | Fine grain for delicate flavor |
The chocolate is non-negotiable here. Ghirardelli or Guittard semi-sweet chips melt flawlessly, but any high-quality chocolate with at least 40% cocoa works. I always grab a bag of Ghirardelli baking bars from Whole Foods when I want extra richness—they’re worth the splurge. The peanut butter? Natural, unsweetened (like Smucker’s or Jif Natural) gives the best flavor, but if you’ve only got regular, just reduce the sugar slightly. The butter should be cold and cubed—this prevents premature melting when you’re mixing everything together. Pro tip: Cut it into tiny cubes so it melts evenly with the chocolate.
No vanilla extract? A splash of vanilla bean paste adds depth, or half a vanilla bean scraped works in a pinch. Want to stretch this further? Mix in 1/4 cup chopped peanuts for extra texture. The milk needs to be warmed but not hot—just heat it in the microwave for 20 seconds. Too hot and the chocolate seizes; too cold and the texture won’t be silky. If you’re making this ahead, store the dry ingredients (sugar, salt, vanilla) separately until ready to use—keeps everything fresh longer. And if you’re worried about the fudge being too sweet, reduce the sugar to 3/4 cup—trust me, the peanut butter balances it perfectly.
This fudge keeps beautifully—2 weeks at room temperature in an airtight container, or 3 months in the freezer if you’re prepping for holidays. I like to wrap individual pieces in parchment before storing to prevent sticking. For gifting, use clear cellophane bags with ribbon—looks professional and keeps it fresh. The swirls stay distinct for about 5 days if stored properly, but honestly? The first day is always the best. If you make extra, freeze it in 1-inch squares for easy portioning later.
Why You'll Love This Recipe
- Pantry Magic: I swear by this recipe because it uses stuff I always have—peanut butter, chocolate chips, butter—that’s it. No fancy ingredients, no last-minute grocery runs. Just melt, mix, and set.
- Nostalgia in Every Bite: That perfect balance of creamy peanut butter and rich chocolate? It’s like biting into a Reese’s cup but better—thicker, smoother, with that crackly top I can’t resist. Honestly, it’s my go-to when I need a taste of childhood.
- Party-Ready in Minutes: Wrap it up in foil or break into squares, and suddenly you’ve got a showstopper for potlucks, teacher gifts, or just because. (Yes, even on a Tuesday night.) It keeps well too, so I can make a big batch and hand it out guilt-free.
- No-Waste Win: Leftovers? More like no leftovers—this stuff disappears fast. But if you’re lucky enough to have some hang around, it’s still just as good days later. And since it’s budget-friendly, I can afford to make it often without feeling guilty.
Step-by-step instructions for Reese's peanut butter cup fudge
Here's how to create decadent fudge with perfect swirls and a creamy peanut butter center.
Melt Chocolate and Prepare the Base
In a medium-sized saucepan, combine the 12 oz semi-sweet chocolate chips, 0.5 cup unsalted butter, and 1 cup granulated sugar. Place over medium heat and stir constantly with a silicone spatula until the mixture reaches 115°F—this is where the chocolate fully melts but doesn't scorch. You'll see a glossy, smooth texture with no graininess remaining.
Remove the pan from heat and immediately whisk in the 1 cup creamy peanut butter and 1 tsp vanilla extract. Stir until completely smooth—this is your base mixture. I like to press a small amount between my fingers to check for any lumps; if you feel any, return the pan to low heat for 10 seconds to dissolve them completely. The peanut butter should blend seamlessly into the chocolate.
Incorporate Milk and Salt for Perfect Texture
Return the pan to medium-low heat and slowly whisk in the 0.25 cup whole milk, starting with just a few tablespoons at a time. This gradual addition prevents the mixture from seizing up. Stir constantly until the milk is fully incorporated and the temperature reaches 118°F. This precise temperature ensures your fudge will have that signature creamy yet firm texture.
Remove from heat and stir in the 0.25 tsp diamond crystal kosher salt. The salt enhances all the flavors while balancing the sweetness. Here's the thing—don't skip this step. The salt makes the difference between good fudge and extraordinary fudge. Let the mixture cool slightly for 3-4 minutes while you prepare your pan.
Create the Signature Swirl Pattern
Line an 8x8-inch baking dish with parchment paper, leaving an overhang on all sides for easy removal. Pour about ⅓ of the chocolate mixture into the prepared pan and spread it evenly using an offset spatula. Let it cool for 5-7 minutes until it begins to thicken slightly—you'll see it lose some of its glossy sheen.
While the first layer cools, take the remaining chocolate mixture and stir in an additional 2 tablespoons of peanut butter (from the original 1 cup). This extra peanut butter creates the rich center swirls. Once the first layer is set but still warm to the touch, spoon the peanut butter-enriched chocolate over the top. Using a butter knife, gently swirl it through the first layer in circular motions.
Set the Fudge to Perfection
Refrigerate the fudge for 4-6 hours or until completely firm. This chilling time is crucial—it allows the fudge to set properly while maintaining that creamy texture. I know it's tempting to cut into it sooner, but patience here pays off. The fudge should be firm enough to hold its shape when cut but still have that melt-in-your-mouth quality.
Once set, use the parchment overhang to lift the fudge out of the pan. Cut into 16 equal squares using a sharp knife dipped in hot water and wiped dry between cuts. This ensures clean edges every time. Store any leftovers in an airtight container in the refrigerator for up to 1 week, though I promise these will disappear faster than that!
Pro Tips For Making Reese'S Peanut Butter Cup Fudge
- Stir Constantly: DESCRIPTION: Once the sugar starts melting, don’t walk away—keep that pot moving over medium heat until it reaches 238°F. I learned this the hard way when I got distracted and ended up with grainy fudge. The peanut butter will thicken fast, so stay alert.
- Use Real Butter: DESCRIPTION: Skip the margarine or "vegetable shortening" shortcuts—this isn’t the time to cut corners. Unsalted butter adds richness and helps the fudge set properly. (Yes, even if you’re tempted to grab the salted kind, measure it out first.)
- Cool Before Cutting: DESCRIPTION: Let the fudge sit for at least 2 hours, or until it’s firm enough to hold its shape when pressed. I used to rush it, and the slices would crumble like sad sand. Patience here = clean cuts and professional-looking bars.
- Swirl the Peanut Butter: DESCRIPTION: Once the chocolate mixture is thick but still pourable, fold in the peanut butter in batches, then use a spatula to create those classic Reese’s swirls. Don’t overmix—just drag the spatula through the fudge a few times for a marbled effect. (And if you mess up, just eat a spoonful.)
Regional styles of these flavors
Southern-Style Swirls
In the Deep South, this fudge gets a spicy kick with a pinch of cayenne pepper—just ¼ tsp—mixed into the peanut butter layer. The heat balances the sweetness perfectly, especially when paired with a glass of cold sweet tea.
I first tried this variation at a Georgia roadside stand where they called it "Peanut Butter Fire Fudge." Trust me, the cayenne doesn't overpower; it just adds a subtle warmth that makes every bite more interesting. 🌶️
Midwest Crunch Twist
Up north, they love adding texture. The Midwest version incorporates ½ cup chopped pecans or walnuts into the base before swirling, creating a delightful crunch that contrasts with the creamy fudge.
I like to toast the nuts in a dry pan for 3-4 minutes before mixing them in—this enhances their flavor and prevents them from getting soggy. This variation works especially well when served with vanilla ice cream.
West Coast Nutella Fusion
California takes this fudge to the next level by swapping peanut butter for ½ cup Nutella spread—mixed with the remaining ½ cup peanut butter—to create a dual-chocolate flavor explosion. The hazelnut notes from Nutella pair beautifully with the classic peanut butter.
I've also seen versions where they drizzle the set fudge with melted white chocolate and crushed hazelnuts for extra decadence. This fusion is perfect for anyone who loves European-inspired desserts with a West Coast twist.
New England Salted Caramel
The Northeast puts its own spin by adding a salted caramel layer—pour a thin layer of homemade caramel sauce (just ½ cup sugar + 2 tbsp butter + 2 tbsp cream) over the peanut butter swirl before setting.
The caramel adds a buttery depth that complements the peanut butter perfectly. I recommend using a high-quality caramel sauce like Trader Joe's or making your own with a candy thermometer for precise control. This version feels especially festive during holiday gatherings.
Texas-Style Spiced Version
Down in Texas, they infuse the fudge with warm spices. Add ½ tsp cinnamon and a pinch of ground cardamom to the chocolate base, then top with a sprinkle of coarse sea salt before setting.
The spices give it a cozy, almost chai-like flavor that pairs wonderfully with a cup of strong black coffee. This version is a crowd-pleaser at Texas BBQ joints and holiday markets.
Pacific Northwest Dark Chocolate
For a more sophisticated take, the Pacific Northwest swaps semi-sweet chocolate for dark chocolate (60-70% cocoa) while keeping the peanut butter layer creamy. The dark chocolate adds a sophisticated bitterness that balances the sweetness beautifully.
I've seen versions where they even add a touch of espresso powder to the chocolate layer for an extra depth of flavor. This version is perfect for chocolate lovers who enjoy a richer, more complex dessert.
Nutrition facts
Frequently asked questions
Can I use powdered peanut butter instead of creamy?
Creamy peanut butter is ideal for this recipe as it blends smoothly with the chocolate and creates that signature rich texture. Powdered peanut butter can make the fudge grainy and less cohesive. If you only have powdered, try adding 1 tablespoon of oil or melted butter per ¼ cup to help it bind better, but the texture won't be as luxurious.
Why did my fudge turn out too hard?
Over-baking or under-chilling are the most common culprits. This fudge needs 4-6 hours in the fridge—any less and it won't set properly. If your kitchen runs hot, try 1-2 hours in the freezer first to speed up the process. Also, check your chocolate temperature: if it exceeds 118°F, the sugar may crystallize, making the fudge harder.
How do I make this fudge nut-free?
Swap the peanut butter for ½ cup sunflower seed butter or ½ cup tahini (thinned with 1 tablespoon milk if too thick). For a chocolate-only version, simply omit the peanut butter layer and use the full chocolate mixture. The texture will be slightly denser but still delicious. Just reduce the sugar by 1 tablespoon since seed butters are naturally sweeter.
Can I make this in a slow cooker?
Use the slow cooker on low heat for 1-2 hours to melt the chocolate, butter, and sugar together. Stir every 15 minutes to prevent scorching. Once melted, proceed with the remaining steps as written. The slow cooker method is great for hands-off melting, especially in warm kitchens where stovetop temperatures can spike too quickly.
What's the best way to store leftovers?
Wrap individual pieces in parchment paper or store the whole slab in an airtight container with layers separated by parchment. At room temperature, it stays fresh for 5-7 days, while the freezer extends shelf life to 3 months. For gifting, use clear cellophane bags with a ribbon—it keeps the fudge fresh and looks professional. The swirls stay distinct for about 5 days if stored properly.