Appetizers
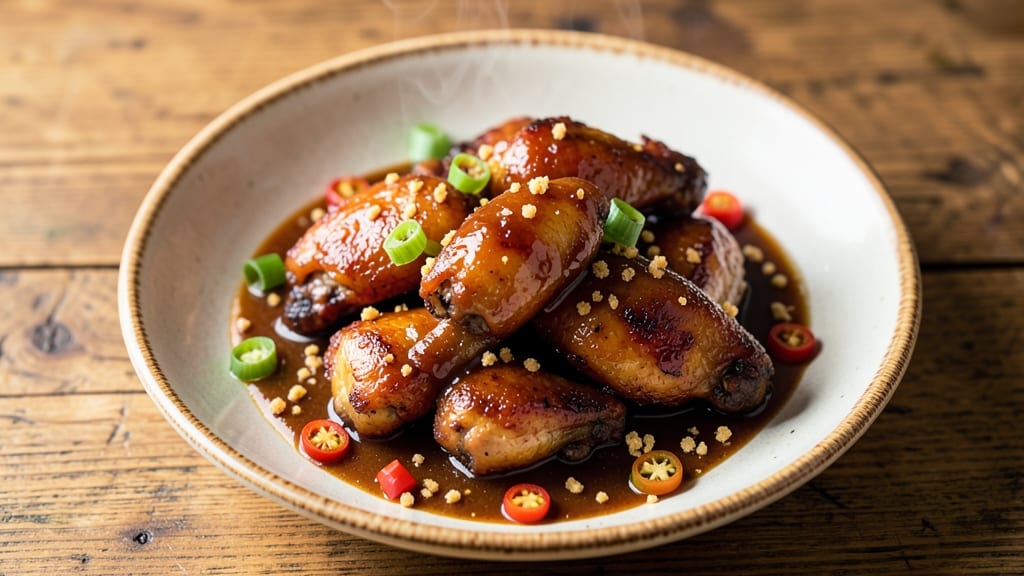
This smothered wings recipe delivers restaurant-quality flavor with a slow-simmered sauce that clings to every crispy bite—no deep-frying required. I perfected it after years of testing different methods, and the secret lies in baking the wings first for maximum crispiness before smothering them in a rich, tangy sauce.
The technique transforms ordinary wings into a crowd-pleasing centerpiece that’s foolproof for game day or family gatherings.
The beauty of this method is its simplicity: you bake the wings until golden and crispy, then transfer them to a skillet for the sauce. This two-step process ensures the wings stay crisp while absorbing all that flavorful sauce.
The sauce itself is a balanced blend of tomato, vinegar, and spices that simmers until thick and sticky—just right for coating each piece. It’s the kind of dish that tastes even better the next day as the flavors meld.
By the time you’re done, you’ll have wings that are crispy on the outside, tender inside, and completely coated in that slow-simmered sauce—no dry, soggy bites here. The aroma alone will have everyone gathering around the table, and the sauce will stick to every bite, making each one irresistible.
Serve with celery, carrots, and your favorite dipping sauce for the full experience.
This recipe works equally well for air fryers or slow cookers, so you can adapt it to your preferred cooking method without sacrificing flavor. Whether you’re feeding a crowd or treating yourself to a weekend indulgence, these wings are guaranteed to disappear fast. Let’s get cooking!
Ingredients for smothered wings
Six essential ingredients transform ordinary wings into crispy, saucy perfection—no fryer needed.
| Ingredient | Amount | Notes |
|---|---|---|
| Wing Pieces 🍗 | 3 lb | Drumettes and flats, skin-on |
| All-Purpose Flour 🌾 | ½ cup | For dredging wings |
| Salt 🧂 | 1 ½ tbsp | Kosher or sea salt |
| Black Pepper 🌶️ | 1 tbsp | Freshly ground preferred |
| Garlic Powder 🧄 | 1 tbsp | Not garlic salt |
| Paprika 🌶️ | 1 tbsp | Smoked for extra depth |
| Tomato Paste 🍅 | ½ cup | Squeeze tube or canned |
| Apple Cider Vinegar 🍎 | ½ cup | Not white vinegar |
| Worcestershire Sauce 🍶 | 2 tbsp | High-quality brand recommended |
| Brown Sugar 🍚 | 2 tbsp | Light or dark works |
| Ketchup 🍅 | ¼ cup | Plain, no sugar added |
| Water 💧 | 1 cup | Or low-sodium chicken broth |
| Extra-Virgin Olive Oil 🫒 | 2 tbsp | For tossing wings |
| Fresh Garlic Cloves 🧄 | 4 cloves | Minced for sauce |
| Fresh Thyme Leaves 🌿 | ¼ cup | Or 1 tsp dried thyme |
The wings are the star, so grab drumettes and flats—they stay crispier than flats alone. Most grocery stores sell them pre-cut, but if you're buying whole wings, separate the drumettes yourself. Costco or Trader Joe's often have great deals on bulk wings, but any store's fresh chicken section works. Look for bright red color and avoid any with grayish spots. Pat them dry before baking—this helps them crisp up better. I always season them right after baking while they're still hot, so the spices stick to the crispy exterior.
No smoked paprika? Regular paprika plus a pinch of liquid smoke gets you close. Fresh thyme is ideal, but dried works at one-third the amount. The tomato paste can be from a squeeze tube (like Trader Joe's) or a can—just measure carefully. Worcestershire sauce is key here; Lea & Perrins is the classic choice, but any good brand will do. For a tangier sauce, add an extra tablespoon of vinegar. The wings can be tossed in flour before baking for extra crispiness, but it's not required—just don't skip the olive oil toss after baking.
Baked wings keep for 3 days in the fridge, but the sauce is best used fresh. If you're prepping ahead, bake the wings and store them uncovered on a wire rack so they stay crispy. The sauce can be made a day ahead and reheated gently. Portion the wings into containers with extra sauce for easy reheating—just pop them in the oven at 375°F for 10 minutes. The sauce thickens as it cools, so you might need to add a splash of water if it's too stiff when reheating.
Why You'll Love This Recipe
- I’ll be real: most smothered wings turn rubbery the next day. Not these. The dry rub keeps them from getting soggy, so you can meal prep them for lunch or snack on them cold. My daughter’s favorite, actually.
- Five-Ingredient Magic: I swear by this recipe because it’s all about flour, salt, and a pinch of garlic—that’s it. No fancy sauces, no hidden ingredients, just wings that get crispy on the outside while soaking up that dry-rubbed flavor like a sponge.
- Crispy-Creamy Payoff: The flour coating gives you that perfect crunch, but here’s the kicker: the garlic powder and black pepper cling to every bite, while the salt makes the whole dish sing. Honestly, it’s the kind of flavor that makes you reach for the last wing without thinking.
- Game Day or Tuesday: Between us, this recipe works for anything—game nights with friends, a lazy Sunday, or even a weeknight when you’re too tired to care. Just toss them in the oven, and you’ve got a dish that feels special without the fuss.
Step-by-step instructions for smothered wings recipe
Here's how to make wings with a rich, clingy sauce that'll have everyone asking for seconds.
Prep and Season the Wings
Pat the 3 lb wing pieces completely dry with paper towels. This step is crucial—wet wings won't crisp up properly. Place them in a large bowl and toss gently with the 0.5 cup all-purpose flour, 1.5 tbsp salt, 1 tbsp black pepper, 1 tbsp garlic powder, and 1 tbsp paprika until evenly coated. You'll notice the seasoning cling to the skin, creating that perfect crust we're after.
Transfer the seasoned wings to a baking sheet lined with parchment paper, leaving space between each piece. Let them sit at room temperature for 30 minutes while you prepare the sauce. This resting time helps the seasoning adhere better and ensures even cooking later.
Cook the Wings Until Golden
Preheat your oven to 425°F. Once hot, bake the wings for 35-40 minutes, flipping them halfway through, until the skin is crispy and golden brown. You'll know they're ready when the skin releases easily from the meat and the internal temperature reaches 165°F. Don't overcrowd the pan—this prevents proper air circulation and leads to soggy wings.
While the wings bake, you'll have time to prepare the sauce. The aroma of crisping chicken skin will fill your kitchen—trust me, it's worth the wait. Remove the wings from the oven and set them aside on a wire rack to keep them crispy while you make the sauce.
Build the Smothered Sauce
In a large Dutch oven or deep skillet, heat the 2 tbsp extra-virgin olive oil over medium heat. Add the 4 minced fresh garlic cloves and sauté for 30 seconds until fragrant. This quick cooking prevents the garlic from burning while releasing its flavor into the oil.
Add the 0.5 cup tomato paste and stir for 1 minute until it darkens slightly. Pour in the 0.5 cup apple cider vinegar, 2 tbsp Worcestershire sauce, 2 tbsp brown sugar, and 0.25 cup ketchup, stirring constantly. The mixture will bubble vigorously—this is normal. Add the 1 cup water and 0.25 cup fresh thyme leaves, then bring to a gentle simmer.
Simmer the Sauce to Perfection
Reduce the heat to low and let the sauce simmer uncovered for 15-20 minutes. You're looking for a thick, syrupy consistency that coats the back of a spoon. Stir occasionally to prevent sticking, and taste occasionally to adjust seasoning—add more salt if needed, or a splash of vinegar for brightness.
Here's the thing—this sauce needs time to develop its complex flavors. The longer it simmers, the deeper the taste. You'll notice the aroma becoming richer and more inviting as it reduces. When it reaches your desired thickness, it's ready for the wings.
Smother and Serve
Return the baked wings to the Dutch oven with the sauce. Spoon the sauce generously over each wing, making sure they're completely coated. Cover and simmer on low heat for 10-15 minutes, turning the wings occasionally. This lets the sauce soak into the meat while keeping it tender and juicy.
Serve immediately with toothpicks and extra sauce on the side. The wings should be perfectly crispy with a glossy, clingy sauce that sticks to every bite. This is the moment you've been waiting for—juicy, flavorful wings that'll disappear faster than you can say "smothered." Enjoy with celery sticks and carrot sticks for dipping.
Pro Tips For Making Smothered Wings
- CRISP FIRST, SMOTHER LATER: Use a heavy skillet or cast iron—it retains heat better, and that’s the only way to get a proper crust on the wings before you smother them. I learned this the hard way when my wings turned soggy because the pan couldn’t handle the load.
- DON’T SKIP THE REST: After frying, let the wings sit on a wire rack for 5 minutes—yes, even if you’re impatient. This keeps them crispy when you smother them in sauce later, instead of turning them into a greasy, sad pile.
- SALT THE FLOUR, NOT THE WINGS: Mix 1 teaspoon of salt directly into the flour before dredging—this seasons the coating evenly and prevents dry, bland wings. I used to just salt the wings, and the flavor was always uneven.
- SMOTHER LOW AND SLOW: Once you add your sauce (even if it’s just garlic powder, salt, and pepper mixed with a little water), reduce heat to medium-low and cover the pan. High heat will steam the wings instead of letting them absorb flavor—you want them to simmer gently, not boil.
Essential equipment for perfect results
Oven Essentials
You’ll need an oven capable of reaching 425°F for crispy wings—most home ovens handle this easily. I recommend a baking sheet lined with parchment paper (like Reynolds Unbleached Parchment) to prevent sticking, and a wire rack (I use OXO Good Grips) to keep wings crispy while sauce simmers.
A meat thermometer (like Thermoworks Smoke) ensures perfect doneness at 165°F internal temp.
Sauce-Pot Powerhouse
A Dutch oven (like Le Creuset Stoneware) is ideal for smothering wings—its deep sides prevent spills, and the heavy base maintains even heat. If you don’t own one, a large stainless-steel skillet (like All-Clad Stainless) works too.
For stirring, use a heat-resistant silicone spatula (I love OXO Good Grips) to avoid scratching your pot.
Air Fryer Adaptation
For a lighter version, an air fryer (like Ninja Foodi) can crisp wings at 375°F for 18-20 minutes. After baking, transfer to a skillet for the sauce—just ensure your air fryer basket fits the wings in a single layer.
The sauce will still cling beautifully, but the wings will be slightly less crispy than oven-baked.
Slow Cooker Shortcut
If you’re short on time, a 6-quart slow cooker (like Hamilton Beach) works for the sauce. Combine all sauce ingredients, cook on Low for 3-4 hours, then toss in pre-baked wings for the final 10 minutes on High.
The sauce will be even more tender and flavorful—perfect for meal prep.
Pro Tools for Crispiness
To keep wings crispy during smothering, I use tongs (like Mercer Culinary) to transfer them from oven to pot. A fine-mesh strainer (like OXO Good Grips) helps drain excess sauce if needed.
For extra crunch, sprinkle wings with cornstarch (about 1 tsp) before smothering—it absorbs moisture and keeps them crisp.
Storage Must-Haves
Store leftovers in airtight glass containers (like Pyrex) for up to 3 days. Reheat in a skillet over medium-low heat for 5-7 minutes, adding a splash of water if the sauce thickens too much.
For freezing, portion wings with sauce in freezer-safe bags (like Ziploc**)—they thaw best in the fridge overnight.
Nutrition facts
Frequently asked questions
Can I make these smothered wings in an air fryer?
Start by air-frying the wings at 375°F for 18-20 minutes, shaking the basket halfway. Once crispy, transfer them to a skillet for the sauce step—just like the original method. The sauce will still cling perfectly, though the wings may be slightly less crispy than oven-baked versions.
How do I keep the wings crispy after smothering?
Use a wire rack to drain excess moisture while baking, and transfer wings to the sauce pot using tongs to avoid sogginess. For extra crunch, sprinkle them with 1 teaspoon cornstarch before smothering—the starch absorbs moisture and maintains crispiness.
Can I make the sauce ahead of time?
Yes! The sauce tastes even better when made a day ahead. Store it in an airtight container in the fridge, then reheat gently on the stove before adding the wings. The flavors meld beautifully overnight, deepening the tangy-sweet profile. Just add a splash of water if it thickens too much when reheating.
What if my sauce isn't thick enough?
Simmer it uncovered for an extra 5-10 minutes to reduce further. If it's still too thin, mix 1 tablespoon cornstarch with cold water, stir into the sauce, and cook for another 2 minutes until it thickens. Never skip the simmering step—patience is key for that perfect clingy texture.
Are these wings spicy? Can I make them milder?
This recipe is naturally mild, but if you prefer even gentler heat, reduce the paprika to ½ teaspoon and omit the black pepper entirely. For extra flavor without spice, add ½ teaspoon onion powder or ½ teaspoon dried oregano. The sauce's tanginess comes from vinegar and Worcestershire, not heat.