
Side Dishes
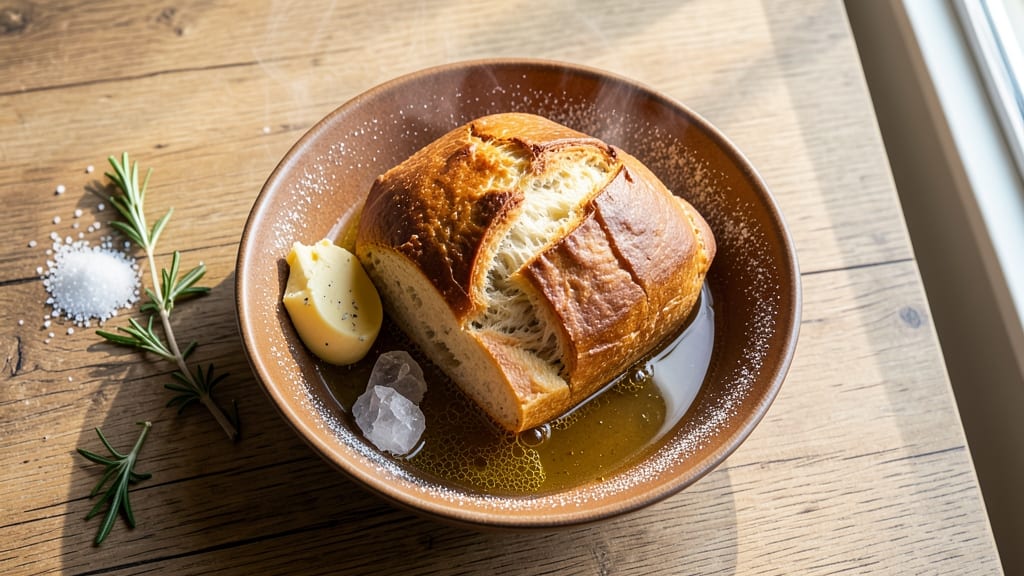
This American bread recipe delivers the kind of artisan-style loaf you’d find in a rustic bakery—crusty on the outside, tender inside, with a perfect rise that never disappoints.
After years of baking experiments and failed attempts with dense, flat loaves, I finally cracked the code using a precise method that balances hydration, kneading, and proofing. The secret lies in patience and technique, not shortcuts.
The dough comes together with simple ingredients—flour, yeast, water, and a touch of salt—but the magic happens during the two-hour proofing at room temperature. This slow rise develops gluten properly, ensuring a light, airy crumb that’s impossible to achieve with rushed methods.
For those who love texture, the crust develops a satisfying crackle when baked at 425°F for 25 minutes.
What you’ll end up with is a golden-brown loaf that smells like a home bakery, with a crisp exterior and a soft, even crumb inside. Slice it fresh for sandwiches, toast it for breakfast, or serve it warm with butter—this bread is versatile enough for any meal.
The best part? It’s foolproof once you master the timing, and you’ll never buy store-bought again.
For regional variations, try adding honey or molasses for a Southern-style sweetness, or swap in whole wheat flour for a heartier texture. The method stays the same, but the flavor possibilities are endless. Let’s get started on your perfect loaf.
Ingredients for american bread
Four cups flour, a pinch of yeast, and patience—this is your ticket to bakery-quality bread at home.
| Ingredient | Amount | Notes |
|---|---|---|
| Bread Flour 🌾 | 4 cups | High-protein for better gluten structure |
| Active Dry Yeast 🍞 | ¼ oz | Or 2.5g, ensure it's fresh |
| Granulated Sugar 🍚 | 1 tbsp | Feeds yeast for activation |
| Warm Water 💧 | 1 ¼ cups | 105-110°F for yeast activation |
| Unsalted Butter 🧈 | ¼ cup | Cold, cubed for texture |
| Sea Salt 🧂 | 1 ½ tsp | Diamond Crystal preferred |
| Cornmeal 🌽 | ¼ cup | For dusting and crust texture |
| Ice Water ❄️ | ¼ cup | Slows gluten development |
| Extra-Virgin Olive Oil 🫒 | 1 tbsp | For dough handling |
The flour is non-negotiable here. King Arthur or Caputo bread flour are my go-tos—they’ve got that extra protein punch for a proper rise. If you’re in a pinch, all-purpose works, but expect a slightly denser crumb. The yeast? Freshness matters—if it’s past its expiration, toss it. For the water, room temperature is key—too hot and you’ll kill the yeast, too cold and it won’t activate. I use my instant-read thermometer to hit 105°F every time. The butter? European-style (like Plugrá) has more fat content for that perfect tender crumb. If you can’t find it, stick with unsalted—just don’t melt it.
No bread flour? All-purpose plus 1 tbsp vital wheat gluten gets you close. Yeast expired? Proof it first—mix with sugar and warm water, let sit 5-10 minutes until foamy. The cornmeal is a game-changer for that rustic crust—don’t skip it. Short on olive oil? Melted butter works, but it’ll add richness. For a Southern twist, swap 1 tbsp of the water for honey or molasses. Want a whole wheat version? Replace 1 cup of bread flour with whole wheat—just add 1 extra tbsp water since it’s thirstier. And if your kitchen’s hot, chill the dough 30 minutes before shaping to prevent over-proofing.
This dough is a two-stage proofing beast. First proof for 1 hour, then shape and let it rise again for 1 hour at room temp. Don’t rush it—that’s when the magic happens. For storage, cool completely, wrap in a clean kitchen towel, then seal in a paper bag at room temp for 3 days. Freeze for up to 3 months—thaw overnight in the fridge. Pro tip: Toast slices straight from the freezer for crispy, warm bread. The crust? Best eaten fresh, but reheat slices at 350°F for 5 minutes if you’re craving it later.
Why You'll Love This Recipe
- No-Knead Magic: I swear by this—just mix the bread flour, yeast, and warm water, let it rest, then fold once. That’s it. No stand mixer, no arm workout, just pure dough ease.
- Buttery Crust Dream: The moment you pull it from the oven, that golden crust crackling with melted butter? It’s like hugging a warm, pillowy cloud—simple ingredients, but ridiculously satisfying.
- Leftovers That Last: This bread stays fresh for days, perfect for toast, sandwiches, or even French toast. I make a double batch Sunday night and forget about it until Thursday.
- Budget-Friendly Staple: Five ingredients, zero fancy substitutions. The butter makes it feel special, but the flour and yeast keep it affordable—ideal when you want homemade without breaking the bank.
Step-by-step instructions for artisan-style American bread
Here's the method that guarantees a perfectly risen, crusty loaf every single time—no baking failures here.
Activate the Yeast for Maximum Rise
In a large mixing bowl, combine the 1.25 cups warm water (between 105-110°F) with the 1 tbsp granulated sugar and 0.25 oz active dry yeast. Let this sit for 5-10 minutes until it becomes frothy and bubbly—this confirms your yeast is alive and ready to work its magic. If it doesn't foam, your yeast is dead and you'll need to start over.
I always test my water temperature first with a thermometer—too hot kills yeast, too cold makes it sluggish. The sugar jumpstarts fermentation, creating that perfect bubbly texture that gives your bread its airy structure. Don't skip this step; proper yeast activation is the foundation of a great loaf.
Develop the Dough with Butter and Salt
Add the 4 cups bread flour to the yeast mixture and stir until combined. Create a well in the center and add the 0.25 cup cold cubed unsalted butter, 1.5 tsp sea salt, and 1 tbsp extra-virgin olive oil. Using a wooden spoon, mix just until the dough starts to come together—you're building gluten, but don't overwork it yet.
Once the dough forms a shaggy mass, turn it out onto a lightly floured surface and knead for 8-10 minutes until smooth and elastic. The dough should be slightly tacky but not sticky—if it's too wet, add 1-2 tablespoons more flour; if too dry, add 1 teaspoon warm water. This kneading develops the gluten network that traps gas during rising, giving you that perfect oven-spring.
First Rise for Optimal Flavor Development
Shape the dough into a ball, place it in a lightly oiled bowl, and cover with a damp towel. Let it rise in a warm place (75-80°F) for 1.5-2 hours, until it has doubled in size. You'll know it's ready when you poke it gently and the indentation springs back slowly—this indicates proper fermentation.
I like to place my dough near a warm oven with the light on (the light generates heat) or use my oven's pilot light setting. The warm environment accelerates fermentation without overproofing. Don't rush this step—proper fermentation develops those complex flavors that make homemade bread taste so much better than store-bought.
Shape and Second Rise for Structure
Punch down the risen dough to release air, then divide it into 4 equal portions (about 8 ounces each). Shape each portion into a smooth ball by pulling the edges toward the center and sealing the seam. Place the shaped dough balls on a floured surface and let them rest for 10 minutes—this relaxation step prevents them from springing back when you shape them.
After resting, shape each ball into a 12-inch long batard (oval loaf) by rolling it gently with your hands. Place the shaped loaves on a baking sheet dusted with 0.25 cup cornmeal, cover with a towel, and let them rise for another 30-45 minutes until they've puffed up noticeably. The cornmeal creates that beautiful textured crust we all love.
Bake to Golden Perfection with Steam
Preheat your oven to 425°F with a baking stone or inverted baking sheet inside—this creates the perfect baking surface. About 10 minutes before baking, place an ice cube on the baking stone and pour 0.25 cup ice water into a heatproof bowl. When you put the dough in, quickly pour the hot water from the oven into the bowl to create steam—this helps develop that crisp crust.
Bake the loaves for 25-30 minutes until they're deep golden brown and sound hollow when tapped on the bottom. The internal temperature should reach 190-195°F. I like to rotate the pans halfway through baking for even color. Let the bread cool on a wire rack for at least 30 minutes before slicing—this allows the gluten to relax and prevents a gummy crumb.
Pro Tips For Making American Bread
- Use a thermometer for water: I learned this the hard way—yeast hates surprises. Your warm water should hit 105–110°F (40–43°C). Too hot and you kill it; too cool and it takes forever to activate. A cheap instant-read thermometer solves this instantly.
- Knead by hand for 10 minutes: Yes, even if you’re impatient like me. The butter in this dough needs proper development to create those signature flaky layers. Skip the food processor—your forearms will thank you later, and the texture will be noticeably better.
- Don’t rush the first rise: I used to eyeball it and ended up with dense, gummy loaves. Let that dough double in size—at least 1.5 to 2 hours—before shaping. Cold weather? Add 30 minutes. The yeast needs time to do its job right.
- Cut butter into flour first: This isn’t the prettiest method, but it’s the tastiest. Mix the cold unsalted butter into the dry bread flour before adding water—it creates tiny pockets that trap steam during baking, giving you that classic soft yet crisp crust. (Your future self will notice the difference.)
Perfect pairings for this american bread
Classic Butter Spreads
Nothing beats warm bread with a pat of cultured butter—I swear by Plugrá European-style butter for its rich, high-fat content. For a sweet touch, mix softened butter with 1 tsp honey and a pinch of sea salt (like Maldon).
For savory lovers, whip butter with garlic powder and fresh parsley—this combo elevates grilled cheese sandwiches to restaurant level. 🧈
Sweet Toppings
Drizzle fresh bread with local honey (try Wildflower or Clover) for a floral note, or spread peanut butter (like Skippy Creamy) for a nostalgic touch. For a gourmet twist, top with whipped mascarpone mixed with vanilla extract and a sprinkle of toasted pecans.
The contrast of creamy, crunchy, and sweet is pure magic.
Savory Pairings
Slice your bread into thick toasts and pair with avocado mash (blend 1 ripe avocado with lime juice, salt, and cilantro). For a Mediterranean vibe, layer with hummus, sliced cucumber, and cherry tomatoes.
I also love olive tapenade (blend Kalamata olives, capers, and garlic)—it adds a briny punch that cuts through the bread's richness.
Cheese Boards
Create a charcuterie-style board with your bread as the base. Pair with aged cheddar, brie, and smoked gouda alongside prosciutto and cornichons. For a lactose-free option, include nutritional yeast (it has a cheesy flavor!) and marinated artichokes.
The bread soaks up all the flavors beautifully, making every bite a symphony. 🧀
Breakfast Combinations
Toast slices and top with scrambled eggs cooked in butter, then finish with crispy bacon and chives. For a sweet breakfast, spread with Nutella and add banana slices and crushed walnuts.
My go-to? Cream cheese mixed with everything bagel seasoning—it’s like a bagel in every bite without the effort. ☕
Dinner Sidekicks
Use your bread to mop up beef stew or tomato basil soup—it’s the ultimate comfort food combo. For a lighter option, pair with roasted vegetable medley (zucchini, bell peppers, and red onion) tossed in olive oil and herbs.
The bread’s crust soaks up all the juices, making every spoonful better. 🍲
Nutrition facts
Frequently asked questions
Why does my homemade bread turn out dense instead of light and airy?
Most likely, your dough didn't ferment long enough or was over-kneaded. This recipe relies on a two-stage proofing process—skipping either stage or rushing the 1.5-2 hour rise at 75-80°F prevents proper gluten development. Also, check your yeast: expired yeast won't activate properly, leading to dense bread. Always test your yeast first by mixing with warm water and sugar for 5-10 minutes—it should become bubbly before using.
Can I make this bread without a stand mixer?
This dough only requires 8-10 minutes of hand-kneading on a lightly floured surface. Use the "windowpane test" to check readiness: stretch a small piece of dough—if it's thin enough to see light through without tearing, it's properly kneaded. For extra strength, let the dough rest for 10 minutes between kneading sessions to relax the gluten.
How do I store leftover bread to keep it fresh?
Cool the bread completely, then wrap it in a clean kitchen towel followed by plastic wrap. Store at room temperature in a paper bag for up to 3 days. For longer storage, freeze sliced bread in a sealed bag for up to 3 months. Thaw overnight in the fridge or reheat slices at 350°F for 5 minutes for that fresh-baked taste.
What's the difference between bread flour and all-purpose flour for this recipe?
Bread flour has 12-14% protein vs. all-purpose's 10-11%, which means more gluten development for that signature open crumb. If you must substitute, use all-purpose plus 1 tbsp vital wheat gluten per cup of flour. The dough will be slightly tougher, but still edible. For best results, stick with bread flour—it's the secret to that bakery-style texture.
Can I add herbs or seeds to this dough?
Yes! Try 1 tbsp sesame seeds, poppy seeds, or fresh rosemary (finely chopped) for flavor. For seeds, mix them into the dough during the final kneading. For herbs, fold them in after shaping but before the second rise. Just reduce the water by 1 tsp if adding seeds to account for their moisture content.