Side Dishes
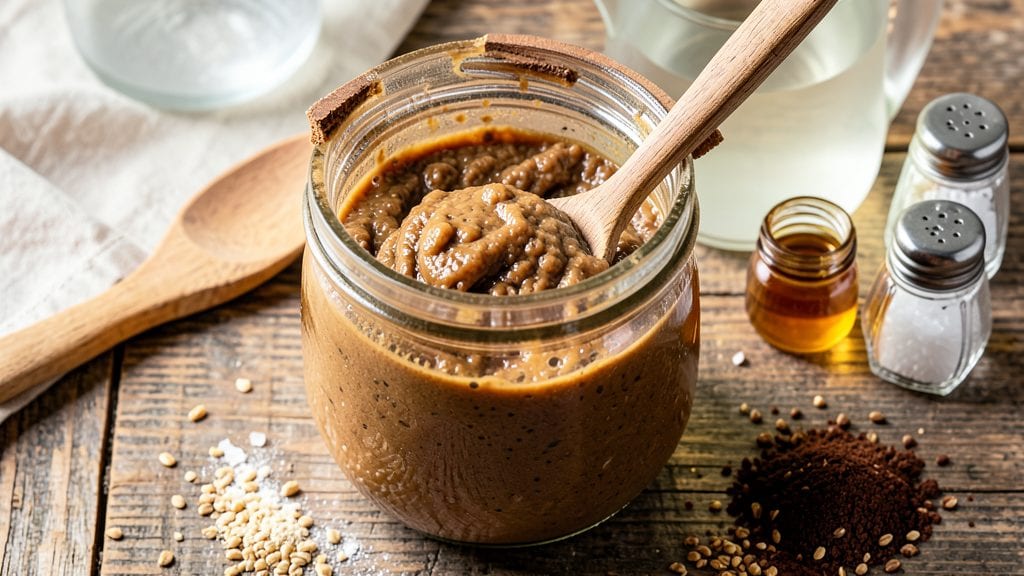
Creating an Amish sourdough bread starter from scratch unlocks the secret behind that iconic rustic flavor—no yeast required. This 7-day process mirrors traditional Amish techniques, where patience and simple ingredients build a living culture that transforms ordinary flour into artisanal bread.
The key lies in understanding fermentation, a skill passed down through generations that delivers that signature tangy depth.
What sets this method apart is its simplicity: just flour, water, and time. Unlike commercial yeast, a sourdough starter develops naturally through wild yeast and lactic acid bacteria, creating complex flavors that store-bought bread can't match.
The 7-day schedule ensures you'll have an active starter ready for baking, with troubleshooting tips to keep it thriving for months. This is how Amish communities have baked for generations—no shortcuts, just pure, fermented flavor.
By the end of this process, you'll have a robust starter that produces bread with a crispy crust, open crumb structure, and that unmistakable sourdough aroma. The dough requires minimal handling—just mix, rest, and shape—before baking in a Dutch oven for that perfect oven spring.
Every batch improves as your starter matures, rewarding your patience with bread that tastes like a slice of history.
Perfect for beginners or experienced bakers, this method adapts to any kitchen. Whether you're making a loaf for Sunday dinner or sharing starters with neighbors, you're connecting with a tradition that values simplicity and craftsmanship. Let's get started on your first batch—your kitchen will thank you for the aroma alone.
Ingredients for amish sourdough bread starter
Four simple ingredients kickstart this living culture, transforming flour into artisanal bread with Amish tradition.
| Ingredient | Amount | Notes |
|---|---|---|
| Unbleached All-Purpose Flour 🌾 | 2 cups | King Arthur or Bob's Red Mill preferred |
| Filtered Water 💧 | 1 ½ cups | Room temperature, no chlorine |
| Whole Wheat Flour 🌾 | ½ cup | For added nutrition and depth |
| Organic Rye Flour 🌾 | ¼ cup | Boosts fermentation complexity |
| Raw Honey 🍯 | 1 tbsp | Local variety preferred |
| Sea Salt 🧂 | ½ tsp | Diamond Crystal preferred |
| Non-Chlorinated Water 💧 | 1 cup | For refreshing starter |
| Unbleached Bread Flour 🌾 | 1 cup | For final feeding |
| Raw Apple Cider Vinegar 🍏 | 1 tsp | Optional for faster fermentation |
| Whole Grain Spelt Flour 🌾 | ¼ cup | Optional for heritage flavor |
The flour selection matters most here. King Arthur Unbleached or Bob's Red Mill Organic are my go-tos—they're consistent and reliable. For the whole wheat and rye, local organic mills often have fresher stock, but the grocery store brands work fine. The honey? Raw, local honey adds subtle floral notes that store-bought can't match, but any raw honey will do. If you're feeling adventurous, grab spelt flour from a bulk bin—it adds a nutty depth that's perfect for this traditional method. Store your flours in airtight containers away from heat to preserve their freshness, which directly impacts your starter's development.
No honey? Maple syrup works 1:1, though it has a different flavor profile. Short on rye? Substitute with extra whole wheat—just know it'll ferment slightly faster. The apple cider vinegar is optional but cuts fermentation time by 24 hours if you're impatient. For water, filtered is best, but if you're in a pinch, boiled-and-cooled tap water works. The key is consistency—always use the same temperature water (around 75°F) for each feeding. If your kitchen runs cold (below 70°F), your starter might be sluggish—consider a proofing box or warm oven to keep it cozy during the initial days.
Your starter thrives in a glass jar with a loose lid—this allows gas to escape while keeping contaminants out. Store it on your counter during the 7-day process, then transfer to the fridge once active. It'll keep for months this way, though I recommend feeding it weekly to maintain strength. For baking, use 1 cup of active starter per loaf—it should float in water when ready. If it smells like vinegar or alcohol, it's overfed; if it's flat and smells dull, it's hungry. The beauty of this method is its adaptability—whether you're in a modern kitchen or a traditional Amish home, the principles remain the same.
Why You'll Love This Recipe
- No-Fuss Starter: I’ve made this a hundred times—just flour, water, and a splash of honey. No fancy scales, no stressing over temperatures. Honestly, if you can stir, you can do this.
- Deep, Tangy Soul: That rye flour and whole wheat? They pack a punch—earthy, slightly sweet, with a slow-fermented depth that’s chef’s kiss. The honey rounds out the sharpness like a warm hug.
- Weeknight Wonder: Use it for crusty loaves, sandwich bread, or even pancakes. I keep a jar in the fridge and pull it out whenever I need something fresh without the grocery store markup.
- Penny-Smart Magic: A few cups of flour and a little honey stretch into meals for days. My starter lasts weeks, so I’m basically printing money every time I bake. (Yes, even on a Tuesday night.)
Step-by-step instructions for Amish sourdough bread starter recipe
Here's how to build a robust, flavorful starter using traditional Amish techniques.
Create the Initial Starter Mixture
In a clean glass jar with a lid, combine the 2 cups unbleached all-purpose flour with the 1.5 cups filtered water. Stir vigorously with a wooden spoon until you achieve a thick, shaggy batter that resembles pancake batter in consistency. The mixture should clump together when stirred but still be pourable.
Next, add the 1 tbsp raw honey and 0.5 tsp sea salt to the jar. Mix again until fully incorporated. The honey helps feed the developing microbes while the salt regulates fermentation. Cover the jar loosely with a cloth or paper towel (do not seal tightly) and let it rest at room temperature, ideally between 70-75°F. This initial mixture will begin developing wild yeast and bacteria within hours.
Feed and Observe Daily for 3 Days
After 24 hours, you'll notice bubbles forming and a slightly sour aroma. This indicates fermentation is beginning. Discard half of the starter (about 1 cup) and feed it with 0.5 cup whole wheat flour, 0.25 cup organic rye flour, and 0.5 cup non-chlorinated water. Mix thoroughly until smooth. The rye flour introduces beneficial bacteria that accelerate fermentation, while the whole wheat adds nutritional depth.
Repeat this feeding process daily at the same time each day. After each feeding, observe for increased bubbling and a tangy, slightly sweet aroma. By day 3, your starter should double in size within 4-6 hours after feeding and exhibit a domed surface with small bubbles throughout. If it smells strongly alcoholic or has a grayish hue, reduce feeding quantities slightly.
Strengthen with Final Feedings for Days 4-7
On day 4, discard half again and feed with 1 cup unbleached bread flour and 0.5 cup non-chlorinated water. The bread flour's higher protein content strengthens the gluten structure. Optionally, add 1 tsp raw apple cider vinegar to this feeding if you want to accelerate fermentation—this introduces acetic acid that mimics the environment of traditional sourdough starters.
For days 5-7, continue daily feedings using the same ratio (1:1:1 of starter to flour to water). On day 7, your starter should pass the float test: drop a small spoonful into a glass of water—if it floats, it's ready. For added complexity, incorporate 0.25 cup whole grain spelt flour in your final feeding. This heritage grain contributes unique flavors and enhances the starter's resilience.
Maintain Your Active Starter
Once your starter passes the float test, it's ready for baking. For maintenance, store it in the refrigerator between uses. Before baking, remove it from the fridge and feed it twice daily for 24 hours to revive activity. Use the 1:1:1 ratio (starter:flour:water) for feedings. A properly maintained starter will last indefinitely, developing richer flavors with each generation.
For baking, use your active starter when it's at its peak—typically 4-6 hours after the final feeding when it's bubbly and has a pleasant, slightly tangy aroma. The combination of flours in this starter creates a complex flavor profile with notes of caramel, spice, and subtle acidity that's characteristic of Amish sourdough traditions.
Pro Tips For Making Amish Sourdough Bread Starter
- Mix at Room Temp: DESCRIPTION: Dump your filtered water and flours into the jar when they’re both between 70-75°F—no cold fridge flour or ice-cold water. I learned this the hard way when my starter took three days to even bubble because the whole wheat flour was straight from the freezer. Warm hands work better than a microwave.
- Rye First, Then Wheat: DESCRIPTION: Add the organic rye flour first to your starter mix—it kickstarts fermentation faster than all-purpose. Then toss in the whole wheat, and finish with the unbleached flour. My grandmother swore by this order, and she was right: the rye’s wild yeast gets things moving before the honey can slow things down.
- Honey in Small Batches: DESCRIPTION: Dribble the raw honey slowly over the starter, no more than 1 teaspoon at a time, and stir it in thoroughly. I once dumped it all at once, and the starter turned gummy and sluggish. The honey needs to dissolve evenly—think of it like sweetening coffee, not syrup.
- Burp It Twice Daily: DESCRIPTION: Loosen the lid and give your starter a quick stir every 12 hours—even if it doesn’t look active yet. I skipped this when I was traveling and came home to a sad, hooch-covered mess. A 10-second stir keeps oxygen flowing and prevents that sour, boozy smell from taking over. (Yes, even if you’re impatient like me.)
Dietary considerations for amish sourdough bread starter
Gluten-Free Adaptations
While traditional Amish sourdough relies on wheat flour for structure, you can adapt this starter using a 1:1 gluten-free flour blend like Bob's Red Mill GF 1-to-1.
Replace all-purpose flour with this blend, but add 1 tbsp psyllium husk powder per cup of GF flour to mimic gluten's binding properties. The starter will still develop wild yeast, though fermentation may take 1-2 extra days due to lower gluten content.
Test your GF starter's readiness by checking for bubbles and a float test—it should still rise properly. 🌱
Low-FODMAP Options
For those avoiding fermentable carbs, swap whole wheat and rye flours with certified low-FODMAP oat flour (like Bob's Red Mill GF oats ground into flour). Use 1 cup oat flour + 1 cup unbleached all-purpose flour for each feeding.
Reduce honey to ½ tbsp and omit apple cider vinegar, as both are high-FODMAP. Fermentation will be slower, so extend the process to 10 days for full development. Always test small batches first to monitor tolerance.
Nut-Free and Seed-Free
This starter is naturally free of nuts and seeds, but if you're using spelt flour (which may contain trace gluten cross-contamination), opt for certified nut-free and seed-free brands like King Arthur Organic Spelt Flour. For added safety, process all flours in a clean environment—never share utensils with nut products.
The fermentation process itself is nut-free, so no additional modifications are needed beyond ingredient sourcing. Always check labels for "may contain" warnings on pre-packaged flours.
Keto-Friendly Starter
Creating a keto-compatible starter requires a different approach since traditional flours are off-limits. Use 1 cup almond flour (blanched, fine-ground) and ½ cup coconut flour as your base flours, mixed with 1.5 cups filtered water.
Add 1 tbsp erythritol or monk fruit sweetener instead of honey, and reduce salt to ¼ tsp. Fermentation will be slower (expect 10-14 days
For baking, use this starter in low-carb sourdough recipes with almond flour as the primary dough ingredient. This starter is inherently dairy-free, but if you're using honey from a non-vegan source, substitute with agave nectar or maple syrup (both 1:1). For those avoiding all animal products, ensure your honey is certified vegan (though true honey isn't vegan, some brands offer "vegan honey" alternatives). The fermentation process remains unchanged—dairy isn't involved, so no modifications are needed beyond ingredient swaps. Always check labels on pre-packaged flours for dairy-derived additives like malt vinegar (sometimes used in processing).Dairy-Free Considerations
Nutrition facts
Frequently asked questions
Why does the Amish sourdough starter recipe use multiple flours?
Each flour adds unique benefits: whole wheat and rye introduce beneficial bacteria that accelerate fermentation, while unbleached all-purpose provides structure. The combination creates complex flavors with subtle caramel and spice notes. Traditional Amish bakers used whatever flours were available, but this blend mimics that heritage while ensuring reliability.
What if my starter doesn't bubble after 3 days?
Check your kitchen temperature—it should be between 70-75°F. If too cold, move the jar to a warmer spot (like near your oven with it off). If it smells strongly alcoholic or has gray streaks, reduce feeding amounts by half. Patience is key—some starters take up to 10 days to fully activate, especially in cooler climates.
Can I use this starter for other baked goods besides bread?
Try it in pancakes, waffles, or even crackers. For bread, use 1 cup active starter per loaf. For pancakes, replace ½ cup liquid with starter and reduce other liquids by ¼ cup. The tangy depth enhances any recipe where you'd normally use yeast or buttermilk.
How do I know when my starter is ready for baking?
Perform the float test: drop a spoonful in water—if it floats, it's ready! It should also double in size within 4-6 hours after feeding and have a pleasant, slightly tangy aroma (like yogurt). Avoid using it if it smells strongly like vinegar or alcohol.
What's the best way to store my starter long-term?
Keep it in the fridge in an airtight container. Feed it weekly by discarding half and adding 1:1:1 ratio of starter:flour:water. Before baking, revive it by feeding twice daily for 24 hours at room temperature. A well-maintained starter can last years with consistent care!