
Appetizers
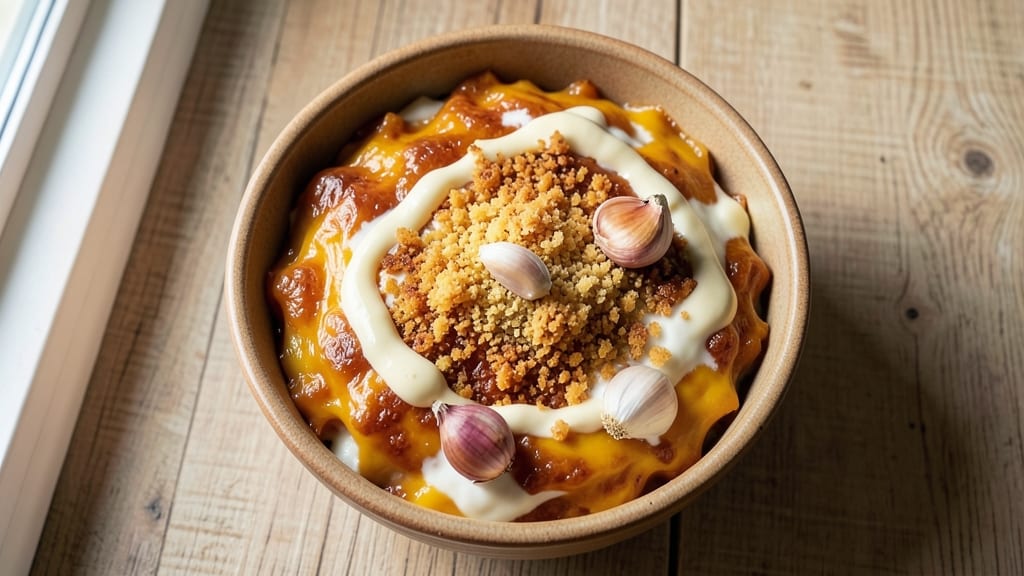
This baked dip recipe transforms ordinary appetizers into cheesy pull-apart magic that disappears faster than you can say "second round." The secret lies in layering ingredients perfectly—creamy fillings, melted cheese, and crispy toppings—all baked until bubbly and golden.
I developed this version after years of testing, ensuring it delivers restaurant-quality results in just 20 minutes of hands-on time (plus baking).
The beauty of this recipe is its versatility—whether you crave classic spinach-artichoke, spicy buffalo chicken, or rich queso flavors, the technique remains the same. The key is baking in a cast-iron skillet or oven-safe dish, which creates that signature crispy crust while keeping the center creamy and gooey.
No fancy equipment needed, just simple ingredients and precise timing for foolproof results.
Imagine serving this at your next gathering: guests reach in, pull out warm, cheesy bites, and immediately ask for the recipe. The aroma alone will have everyone gathering around, while the texture—crispy on top, melty inside—makes it impossible to resist.
Perfect for game day, parties, or even a cozy weeknight snack with fresh veggies or tortilla chips.
What makes this recipe truly special is how easily it adapts to dietary preferences. Swap out ingredients for lighter options, add protein for a heartier bite, or keep it classic for maximum crowd-pleasing appeal.
The method scales perfectly for small gatherings or large crowds, ensuring you never run out of dip. Let's get started on creating your next crowd favorite!
Ingredients for baked dip
Layered cheeses, creamy fillings, and crispy toppings create restaurant-quality baked dip magic in minutes.
| Ingredient | Amount | Notes |
|---|---|---|
| Sharp Cheddar Cheese 🧀 | 2 cups | Shredded, medium sharpness preferred |
| Monterey Jack Cheese 🧀 | 1 cup | Shredded, mild flavor balance |
| Heavy Cream 🥛 | ½ cup | Full-fat for optimal creaminess |
| Sour Cream 🥛 | ½ cup | Full-fat preferred for texture |
| Mayonnaise 🥫 | ¼ cup | Duck or avocado oil preferred |
| Garlic Cloves 🧄 | 3 cloves | Fresh, minced for aromatic depth |
| Fresh Spinach 🌿 | 3 oz | Chopped, for classic flavor profile |
| Canned Artichoke Hearts 🍃 | ½ cup | Chopped, high-quality brand |
| Panko Breadcrumbs 🍞 | ½ cup | Japanese-style for superior crisp |
| Parmesan Cheese 🧀 | ¼ cup | Freshly grated, nutty finish |
| Diamond Crystal Kosher Salt 🧂 | ½ tsp | Fine grain for even distribution |
| Freshly Ground Black Pepper 🌶️ | ¼ tsp | Cracked peppercorn preferred |
| Extra-Virgin Olive Oil 🫒 | 1 tbsp | High-quality, fruity variety |
| Hot Sauce 🌶️ | 1 tbsp | Optional, for spicy variation |
The cheese selection is critical for achieving that signature melt and pull-apart texture. Sharp cheddar provides the tangy backbone, while Monterey Jack adds smoothness and prevents excessive browning. For optimal results, purchase block cheese from specialty cheesemongers—pre-shredded contains anti-caking agents that prevent proper melting. The Parmesan should be freshly grated, as pre-grated varieties often include fillers that compromise texture. When shopping for panko, Japanese brands like Kikkoman are superior due to their light, airy structure that creates an exceptional crispy crust. Store all cheeses in airtight containers in the refrigerator, using within 3 months for peak freshness.
Substitutions are possible but should be made thoughtfully to preserve the dip's signature characteristics. For a lighter option, Greek yogurt can replace half the sour cream, though texture will be slightly less rich. Vegetarian? Swap the artichokes for roasted red peppers or sautéed mushrooms. Need to accommodate gluten concerns? Almond flour or crushed cornflakes work as breadcrumb alternatives, though texture will differ. The hot sauce can be omitted entirely or replaced with smoked paprika for a milder kick. For those without fresh garlic, garlic powder at half the amount will suffice, though fresh provides superior flavor. When substituting cheeses, maintain a 2:1 ratio of sharp to mild varieties for optimal balance.
Proper storage extends this dip's shelf life while maintaining quality. Once baked, transfer to an airtight container and refrigerate for up to 5 days. For longer storage, freeze individual portions in parchment-lined containers for up to 3 months. To reheat, bake at 350°F (175°C) for 10-15 minutes until bubbly. The texture will be slightly less crispy after refrigeration, but the cheesy center remains delightfully gooey. For serving, use a cast-iron skillet or oven-safe dish—these materials conduct heat evenly and create the signature crispy crust. When prepping ahead, assemble the dip but omit the breadcrumb topping until ready to bake, preventing sogginess.
Why You'll Love This Recipe
- Five-Ingredient Magic: I swear by this combo—sharp cheddar and Monterey Jack melt into this perfect tangy-smooth balance, while the heavy cream keeps it luscious. No weird additives, just real dairy doing its thing.
- No-Bake Bake: Honestly, the hardest part is preheating the oven. Mix the cheeses with sour cream and mayo, dump it in a dish, and let the oven do the work. My kids think it’s "easy food," but adults will fight over the last bite.
- Party MVP: This dip is my go-to for game days, potlucks, or when I’m too tired to cook. Serve it with chips, veggies, or even crackers—no one judges, and no one leaves hungry.
- Leftovers? More Like Leftovers: Between us, this recipe makes way more than I need for one sitting. The leftovers reheat beautifully (just a quick zap in the microwave) and taste just as good the next day—ideal for when I’m lazy or hosting.
Step-by-step instructions for baked dip recipe
This method delivers a perfectly pull-apart, golden-brown dip with layers of cheesy richness and crispy texture.
Preheat and Prepare the Baking Dish
Preheat your oven to 375°F to ensure even baking. Lightly grease a 9-inch oven-safe skillet or cast-iron pan with 1 tablespoon extra-virgin olive oil, then sprinkle a thin layer of panko breadcrumbs over the bottom. This prevents sticking and adds an extra crispy foundation.
Toss the 3 ounces chopped fresh spinach with 1 tablespoon hot sauce in a small bowl to soften the leaves and infuse flavor. Set aside—this will blend seamlessly into the dip when baked. The spinach adds freshness that balances the richness of the cheeses.
Combine Wet and Dry Ingredients
In a large mixing bowl, combine the 2 cups shredded sharp cheddar cheese, 1 cup shredded Monterey Jack cheese, 0.5 cup heavy cream, and 0.5 cup sour cream. Use a rubber spatula to fold until fully incorporated, ensuring no dry cheese remains. The cream and sour cream create a velvety texture that prevents the dip from becoming grainy.
Add the 3 cloves minced garlic, 0.25 cup mayonnaise, 0.25 cup freshly grated Parmesan cheese, 0.5 teaspoon Diamond Crystal kosher salt, and 0.25 teaspoon freshly ground black pepper. Mix until smooth—this ensures even distribution of flavor and prevents pockets of salt or pepper. The mayonnaise adds stability and prevents the dip from separating during baking.
Layer and Bake for Maximum Pull-Apart
Spread half of the cheese mixture evenly into the prepared skillet, then sprinkle ¼ cup panko breadcrumbs over the top. Repeat with the remaining cheese mixture and another ¼ cup panko breadcrumbs. The breadcrumbs create a crispy, pull-apart texture that contrasts beautifully with the creamy cheese.
Bake for 18-20 minutes until the top is golden brown and the edges are bubbling. The dip should be soft in the center but firm enough to hold its shape when pulled apart. If the top browns too quickly, loosely cover with foil for the last 5 minutes to prevent over-browning while ensuring the center cooks through.
Fold in Spinach and Serve Warm
Remove the dip from the oven and let it rest for 2-3 minutes. Using a spatula, gently fold in the spinach mixture, stirring until evenly distributed. The residual heat will wilt the spinach completely, blending its freshness into the creamy cheese base.
Serve immediately while warm, accompanied by toasted bread, tortilla chips, or fresh vegetables. The contrast of crispy breadcrumbs, creamy cheese, and tender spinach makes this dip irresistibly versatile for any gathering. For extra crispiness, broil for 1-2 minutes before serving if desired.
Pro Tips For Making Baked Dip
- Preheat Like a Boss: Crank your oven to 425°F (220°C) and let it scream hot for 15 minutes before baking. I used to skip this, and my dip would either sit there like a sad puddle or burn before the cheese melted—neither of which is fun.
- Shred Cheese Right: Use a box grater (not a food processor) for sharp cheddar and Monterey Jack—this keeps the texture chunky and melty, not gloppy. I learned this the hard way when my first batch turned into a cheese paste after baking.
- Don’t Overmix the Cream: Stir the heavy cream, sour cream, and mayo just until combined—lumps are fine, but don’t turn it into a smoothie. Overworking it makes the dip greasy, and we’re going for creamy, not oily.
- Watch the Bubble: Pull the dip out when the top is golden and bubbling fiercely—not when it’s just starting to turn. I was skeptical until I tried it: waiting for that aggressive bubble means the cheese is fully melted and the dip won’t be gummy inside.
Perfect pairings for this baked dip
Crispy Chip Classics
Classic tortilla chips are the ultimate partner for this baked dip—each bite of warm, cheesy goodness pairs perfectly with their satisfying crunch. I recommend Fritos Scoops or Tostitos Scoops for their sturdy shape that holds up to the creamy dip without falling apart.
For a healthier twist, try baked tortilla chips like Late July—they’re crispier and lower in fat, yet still deliver that satisfying crunch. 🌶️
Fresh Veggie Sticks
For a lighter option, serve with crisp raw vegetables that add freshness and color to the spread. Bell pepper strips, carrot sticks, and celery are crowd-pleasers, while jicama or endive leaves add a refreshing crunch.
I like to arrange them on a platter with the dip at the center—guests will love the contrast of cool veggies and warm, melty cheese. 🥕
Crunchy Bread Bites
Toasted sourdough bread or baguette slices elevate this dip to restaurant-quality status. Cut into 1-inch cubes, brush with garlic-infused olive oil, and toast in the oven until golden.
The crusty exterior and soft interior create the perfect textural contrast. For extra flair, sprinkle with flaky sea salt and smoked paprika before serving. 🍞
Protein-Packed Add-Ons
Turn this into a heartier appetizer by adding protein elements. Grilled chicken breast strips or shrimp add a savory bite, while crumbled bacon or chorizo bring smoky depth.
I often serve this dip with mini pulled pork sliders on the side—guests can build their own bites with the cheesy dip as a base. 🍗
Sweet Contrast Pairings
Balance the richness with sweet elements that complement the savory flavors. Apple slices or pear wedges add a crisp, fruity contrast, while honey-drizzled pretzels bring a salty-sweet crunch. For a decadent touch, serve with dark chocolate-dipped strawberries—the cool fruit cuts through the warmth of the dip beautifully. 🍎
Beverage Pairings
A crisp white wine like Sauvignon Blanc or Pinot Grigio cleanses the palate between bites, while a sparkling rosé adds festive energy. For beer lovers, a hoppy IPA or wheat beer balances the richness.
I also love serving this dip with iced tea or sparkling water with lemon—the acidity refreshes after each cheesy bite. 🍷
Nutrition facts
Frequently asked questions
Can I make this baked dip ahead of time?
Assemble the dip in your baking dish, cover tightly with plastic wrap, and refrigerate for up to 24 hours before baking. The flavors meld beautifully overnight. For best results, bake straight from the fridge at 375°F for 25-30 minutes, adding 5 extra minutes to the original time. The texture will be slightly more compact but still delicious!
What if my dip doesn't get crispy on top?
This usually happens when the oven isn't hot enough or the breadcrumbs get soggy. First, ensure your oven reaches 375°F accurately (use an oven thermometer). For extra crispiness, broil for 1-2 minutes at the end, watching closely to prevent burning. Also, spread the cheese mixture evenly and press breadcrumbs firmly on top before baking.
Can I use this technique for other flavors?
Yes! This method works perfectly for creating other baked dips. Swap the spinach-artichoke filling for buffalo chicken (mix shredded chicken with hot sauce and cream cheese), queso (add diced tomatoes and jalapeños), or white bean (blend cannellini beans with garlic and lemon). Keep the same layering technique for that signature pull-apart texture!
How do I store leftovers?
Transfer any remaining dip to an airtight container and refrigerate for up to 5 days. To reheat, bake at 350°F for 10-15 minutes until bubbly. The texture will be slightly softer after refrigeration, but the flavor remains rich. For freezing, wrap individual portions tightly in plastic wrap and freeze for up to 3 months. Thaw overnight in the fridge before reheating.
Can I make this dip gluten-free?
Certainly! Replace the panko breadcrumbs with crushed cornflakes or almond flour for a gluten-free topping. For the base, ensure all cheeses are certified gluten-free (some brands process cheese in facilities with gluten). The texture will be slightly different but still delicious—just expect a less crispy exterior. Serve with gluten-free crackers or veggie sticks.