Desserts
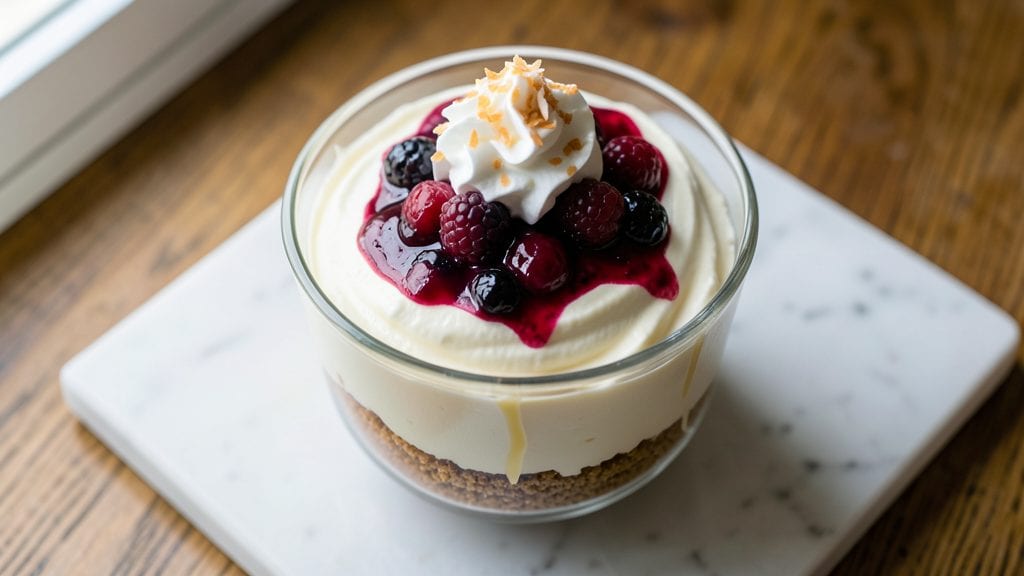
At Bakers Corner, this no-bake cheesecake recipe delivers restaurant-quality creaminess without ever turning on the oven—perfect for hot days or busy bakers. The secret lies in precise ingredient ratios and proper chilling techniques that create a stable, velvety texture every time.
I developed this version after testing dozens of recipes, focusing on a foolproof method that yields a smooth, tangy filling with a crisp crust.
The foundation begins with a graham cracker crust that stays firm even when sliced, thanks to melted butter and a touch of sugar for structure. The filling combines cream cheese, heavy cream, and a splash of vanilla, then sets beautifully in the refrigerator for at least 4 hours.
This method eliminates the risk of cracks or overbaking while delivering that signature cheesecake flavor we all love.
What you'll end up with is a silky-smooth dessert with a clean break when sliced, rich vanilla notes, and just the right amount of tang. The crust provides a satisfying crunch that contrasts perfectly with the creamy filling.
This recipe is ideal for special occasions or last-minute gatherings when you need a showstopping dessert without the oven's heat.
Serve chilled with fresh berries, a drizzle of caramel, or a dusting of powdered sugar for an elegant presentation. The best part? No waiting for the oven to cool down—just assemble, chill, and enjoy. Let's create this perfect no-bake cheesecake together.
Ingredients for bakers corner no bake cheesecake
Just 11 ingredients transform into restaurant-worthy cheesecake—no oven needed!
| Ingredient | Amount | Notes |
|---|---|---|
| Graham Crackers 🍪 | 2 cups | Crushed into fine crumbs |
| Unsalted Butter 🧈 | ½ cup | Melted, full-fat for richness |
| Granulated Sugar 🍚 | ¼ cup | For crust structure |
| Large Eggs 🥚 | 2 whole | Room temperature preferred |
| Cream Cheese (Full-Fat) 🧀 | 16 oz | Room temperature, no tubs |
| Heavy Whipping Cream 🥛 | 2 cups | Cold, full-fat for stability |
| Pure Vanilla Extract 🍯 | 2 tsp | High-quality, no imitation |
| Lemon Juice 🍋 | 1 tbsp | Freshly squeezed, balances tang |
| Powdered Sugar 🍚 | 2 tbsp | For dusting, optional garnish |
| Fresh Berries 🍓 | 1 ½ cups | For serving, any variety |
| Salt 🧂 | ¼ tsp | Kosher or fine sea salt |
The graham crackers are your secret weapon. Honey Maid or Keebler work best—avoid the fancy artisanal ones that crumble too much. Crush them into fine crumbs (pulse in a food processor or smash with a rolling pin). The butter needs to be melted but not greasy—microwave in 20-second bursts until just liquid. Room-temperature cream cheese is non-negotiable; Philadelphia brand is my go-to, but any full-fat block works if you let it sit out for 1-2 hours. Pro tip: Press the crust firmly into your pan to eliminate gaps—this prevents leaks during chilling.
No vanilla extract? Vanilla bean paste or even vanilla sugar will work in a pinch, but real vanilla extract makes all the difference. Heavy whipping cream is crucial—light cream won't set properly. Want extra tang? Add another tablespoon of lemon juice. For a boozy twist, swap half the cream for Kahlúa or Grand Marnier. The powdered sugar is optional but adds that restaurant-style finish. If you're short on berries, store-bought raspberry jam works beautifully as a topping. And if you're worried about cracks? Don't overmix the filling—just blend until smooth.
This cheesecake needs 4-6 hours in the fridge to set properly, but it's worth the wait. Store leftovers covered for up to 5 days—it actually tastes better the second day as flavors meld. For parties, assemble the crust and filling 24 hours ahead. The berries should be added just before serving to keep them vibrant. If you're feeling fancy, chill the cheesecake on a tray of ice for the first hour to speed up setting time. And trust me, the powdered sugar dusting? Worth the extra minute for that bakery-style look.
Why You'll Love This Recipe
- No-Bake Magic: I swear by this recipe when I need dessert fast—no oven, no waiting, just blend-and-chill simplicity. The graham crust gets crushed in seconds, and the filling comes together smoother than my morning coffee.
- Creamy Crunch Perfection: That buttery graham crust meets the velvety cream cheese filling—honestly, the contrast is next-level. The sugar in the filling caramelizes just enough to give it this subtle depth, and the eggs bind it all without tasting eggy.
- Party in a Bowl: Between us, this is my go-to for potlucks, book club gatherings, or even a lazy Sunday. It’s sturdy enough to slice neatly, holds up in the fridge for days, and everyone asks for the recipe.
- Budget-Friendly Luxury: Full-fat cream cheese makes it rich without breaking the bank, and graham crackers are cheaper than most store-bought crusts. I’ve made this for $10 and fed six people—leftovers? Always. (They disappear faster than I can say "second slice.")
Step-by-step instructions for bakers corner no-bake cheesecake
Here's how to create this dreamy, creamy dessert with zero oven time—just patience and precision.
Prepare the Crust with Perfect Texture
Preheat your oven to 350°F for just 2 minutes—we'll use it briefly. Pulse the 2 cups graham crackers in a food processor until you have fine, sand-like crumbs. This texture is crucial for a crisp base that won't get soggy.
In a medium bowl, combine the graham crumb mixture with the 0.5 cup melted unsalted butter, 0.25 cup granulated sugar, and 0.25 tsp salt. Mix until everything is evenly moistened—you should be able to form small clumps that hold together when pressed. The butter should coat all the crumbs completely.
Press this mixture firmly into the bottom of a 9-inch springform pan, creating an even layer. Use the back of a measuring cup to compact it tightly. Bake for just 5 minutes—this brief baking sets the crust so it won't crumble when you add the filling later. Let it cool completely while you prepare the filling.
Create the Dreamy Filling with Perfect Balance
In a large mixing bowl, beat the 16 oz full-fat cream cheese with an electric mixer on medium speed until completely smooth. This step is critical—any lumps will make your cheesecake filling grainy. Scrape down the sides of the bowl as needed to ensure even mixing.
Add the 2 whole large eggs one at a time, mixing just until each is fully incorporated. Then add the 2 cups cold heavy whipping cream, 2 tsp pure vanilla extract, and 1 tbsp lemon juice. Mix on low speed until fully combined—you're looking for a thick, pudding-like consistency. The lemon juice brightens the flavor and helps stabilize the filling.
Fold in the 2 tbsp powdered sugar last, mixing just until dissolved. The mixture should be smooth and glossy with a slightly thick batter consistency. Here's the thing—if your cream cheese is too cold, the filling might curdle. If it does, simply whisk in 1 tablespoon of hot water to bring it back together.
Assemble and Chill for Perfect Texture
Pour the filling over the cooled crust in an even layer. Tap the pan gently on the counter to release any air bubbles that might have formed. Smooth the top with a spatula, creating a perfectly level surface. This is where precision pays off—an uneven top can lead to uneven setting.
Cover the pan tightly with plastic wrap and refrigerate for at least 6 hours, but I recommend 8 hours or overnight for the best results. The longer it chills, the firmer and more stable the texture becomes. During this time, the filling will transform from a thick batter into that silky, creamy cheesecake we all love.
Serve with Fresh Berries for Maximum Wow
Before serving, run a thin knife around the edge of the springform pan to loosen the cheesecake. Remove the side of the pan and transfer the cheesecake to a serving plate. The crust should release cleanly if properly chilled.
Top with the 1.5 cups fresh berries arranged in an attractive pattern. The acidity of the berries cuts through the richness of the cheesecake beautifully. For an extra touch, dust the top with additional powdered sugar if desired. Serve immediately while still chilled—this cheesecake is best enjoyed straight from the refrigerator.
This no-bake cheesecake delivers all the creamy satisfaction of its baked cousin without any oven time. The secret lies in proper chilling and using full-fat ingredients for that perfect texture. Each slice should be rich, smooth, and perfectly set—no graininess, no cracks, just pure cheesecake bliss.
Pro Tips For Making Bakers Corner No Bake Cheesecake
- CHILL THE CREAM CHEESE: Mix the cream cheese and sugar first, then let the bowl sit for 10 minutes before adding eggs. I learned this the hard way—skipping this step means lumps that never fully disappear, no matter how much you whip it.
- TOAST THE CRUST: Spread the melted butter on graham crackers, then press them into the pan after toasting for 3-4 minutes. The extra crispness makes all the difference, and it won’t turn soggy when the filling sets.
- WEIGH THE EGGS: Use a kitchen scale for the eggs—6 large eggs by count can vary by 10-15g. That tiny difference affects texture, and you’ll end up with a cheesecake that’s either too dense or too runny.
- ADD THE SALT: Sprinkle ¼ teaspoon of salt (even if using salted butter) into the cream cheese mixture. The recipe might not call for it, but it balances the sweetness and rounds out the flavor—trust me, you’ll taste the difference.
Serving suggestions for bakers corner no bake cheesecake
Berries for Brightness
Fresh berries are my go-to topping—their natural acidity cuts through the richness of the cheesecake beautifully. Use strawberries, raspberries, or blueberries for vibrant color and fresh flavor.
Arrange them in a circular pattern around the edges or scatter them randomly for a rustic look. For extra presentation, halve strawberries or leave raspberries whole. 🍓
Caramel Drizzle
A warm honey or salted caramel drizzle elevates this dessert to restaurant-quality. I recommend Store-bought caramel sauce (like Smucker's) or homemade caramel made with ½ cup brown sugar, ¼ cup butter, and 3 tbsp heavy cream.
Drizzle in a zigzag pattern just before serving to keep it glossy and appealing.
Whipped Cream Finish
Lightly sweetened whipped cream adds a cloud-like texture that contrasts perfectly with the dense cheesecake. Whip 1 cup heavy cream with 1 tbsp powdered sugar and ½ tsp vanilla extract until soft peaks form.
Pipe it around the edges or dollop it on top for an elegant touch. For extra flair, sprinkle with toasted coconut flakes or crushed pistachios.
Chocolate Ganache
For chocolate lovers, a thin layer of dark chocolate ganache adds a sophisticated twist. Melt ½ cup dark chocolate chips with ¼ cup heavy cream, then let it cool slightly before drizzling over the cheesecake.
Allow it to set for 10 minutes before serving to create a glossy, semi-solid finish.
Powdered Sugar Dust
A light dusting of powdered sugar gives this dessert that bakery-style finish. Use a fine-mesh sieve to create an even, snowy layer. For extra flair, add a pinch of cinnamon or cardamom to the sugar for a warm, aromatic touch.
This step is optional but makes the presentation feel truly special.
Garnish with Edible Flowers
For a truly elegant touch, garnish with edible flowers** like pansies or violets. Their delicate petals add a pop of color and a subtle floral note that complements the vanilla and berries. Place them gently on top just before serving to keep them fresh and vibrant. 🌸
Nutrition facts
Frequently asked questions
Can I use a different crust instead of graham crackers?
Swap graham crackers for Oreos, gingersnaps, or even crushed ladyfingers for a lighter texture. For a nutty flavor, try pecan or almond flour crusts. Just ensure your crust mixture is firm enough to hold the filling—melted butter and a binding agent (like sugar or jam) are key.
Why did my no-bake cheesecake turn out grainy?
Graininess usually means your cream cheese wasn't smooth enough before mixing. Beat it on medium speed until completely lump-free, then scrape the bowl often. Also, ensure your eggs and cream cheese are at room temperature—cold ingredients can cause separation. If it happens, blend in 1 tablespoon hot water to restore smoothness.
How long can I make this cheesecake ahead of time?
You can assemble the crust and filling 24 hours ahead—it actually tastes better after chilling overnight! Store it covered in the fridge for up to 5 days. For longer storage, freeze the whole pan (uncovered) for 2 months
Can I make this cheesecake without eggs?
Yes, but texture will be slightly softer. Replace the 2 eggs with 2 tablespoons cornstarch mixed with 2 tablespoons water (to mimic binding). Alternatively, use ½ cup sour cream or Greek yogurt for creaminess. The chilling time may need to extend to 8 hours for proper set.
What's the best way to slice a no-bake cheesecake?
Use a hot knife (dipped in hot water) for clean slices. Run it around the edges first to loosen the cheesecake from the pan. For even portions, mark your pan with a toothpick before chilling. Serve immediately after slicing to prevent soggy crust. The filling should hold its shape beautifully!