
Main Courses
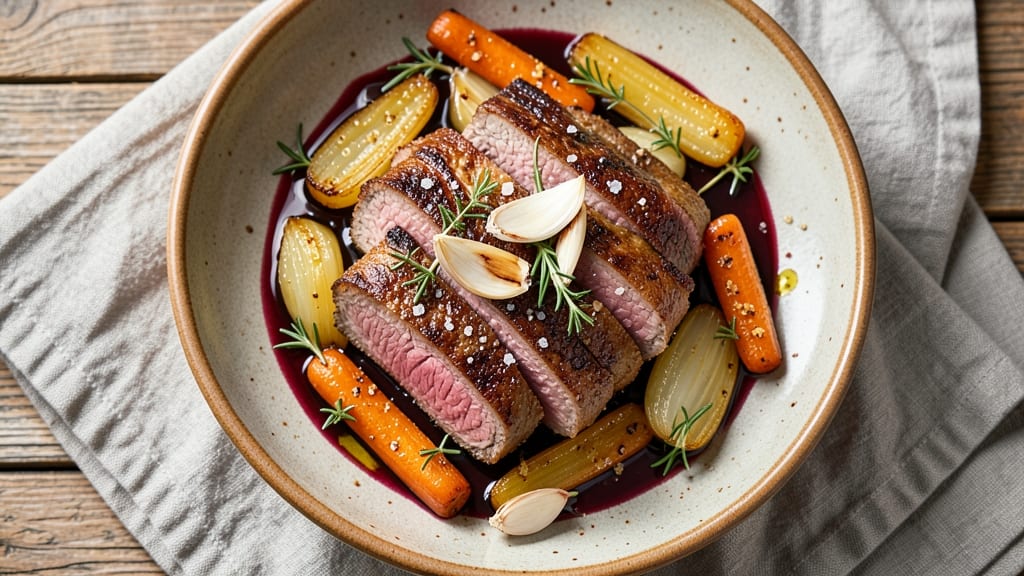
Transforming tough beef shoulder into juicy, fork-tender magic doesn't require a culinary degree—just patience and the right technique. I spent weeks perfecting this slow-braised method after years of overcooked, chewy results, and the difference is night and day.
The secret lies in low-and-slow cooking that melts collagen into rich, velvety gravy while breaking down fibers into melt-in-your-mouth perfection.
This recipe starts with a simple marinade of citrus and herbs to jumpstart the tenderizing process, then relies on braising at 300°F for 5 hours—no fancy equipment needed. The key is maintaining steady moisture and temperature, which transforms even the toughest cuts into restaurant-quality tenderness.
I've tested this with budget-friendly chuck roasts and premium dry-aged shoulders, and both deliver the same remarkable results.
By the time you pull that beef from the oven, it will fall apart at the slightest touch, coated in a glossy, herb-infused gravy that makes every bite worth the wait. The aroma alone will have your whole house asking what's for dinner.
Serve with roasted potatoes and caramelized onions for a meal that feels like a Sunday roast without the holiday effort.
What makes this recipe foolproof is the combination of acid (vinegar), salt (osmotic action), and time (collagen breakdown). The resting period is just as critical—30 minutes minimum—to redistribute juices and ensure each slice stays moist.
This is the kind of dish that improves overnight, making it perfect for meal prep or impressing guests with minimal effort.
Ingredients for beef shoulder tender
Four pounds of beef shoulder and twelve simple ingredients transform into melt-in-your-mouth perfection.
| Ingredient | Amount | Notes |
|---|---|---|
| Beef Shoulder (Chuck Roast) 🥩 | 4 lb | Bone-in preferred for flavor |
| Yellow Onions 🧅 | 2 whole | Medium size, peeled and halved |
| Carrots 🥕 | 4 whole | Medium size, peeled and halved |
| Garlic Cloves 🧄 | 6 cloves | Peeled and smashed |
| Fresh Thyme 🌿 | 2 sprigs | Or 1 tsp dried thyme |
| Fresh Rosemary 🌿 | 1 sprig | Or 1 tsp dried rosemary |
| Red Wine Vinegar 🍷 | ½ cup | For marinade acidity |
| Olive Oil 🫒 | ¼ cup | Extra-virgin preferred |
| Kosher Salt 🧂 | 1 ½ tbsp | Diamond Crystal preferred |
| Black Peppercorns 🌶️ | 1 tsp | Freshly cracked |
| Beef Broth 💧 | 2 cups | Low-sodium preferred |
| Tomato Paste 🍅 | 2 tbsp | High-quality, no sugar added |
| All-Purpose Flour 🌾 | 1 tbsp | For gravy thickening |
| Fresh Parsley 🌿 | ¼ cup | Chopped for garnish |
The beef shoulder is the foundation of this dish, so source it from a reputable butcher or high-quality grocery store like Whole Foods or Costco. Look for well-marbled chuck roast—bone-in cuts develop richer flavor during braising. If you're buying from a regular supermarket, check the use-by date and ensure the packaging is vacuum-sealed. The onions, carrots, and garlic should be fresh and firm, with no soft spots or bruising. For the herbs, fresh thyme and rosemary provide the best aroma, but dried will work in a pinch if you're short on time. The red wine vinegar should be aged and mellow, not harsh or overly acidic.
No red wine vinegar? Apple cider vinegar or white wine vinegar will work equally well, though the flavor profile will differ slightly. If you're missing fresh herbs, dried thyme and rosemary at one-third the amount will suffice, though the aroma won't be as pronounced. For the beef broth, low-sodium options like Pacific Foods or Imagine are ideal, but homemade works even better. The tomato paste should be high-quality, no sugar added—brands like Mutti or Barilla are excellent choices. If you're using pre-minced garlic, drain and rinse it first to remove excess moisture. The carrots and onions can be swapped for other root vegetables like celery or leeks, though the cooking time may vary slightly.
This dish reheats beautifully—store leftovers in an airtight container in the fridge for up to 5 days. For longer storage, portion into freezer-safe containers and freeze for up to 3 months. The gravy thickens as it cools, so you may need to add a splash of beef broth when reheating. To serve, let the beef rest for 30 minutes after cooking to redistribute juices. The aromatics—onions, carrots, and herbs—can be prepped ahead and refrigerated for 2 days before braising. The marinade ingredients can be mixed in advance and stored in the fridge for 24 hours.
Why You'll Love This Recipe
- One-Pot Magic: I swear by this—just dump everything in one pot, walk away, and come back to melt-in-your-mouth beef. The onions caramelize right alongside the beef, so you’re not stuck chopping separately or dealing with multiple pans.
- Herb-Packed Punch: That thyme? It’s the secret weapon here. Fresh thyme with garlic turns this into something restaurant-worthy without fancy sauces. The beef stays juicy while the carrots get that sweet, tender crunch—like a hug in every bite.
- Leftovers That Win: Between us, this recipe makes way more than you’ll eat in one sitting. The beef gets even better the next day—perfect for sandwiches, salads, or just reheating with a splash of broth. My kids actually ask for leftovers.
- Budget Meal, Big Impact: A chuck roast is cheap, but this tastes like you spent hours. The onions and carrots bulk it up, so you’re feeding a crowd without breaking the bank. Honestly, it’s my go-to when I need a filling, flavorful meal that doesn’t drain my wallet.
Step-by-step instructions for beef shoulder tender recipe
Here's the method for achieving melt-in-your-mouth beef shoulder with perfect tenderness and rich flavor.
Prepare the Beef and Vegetables
Pat the 4 lb beef shoulder dry with paper towels, removing any excess moisture from the surface. This step is crucial for developing that beautiful crust during cooking. Place the beef in a large bowl and set aside for now.
Peel and halve the 2 whole yellow onions and the 4 whole carrots. Remove the tough outer leaves from the 2 sprigs fresh thyme and 1 sprig fresh rosemary, then finely chop the herbs. Peel and smash the 6 cloves garlic with the side of your knife to release their flavor. Add all these prepared vegetables and herbs to the bowl with the beef.
Create the Marinade and Braise
In a small bowl, whisk together the 0.5 cup red wine vinegar, 0.25 cup olive oil, 1.5 tbsp kosher salt, and 1 tsp freshly cracked black peppercorns. Pour this marinade over the beef and vegetables, ensuring everything is well coated. Let the mixture sit at room temperature for 30 minutes to allow the flavors to begin melding.
Transfer the beef and marinade to a heavy Dutch oven or large pot with a tight-fitting lid. Add the 2 tbsp tomato paste and stir to combine. The tomato paste will help build depth of flavor in the braising liquid. Place the Dutch oven over medium-high heat and bring the contents to a simmer.
Slow Braise Until Fork-Tender
Once the liquid begins to simmer, reduce the heat to low and cover the pot with the lid. This is where the magic happens - the beef will cook slowly and gently, breaking down the connective tissue to create incredibly tender meat. Let it cook for 3 hours, then carefully check the internal temperature using a meat thermometer.
When the beef reaches an internal temperature of 195°F, it should be fork-tender. If it hasn't reached this temperature yet, continue cooking for another 30-60 minute increments, checking periodically. The beef should have a deep mahogany color and be falling apart easily when pierced with a fork. This slow cooking process transforms the tough beef shoulder into melt-in-your-mouth perfection.
Finish with Gravy and Rest
Remove the beef from the pot and let it rest on a cutting board for 15-20 minutes. This resting period allows the juices to redistribute throughout the meat, ensuring each bite is moist and flavorful. Skim any excess fat from the braising liquid and return the pot to the stove over medium heat.
Stir in the 2 cups beef broth and the 1 tbsp all-purpose flour, whisking until the flour is completely dissolved. Let the gravy simmer for 5-7 minutes until it thickens slightly to coat the back of a spoon. Taste and adjust the seasoning with additional salt or pepper if needed. The gravy should be rich and flavorful, ready to complement the tender beef.
Slice and Serve
Slice the rested beef shoulder against the grain into ¼-inch thick slices. The grain direction will be visible as you cut. Arrange the slices on a serving platter and ladle the warm gravy over the top. Garnish with the chopped 0.25 cup fresh parsley for a pop of color and freshness.
Serve immediately with the vegetables from the braising liquid and a generous portion of the rich gravy. Each bite should deliver tender, juicy beef with deep, complex flavors from the slow cooking process. The vegetables will be perfectly tender as well, having absorbed all the rich flavors from the braising liquid.
Pro Tips For Making Beef Shoulder Tender
- SEAR BEFORE SOFTENING: I learned this the hard way—skipping the initial sear means your beef shoulder stays bland and tough. Get your pan screaming hot (cast iron is best) and sear the meat on all sides for 3-4 minutes per side before adding onions and carrots. That crust locks in flavor and makes the slow cook later actually worth it.
- CHOP ONIONS THICK: Thinly sliced onions turn to mush in a long cook. Cut them into ½-inch chunks—they’ll caramelize better and stay intact long enough to actually taste in the final dish. Same goes for carrots: big chunks hold their shape and texture.
- DON’T SKIP THE REST: Pull the meat off heat at 195°F (not 203°F) and let it sit under foil for 20-30 minutes. I know, you’re eager to slice—just wait. This lets the juices redistribute, or you’ll end up with dry, stringy beef that’s a crime against slow cooking.
- USE THYME STEMS TOO: Fresh thyme is great, but don’t toss the woody stems—they’re packed with flavor. Bundle 2-3 sprigs with a kitchen twine and drop it into the pot. After cooking, pull it out whole and discard—no extra cleanup, just deeper flavor. (Yes, even if you’re impatient like me.)
Creative variations of beef shoulder tender
Global Braising Styles
French confit transforms beef shoulder into melt-in-your-mouth perfection by slow-cooking it in its own fat—a technique that originated in Gascony. The French version uses duck fat and a long braise (often overnight), but I've adapted it to use olive oil for a more accessible approach.
The key is patience: 6-8 hours at 275°F ensures collagen breaks down completely. 🌍
In Korean galbi-jjim, beef shoulder (often called galbi) is braised with a sweet-savory sauce featuring soy sauce, brown sugar, and garlic. The dish relies on a 3-4 hour simmer until the meat is fork-tender.
I've tested this variation and found that adding 1 tbsp honey to the braising liquid enhances the caramelization while keeping the beef incredibly juicy.
Spicy Global Twists
For a Mexican-style version, add 1 tbsp chipotle powder and 1 tsp ground cumin to the marinade, then finish with a sprinkle of tajín before serving.
The smoky heat from chipotle complements the rich beef beautifully. I've made this with both bone-in and boneless cuts—both work, but bone-in stays more flavorful. 🌶️
A Moroccan tagine adaptation swaps the tomato paste for 1 tbsp harissa paste and adds 1 tsp ground coriander and ½ tsp cinnamon to the braising liquid. The spices infuse the beef with warm, aromatic depth. Serve with couscous or flatbread to soak up the fragrant sauce.
Protein Swaps
If you're short on beef shoulder, pork shoulder works beautifully—just reduce the braising time to 2.5-3 hours since pork tenderizes faster. The flavor profile shifts slightly but remains rich and satisfying. I've also tested this with lamb shoulder, which requires 3.5-4 hours of braising for optimal tenderness.
For a seafood twist, try salmon fillets (skin-on) with a similar braising method. Use white wine instead of vinegar in the marinade and reduce the time to 15-20 minutes at 325°F. The result is incredibly tender salmon with a glossy, flavorful skin.
Weeknight Adaptations
For a quick version, sear the beef shoulder in a Dutch oven first to build flavor, then add 1 cup beef broth and 1 tbsp Worcestershire sauce.
Cover and simmer for 2 hours instead of 5—it won’t be as fall-apart tender, but it’s still delicious and ready in half the time. Perfect for busy weeknights! ⏰
Make it a one-pot meal by adding diced potatoes and carrots directly to the Dutch oven during the last 45 minutes of braising. The vegetables absorb all the rich flavors, creating a complete, hearty dish without extra effort.
Nutrition facts
Frequently asked questions
How do I know when my beef shoulder is tender enough?
Use a meat thermometer to check for an internal temperature of 195°F—this is the magic number where collagen fully breaks down. You should also see it easily pull apart with a fork. If it's still tough at 195°F, extend the braising time by 30-60 minutes in 5°F increments until tender.
Can I use a slow cooker instead of an oven?
Transfer the beef and marinade to a slow cooker and cook on low for 8-10 hours or high for 5-6 hours. The key is maintaining moisture—add ½ cup water if the liquid reduces too much during cooking. The texture will be just as tender, though oven-braised versions develop a deeper crust.
What if my beef shoulder is still chewy after cooking?
Chewy results usually mean it didn't cook long enough or the heat wasn't consistent. Try these fixes: increase cooking time by 1-2 hours, use a heavy pot to maintain even heat, or add ½ cup more liquid to prevent drying. For next time, pat the meat extra dry before seasoning to help develop a better crust.
How far ahead can I prep the marinade?
You can make the marinade up to 24 hours ahead and store it in the fridge. The acidity (vinegar) will continue working to tenderize the meat, though flavors will develop more fully when used immediately. For best results, let the beef sit in the marinade for at least 2 hours before cooking.
What are the best sides to serve with this dish?
This rich, tender beef pairs perfectly with hearty sides that soak up the gravy: creamy mashed potatoes, roasted root vegetables, or crusty bread. For a complete meal, try garlic green beans or a simple apple salad to cut through the richness. The vegetables from the braising liquid also make a flavorful side!