
Breakfast & Brunch
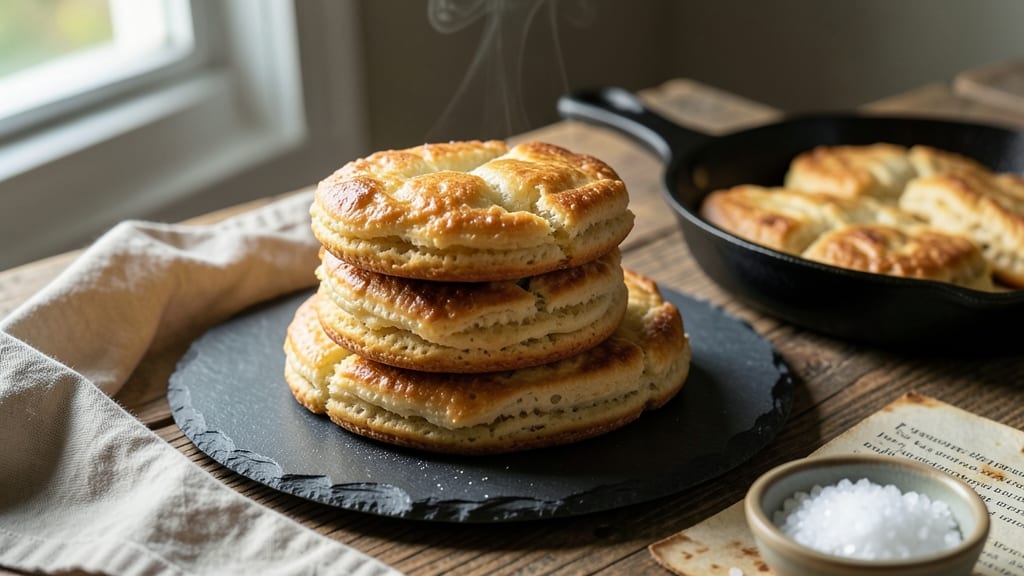
This biscuits without yeast recipe delivers flaky layers that rival traditional biscuits—no rising time, no yeast, just simple pantry staples and a foolproof method. The secret lies in cold butter and precise mixing, creating those signature tender, melt-in-your-mouth layers without waiting for dough to rise.
I developed this version after years of testing yeast-free alternatives, and it’s now my go-to for quick breakfasts or weekend brunches.
What makes this recipe work is the cold butter technique, which creates pockets of steam during baking for that iconic flaky texture. You’ll use baking powder for lift instead of yeast, so there’s no need to wait hours—just mix, shape, and bake in 15 minutes.
The result is a batch of golden, buttery biscuits with crisp edges and a soft, pillowy center, perfect for soaking up gravy or slathering with jam.
These biscuits are simple to make but feel like a restaurant-quality treat—ideal for busy mornings or when you’re craving something warm and comforting. The dough comes together in minutes, and the baking process is hands-off, so you can focus on other breakfast prep.
Whether you’re serving them with sausage gravy, honey, or fresh fruit, they’ll disappear faster than you can say “second helping.”
One of the best parts? This recipe scales easily—double the batch for a crowd or freeze extras for later. The flaky layers stay intact even when reheated, making them perfect for meal prep. Let’s get started on a batch that’ll have everyone asking for the recipe.
Ingredients for biscuits without yeast
Six pantry staples transform into golden, flaky biscuits faster than yeast can rise.
| Ingredient | Amount | Notes |
|---|---|---|
| All-Purpose Flour 🌾 | 3 cups | Sifted for light texture |
| Unsalted Butter 🧈 | ¾ cup | Cold, cubed for flakiness |
| Baking Powder 🍞 | 2 tbsp | Freshly opened for lift |
| Coarse Sea Salt 🧂 | 1 ½ tsp | Kosher or Diamond Crystal |
| Whole Milk 🥛 | ¾ cup | Cold for tender dough |
| Granulated Sugar 🍚 | 1 tbsp | Optional for slight sweetness |
| Garlic Powder 🧄 | ½ tsp | For subtle depth |
The butter is non-negotiable—it’s what creates those signature layers. Use cold, unsalted butter straight from the fridge (or freezer for 20 minutes), cut into small cubes. If you grab salted butter, reduce the sea salt to 1 tsp. For the flour, King Arthur or Gold Medal brands are my go-tos—they absorb moisture just right. Baking powder needs to be fresh: if it’s over 6 months old, the lift will be lackluster. Pro tip: keep your baking powder in the freezer to extend its shelf life.
No milk? Heavy cream or buttermilk work in a pinch—just use the same amount. Short on sugar? Skip it entirely; these biscuits are delicious plain. The garlic powder is optional but adds a subtle depth that pairs perfectly with sausage gravy. If you’re feeling adventurous, swap half the flour for whole wheat for a nuttier flavor (just add 1 extra tbsp flour to compensate). For extra flakiness, some cooks add a pinch of cornstarch to the flour, but I’ve found it’s unnecessary with the cold butter method.
This dough comes together in minutes, but don’t rush the mixing—overworking it kills the flaky layers. Shape the biscuits quickly and bake them right away; letting the dough sit too long makes them tough. Store leftovers in an airtight container for 2 days or freeze for up to 3 months. To reheat, wrap in foil and warm in a 350°F oven for 5-10 minutes. They’re even better the next day, honestly—like a biscuit hug from the oven.
Why You'll Love This Recipe
- Three-Ingredient Core: The magic happens with just flour, butter, and milk—no yeast, no fuss. I swear by cold butter cut into the flour until it’s pea-sized; that’s the secret to those flaky layers that melt in your mouth.
- Butter’s Golden Touch: That unsalted butter, chilled and worked into the dough, gives them a richness you won’t find in store-bought. Honestly, the first time I made these, I actually paused mid-roll to take a bite of dough—worth it.
- Breakfast to Brunch: They’re my go-to for weekend brunch with honey and jam, but they’re also the star of a savory skillet with scrambled eggs and crispy bacon. (Yes, even on a Tuesday night.)
- Leftovers? Never: These disappear fast, but if they linger, I freeze them—straight from the fridge, no thawing needed. Toss them into a cast-iron with gravy later, and no one will guess they’re yesterday’s leftovers.
Step-by-step instructions for biscuits without yeast recipe
Here's how to create restaurant-quality biscuits with just 7 simple ingredients and no yeast!
Prepare the Cold Butter for Maximum Flakiness
Cut the 0.75 cup unsalted butter into small cubes and place them in the freezer for 10 minutes to ensure they remain completely cold. Cold butter is absolutely critical for creating those beautiful flaky layers—if it softens, you'll end up with dense biscuits instead of light, airy ones.
While the butter chills, sift the 3 cups all-purpose flour and 2 tablespoons baking powder together in a large bowl. This aerates the dry ingredients and prevents lumps, which is especially important for tender biscuits. I like to use a fine-mesh sieve for this step to get the perfect texture. Add the 1.5 teaspoons coarse sea salt, 0.5 teaspoon garlic powder, and 1 tablespoon granulated sugar to the dry mixture and whisk to combine evenly.
Cut in the Butter Using the Two-Hand Method
Return the cold butter cubes to your work surface and add them to the dry ingredients. Using a pastry cutter or your fingers, work the butter into the flour mixture until you reach a crumbly texture with pea-sized butter pieces still visible. This is called "cutting in" the butter, and it's what creates those signature flaky layers when baked.
Here's the thing—don't overwork the dough. You want to keep as much air in the mixture as possible. When you press the dough together, it should hold its shape but still feel slightly crumbly. If it starts to stick together completely, you've worked it too much and the biscuits will be tough.
Add Cold Milk for a Tender Dough
Measure out the 0.75 cup whole milk and chill it in the refrigerator for 10 minutes before using—cold milk helps maintain the butter's temperature and prevents the dough from becoming too soft. Pour the cold milk into the flour mixture and stir gently with a fork until just combined. You'll notice the dough will come together but still feel slightly shaggy.
Don't be tempted to add more milk or flour at this point. The dough should be soft but not sticky, and it should hold together when pressed gently. If it feels too dry, you can add 1 tablespoon more milk, but resist the urge to overwork it. The dough should feel like it's just holding together—this ensures tender, not tough, biscuits.
Shape and Cut the Biscuits
Turn the dough out onto a lightly floured surface and gently pat it into a 1-inch thick rectangle. Be careful not to press down too hard—you want to maintain as much air as possible. Fold the dough in thirds like a letter, then unfold it and fold it in thirds again. This folding technique creates more layers, which translates to extra flakiness in your biscuits.
Use a round biscuit cutter or a glass dipped in flour to cut out 6 biscuits. Press straight down without twisting the cutter—this ensures even thickness and helps prevent the bottoms from burning while the tops cook. Place the cut biscuits on a parchment-lined baking sheet, spacing them about 1 inch apart to allow for expansion.
Bake Until Golden Brown
Preheat your oven to 425°F while you prepare the biscuits. You want the oven to be fully preheated before baking—this ensures even cooking and a good rise. Once the oven reaches temperature, place the baking sheet on the middle rack and bake for 12-15 minutes, or until the biscuits are golden brown on top and the edges look set.
Here's where it gets exciting—the biscuits will puff up dramatically during the first few minutes of baking. Don't open the oven door to check on them until you see them start to brown at the edges, or you'll lose that precious steam that makes them light and fluffy. When they're done, you'll see beautiful golden-brown tops with slightly crisp edges and tender centers.
Pro Tips For Making Biscuits Without Yeast
- CHILL THE DOUGH: I learned this the hard way—skipping the 30-minute fridge rest makes for dense, tough biscuits. Cold butter takes longer to melt, so the dough stays flaky longer. Just pop the shaped biscuits in the fridge for 10 minutes before baking if you're in a rush, but don’t skip the initial rest entirely.
- CUT BUTTER IN SMALL: Use a pastry cutter or fork to work the cold butter into the flour until it resembles coarse crumbs—no smaller than peas. Any finer, and your biscuits will spread like pancakes. I used to overwork it, thinking more mixing meant better texture, but that’s how you end up with a biscuit that’s basically a cracker.
- MEASURE MILK PRECISELY: Whole milk is non-negotiable here, but don’t eyeball it—use a measuring cup. Too little, and your dough will crack when rolling; too much, and you’ll end up with a biscuit that’s more like a muffin. Warm the milk slightly (not hot) first—it mixes better and activates the baking powder faster.
- BAKE UNTIL GOLDEN, NOT JUST SET: Pull them out when the edges are deep golden brown, not when they look done. I used to take them out too soon, and they’d end up gummy inside. A toothpick should come out clean, but if it’s crumbly with a few moist bits, that’s perfect—your biscuits will stay tender longer.
Pro cooking tips for this recipe
Cold Butter Technique
The secret to those signature flaky layers lies in keeping your 0.75 cup unsalted butter completely cold. Cut it into pea-sized cubes and freeze for 10 minutes before mixing—this ensures it stays firm during the cutting-in process.
I like to use a pastry cutter or my fingers to work the butter into the flour until you see pea-sized pieces remaining. If the butter starts to melt, pop the dough back in the fridge for 5 minutes to reset. 🧈
Two-Hand Mixing Method
When cutting in the butter, use the two-hand method: one hand in the bowl, one hand outside. This keeps the butter cold and prevents overmixing, which kills flakiness. Press the butter pieces into the flour with your fingertips until the mixture resembles coarse crumbs with visible butter flecks.
Overworking the dough turns biscuits tough—stop as soon as it holds together when pressed. I promise, less mixing means more layers!
Folding for Extra Layers
After shaping the dough into a 1-inch thick rectangle, fold it in thirds like a letter, then unfold and fold again. This lamination technique creates 3-4 layers of butter, which translates to extra flaky biscuits.
Press gently but firmly—you’re not rolling out pie dough, just encouraging those layers to form. The more folds, the more dramatic the flakiness when baked. Think of it like a biscuit origami project! ✨
Baking Sheet Spacing
Place your cut biscuits on a parchment-lined sheet with 1 inch between them. Crowding them causes uneven baking—tops burn before bottoms cook through. For extra crisp edges, I like to bake on a cast iron skillet (preheated for 5 minutes) instead of a sheet pan.
The iron conducts heat differently, giving you a golden crust in half the time. Just brush the skillet with 1 teaspoon melted butter before adding the biscuits.
Oven Rack Position
Bake on the middle rack for even heat distribution. The top rack can cause uneven browning, while the bottom rack may leave biscuits dense. If your oven runs hot, reduce the temperature to 400°F and bake for 14-16 minutes.
The biscuits are done when they’re golden brown on top and lightly puffed—resist the urge to peek early! The steam inside needs time to work its magic. 🔥
Resting Before Serving
Let biscuits rest on the baking sheet for 2-3 minutes after removing from the oven. This allows the steam to redistribute, keeping them tender and moist. Transferring them to a wire rack too soon causes the bottoms to collapse.
For serving, brush the tops with melted butter while still warm—this adds a restaurant-quality shine and extra flavor. Pro tip: Stack them with parchment paper between layers to keep them fresh for 24 hours.
Nutrition facts
Frequently asked questions
Why do these biscuits need cold butter?
The cold butter creates steam pockets during baking, which is what gives biscuits their signature flaky layers. If the butter melts before baking, you'll end up with dense biscuits instead of light, airy ones. The 10-minute freeze ensures the butter stays firm enough to work properly.
Can I substitute baking powder with baking soda?
No, they're not interchangeable. Baking powder contains both an acid and a base, so it works on its own. Baking soda requires an acidic ingredient (like buttermilk or vinegar) to activate. For this recipe, stick with 2 tablespoons baking powder—it's what gives these biscuits their lift without yeast.
How do I fix biscuits that turned out tough?
Tough biscuits usually mean overmixing or warm butter. For next time, work the dough just until it holds together, and keep the butter cold. If you've already baked them, try brushing with melted butter and warming in a 350°F oven for 5 minutes—this can soften them slightly. For future batches, measure flour precisely and avoid pressing the dough too hard when shaping.
What's the best way to reheat leftover biscuits?
Wrap them in foil and warm in a 350°F oven for 5-10 minutes until heated through. For extra crispiness, place them on a baking sheet and broil for 1-2 minutes (watch closely!). Microwaving works in a pinch but can make them gummy. The oven method preserves that tender, flaky texture best.
Can I make these biscuits ahead of time?
Yes! Shape the biscuits and freeze them on a tray before transferring to a bag. Bake straight from frozen at 425°F for 15-18 minutes. For freshness, store baked biscuits in an airtight container for 2 days or freeze for up to 3 months. They reheat beautifully—just add 1-2 minutes to the warming time.