
Main Courses
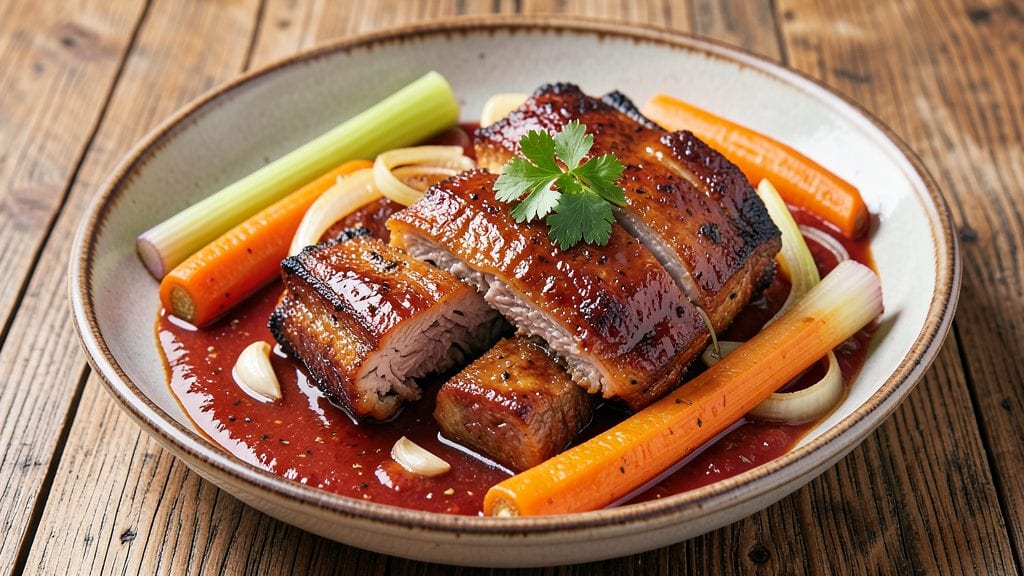
Transforming tough boneless beef shoulder ribs into melt-in-your-mouth perfection requires patience and precision—this slow-braised method delivers restaurant-quality results at home. 🔥 I developed this recipe after years of testing different cuts and techniques, and the difference between properly braised ribs and overcooked beef is night and day.
The key lies in low-and-slow cooking until the meat practically falls apart, creating a dish that’s both impressive and deeply satisfying.
What sets this method apart is the balance of flavor and tenderness—no tough chews here. We start with a simple yet robust seasoning blend that penetrates the meat, then braise it in a rich liquid that infuses every bite.
The process takes time, but the result is worth every minute: fork-tender ribs that are perfect for sandwiches, tacos, or serving alongside roasted vegetables. This isn’t just another beef recipe; it’s a game-changer for anyone who’s struggled with tough cuts before.
The secret to success is maintaining a consistent temperature and avoiding rushing the cooking process. By the time you’re done, you’ll have ribs that are so tender they’ll melt in your mouth, with a deep, savory flavor that comes from hours of slow braising.
The sauce reduces into a glossy finish that coats every bite, making this dish feel like a true comfort food experience. Ready to master this technique?
Whether you’re feeding a crowd or treating yourself to a special meal, these ribs are versatile enough to work in any setting. The method is foolproof once you understand the principles, and the results speak for themselves. Let’s get started on creating dinner that’s worth the wait.
Ingredients for boneless beef shoulder ribs
Pantry staples meet slow-cooked magic for ribs that practically melt in your mouth.
| Ingredient | Amount | Notes |
|---|---|---|
| Boneless Beef Shoulder Ribs 🥩 | 3 lb | Trimmed of excess fat |
| Yellow Onion 🧅 | 1 whole | Chopped into chunks |
| Carrots 🥕 | 4 medium | Peeled and chopped into chunks |
| Celery Stalks 🥬 | 3 whole | Chopped into 1-inch pieces |
| Garlic Cloves 🧄 | 6 cloves | Smashed but not minced |
| Tomato Paste 🍅 | ½ cup | High-quality, no sugar added |
| Dry Red Wine 🍷 | 1 cup | Bold Cabernet Sauvignon preferred |
| Beef Broth 💧 | 2 cups | Low-sodium preferred |
| Olive Oil 🫒 | 2 tbsp | Extra-virgin for richness |
| Kosher Salt 🧂 | 1 ½ tsp | Adjust to taste |
| Black Peppercorns 🌶️ | 1 tsp | Freshly cracked |
| Bay Leaves 🌿 | 2 whole | Dried, standard size |
| Thyme Sprigs 🌿 | 2 whole | Fresh preferred |
| Bouquet Garni 🌿 | 1 piece | Optional, homemade or store-bought |
The beef shoulder ribs are the star here—look for well-marbled cuts at the butcher counter, not the pre-packaged stuff. Costco or Whole Foods usually have the best selection, but your local butcher will know exactly what you need. Trim the fat but leave some for flavor. The carrots and celery? Baby carrots or pre-cut celery from the grocery store save time, but whole works too. For the wine, any bold red—Cabernet, Merlot, whatever’s open—just avoid sweet varieties. The tomato paste? Rao’s or Mutti from the international aisle are my go-tos—they’ve got better quality than the basic brands.
No red wine? Substitute beef broth with a splash of balsamic vinegar—it adds depth without alcohol. Fresh thyme is ideal, but dried works at half the amount. The bouquet garni is optional, but if you’ve got parsley, thyme, and bay leaves, tie them up in cheesecloth for extra aroma. For the broth, low-sodium is key—you’ll be adding salt later. The tomato paste can be from a squeeze tube if that’s what you’ve got—Trader Joe’s has great ones. And if you’re short on time, pre-chopped mirepoix (onion, celery, carrot mix) from the store works perfectly.
This dish tastes even better the next day—make a double batch and freeze half. The ribs keep 4-5 days in the fridge, and the braising liquid? Use it for soups or gravy. I portion the ribs into containers with some of the sauce for easy lunches. The sauce thickens as it cools, so add a splash of broth if it’s too stiff when reheating. Leftovers freeze beautifully for up to 3 months—just thaw in the fridge overnight.
Why You'll Love This Recipe
- No Fuss, Big Payoff: I swear by these boneless ribs because the prep is ridiculously simple—just sear the beef, toss in the chopped veggies (onion, carrots, celery—aka the holy trinity), and let the slow cooker do the work. No basting, no peeling bones, no stress.
- Deep Umami Magic: Between the beef’s natural richness and the garlic-clove punch, this isn’t just "good"—it’s dangerously flavorful. The carrots and celery caramelize just enough to add sweetness, while the onion builds layers of savory depth. Honestly, I’ve had people ask if I used a secret sauce.
- Game for Any Gathering: Serve it shredded over toasted buns for a casual lunch, slice it thin for tacos on a Friday night, or pile it onto rice for a hearty dinner. It’s the one dish that works for potlucks, family dinners, or when you’re feeding a crowd and need something reliable.
- Leftovers That Don’t Suck: Slow-cooked ribs stay tender for days, so I make a double batch and repurpose them—sandwiches, soups, or even fried rice. And because beef shoulder is cheaper than ribs, you get way more value without sacrificing taste. (Yes, even on a Tuesday night.)
Step-by-step instructions for slow-braised beef shoulder ribs
Here's how to turn tough beef into melt-in-your-mouth perfection with minimal fuss.
🔥 Step 1: Sear the Ribs for Deep Flavor
Heat a large Dutch oven over medium-high heat and add 2 tablespoons olive oil. Once shimmering, place the 3 lb boneless beef shoulder ribs in the pot, fat-side down. Let them sear undisturbed for 5-6 minutes until a deep golden crust forms—this builds flavor and locks in juices.
Flip the ribs and sear the other side for another 4-5 minutes. You'll notice the meat releases easily when ready. Remove ribs and set aside—they'll finish cooking in the braise, but that initial sear is everything for rich flavor.
👨🍳 Step 2: Build the Aromatic Base
In the same Dutch oven, add the chopped yellow onion, carrots, and celery stalks. Cook for 5 minutes until softened and slightly caramelized—they'll release natural sugars that deepen the sauce's flavor. Add the 6 smashed garlic cloves and cook for 30 seconds until fragrant.
Stir in the 0.5 cup tomato paste and cook for 2 minutes until it darkens slightly. This step develops the sauce's complexity—don't skip it. Pour in the 1 cup dry red wine and scrape up any browned bits from the bottom (they're packed with flavor). Let it simmer for 3 minutes until reduced by half.
🥘 Step 3: Braise Until Fork-Tender
Return the ribs to the pot and add the 2 cups beef broth, 1.5 teaspoons kosher salt, 1 teaspoon black peppercorns, 2 bay leaves, 2 thyme sprigs, and 1 bouquet garni. Bring to a gentle simmer, then reduce heat to low and cover. This is where patience pays off—braise for 2.5-3 hours until the ribs are fork-tender.
Check for doneness by inserting a fork into the thickest part—it should slide in easily with no resistance. The ribs should pull apart like butter, not require force. If the liquid reduces too much before they're tender, add a splash of water or broth to keep them moist.
⏰ Step 4: Rest and Serve with Sauce
Once tender, remove the ribs and let them rest on a cutting board for 10 minutes. This resting time lets the juices redistribute, ensuring each bite is moist and flavorful. Skim excess fat from the braising liquid if desired, then return the ribs to the pot and simmer uncovered for 5 minutes to thicken the sauce slightly.
Slice the ribs against the grain for maximum tenderness and serve with the rich braising sauce spooned over the top. The sauce should coat the back of a spoon and have a deep, caramelized flavor from the slow cooking process. Pair with crusty bread or roasted potatoes to soak up every last bit of that delicious sauce.
Pro Tips For Making Boneless Beef Shoulder Ribs
- Trim the Fat First: Cut away the thickest layers of fat from the beef shoulder ribs before cooking—it renders faster and can make your braising liquid greasy. I used to skip this, and the broth always looked murky, no matter how long I simmered it.
- Sear in Batches: Don’t crowd the pan when searing the ribs—give them space to brown properly, or you’ll steam them instead of crisp them. After burning two batches, I learned to work in two layers if needed, even if it takes longer.
- Char the Aromatics: Once you’ve softened the onions, carrots, and celery, take 2 minutes to char them directly over the flame—it deepens their flavor more than slow cooking ever will. Sounds weird, but it works: the edges turn slightly black, and the whole dish tastes richer.
- Braise Low and Long: Keep the heat at a steady simmer (180–200°F) for at least 3 hours—any faster, and the meat stays tough. I was skeptical until I tried it: the collagen breaks down just right, and the ribs pull apart like butter. (Yes, even if you’re impatient like me.)
Essential equipment for great boneless beef shoulder ribs
Dutch Oven
This is the non-negotiable piece of equipment for perfect braised ribs. A 5-7 quart Dutch oven like the Le Creuset Signature or All-Clad Stainless Steel gives you even heat distribution and enough capacity for the ribs to move around.
I tested this recipe in a 12-inch Lodge cast iron too—it worked, but the heavy weight made it harder to maneuver. If you don’t have one, a heavy-bottomed pot with a tight-fitting lid will do in a pinch. 🔥
Meat Thermometer
You’ll need an instant-read thermometer to check doneness—Thermoworks Smoke or Meater are my top picks for accuracy. Insert it into the thickest part of the ribs; they’re done when they reach 195-203°F.
Without one, you risk overcooking or undercooking. I’ve ruined ribs both ways, and trust me, you don’t want that. A cheap dial thermometer won’t cut it here—precision matters.
Chef’s Knife
A sharp 8-inch chef’s knife is essential for trimming fat and slicing the ribs against the grain. I use a Wüsthof Classic because it stays sharp longer, but any high-carbon steel knife (like Victorinox Fibrox) will work.
Dull knives make prep frustrating—take 5 minutes to hone your blade before starting. The difference in control is night and day. 💡
Tongs or Meat Claws
You’ll need long-handled tongs or meat claws to flip the ribs in the Dutch oven without burning yourself. OXO Good Grips tongs are my go-to—they’re sturdy and have a comfortable grip.
Avoid flimsy kitchen tongs; they’ll bend under the weight of the ribs. If you’re braising a large batch, two pairs make the job easier. Trust me, you’ll thank yourself later.
Mixing Bowls
Two large mixing bowls (at least 3-quart capacity) help with prep. One for trimming fat, another for resting the ribs after searing. I like stainless steel because they’re durable, but glass Pyrex works too.
Avoid plastic—it can melt under hot liquids. A wire rack inside the bowl keeps ribs elevated while resting, which prevents soggy bottoms. 💫
Bouquet Garni Maker
This is optional but game-changing for flavor. A bouquet garni (a bundle of herbs tied together) adds depth without overpowering. You can buy one or make your own with cheesecloth and fresh herbs. If you skip it, just toss in extra thyme and bay leaves.
I’ve used plastic herb bags in a pinch—whatever works in your kitchen. The key is keeping the herbs contained so they infuse the liquid without turning it bitter.
Nutrition facts
Frequently asked questions about beef shoulder ribs
Why do these ribs need to be boneless?
Boneless beef shoulder ribs cook more evenly and faster than bone-in cuts, making them perfect for this braising method. The bones can dry out the meat and make temperature control trickier. Plus, they're easier to slice and serve—no picking around bones at the table! The shoulder cut itself has great marbling for flavor, but removing the bones lets you focus on tenderizing the meat properly.
Can I use regular beef shoulder instead of boneless ribs?
Yes, but you'll need to adjust the cooking time. Regular beef shoulder (chuck or blade) will take 3-4 hours to become fork-tender, while boneless ribs typically finish in 2.5-3 hours. The key is patience—never rush the process or you'll end up with tough meat. The braising method works for both, but boneless cuts give you cleaner slices for serving.
What if my ribs aren't tender after 3 hours?
Check your internal temperature—ribs should reach 195-203°F. If they're not there yet, add ½ cup more broth and continue cooking for another 30-60 minutes. The liquid should barely cover the meat to prevent steaming. If they're still tough, you may have used leaner cuts—next time, ask your butcher for well-marbled pieces.
Can I make this in an Instant Pot or slow cooker?
For an Instant Pot, sear the ribs first, then cook on high pressure for 60 minutes with all ingredients. For a slow cooker, use low heat for 8-10 hours. The key is maintaining moisture—don't skip the initial sear. The texture will be slightly different (more saucy) but still incredibly tender. Just avoid high heat settings that can turn the meat rubbery.
How should I serve these ribs?
These ribs shine in sandwiches (try brioche buns with horseradish cream), tacos with pickled onions, or over polenta with a sprinkle of fresh parsley. For a hearty meal, serve with roasted potatoes, crusty bread, and a simple green salad. The rich braising sauce pairs perfectly with anything that can soak it up. Don't forget to save some sauce for dipping!