Appetizers
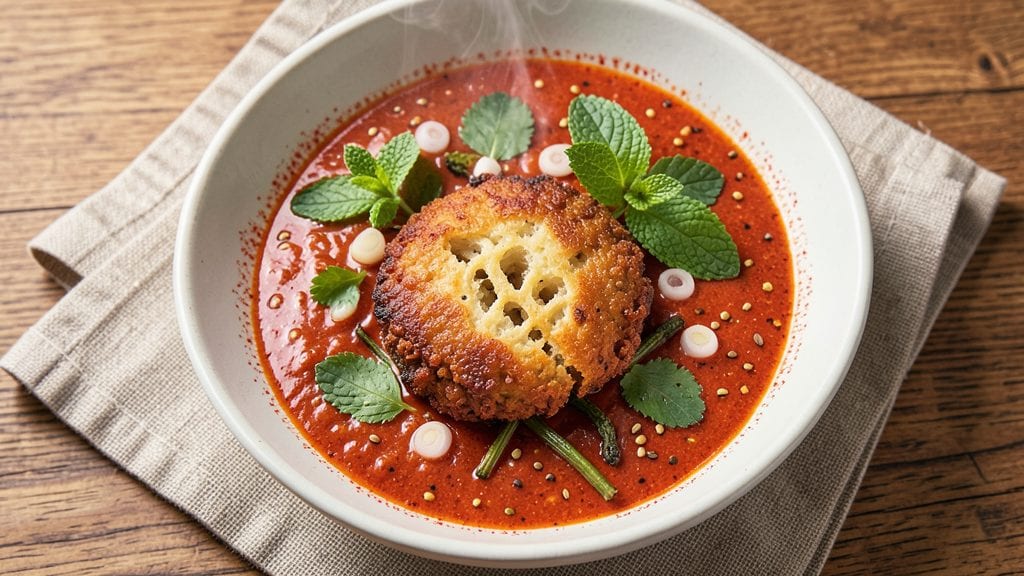
This bread pakora recipe transforms ordinary bread into crispy, golden fritters that balance traditional spice blends with a fresh herbed twist. I first discovered this dish while exploring Indian street food markets, where the contrast of crunchy exterior and tender interior made it impossible to resist.
The secret lies in the chickpea flour batter, which creates that signature texture while keeping the flavor profile light yet complex.
The beauty of this recipe is its simplicity—just a handful of ingredients come together to create something restaurant-quality. You'll start with bread slices cut into triangles, coated in a spiced chickpea batter, and fried until golden brown.
The turmeric and red chili powder give it that authentic flavor, while fresh herbs like cilantro or mint add brightness. It's a foolproof method that delivers results every time, even for beginners.
What you'll end up with is a plate of crispy, aromatic fritters that are perfect for appetizers or a quick snack. The outside stays shatteringly crisp, while the inside remains soft and flavorful, soaking up the spices perfectly.
Serve warm with mint chutney or tamarind sauce for a taste of India that feels like a hug. Ready to make this dish?
This recipe is vegetarian and gluten-free if using gluten-free bread, making it versatile for most dietary needs. The batter can be prepped ahead, so you're ready to fry whenever hunger strikes.
Whether you're hosting a gathering or just craving something crispy, this bread pakora delivers on flavor and texture without the fuss.
Ingredients for bread pakora
Crispy fritters begin with these simple yet flavorful ingredients—just a handful for restaurant-quality results.
| Ingredient | Amount | Notes |
|---|---|---|
| Bread Slices 🍞 | 4 whole | White or gluten-free preferred |
| Chickpea Flour 🌾 | 1 cup | Also called besan flour |
| Water 💧 | ¾ cup | Room temperature preferred |
| Turmeric Powder 🌿 | 1 tsp | Freshly ground for best color |
| Red Chili Powder 🌶️ | 1 ½ tsp | Adjust for spice preference |
| Cumin Seeds 🌿 | ½ tsp | Toasted for deeper flavor |
| Garlic Cloves 🧄 | 4 cloves | Minced for even distribution |
| Fresh Cilantro 🌿 | ¼ cup | Chopped, stems removed |
| Fresh Mint Leaves 🌿 | ¼ cup | Chopped, optional for brightness |
| Salt 🧂 | ½ tsp | Adjust to taste |
| Vegetable Oil 🫒 | 2 cups | High smoke point preferred |
| Lemon Juice 🍋 | 1 tbsp | Freshly squeezed |
The bread matters here—stale or lightly toasted slices work best for extra crispiness. Whole wheat or gluten-free bread adds texture, but white bread stays classic. For authenticity, Indian or Asian grocery stores carry pre-sliced naan or roti, but any bread cut into triangles works. The chickpea flour is non-negotiable; it's what creates that signature crispy exterior. Bob's Red Mill or Anthony's Goods brands are reliable for quality. Toast your cumin seeds in a dry pan for 30 seconds before grinding—they'll add depth to the batter.
No fresh cilantro? Dried cilantro at half the amount works, though it lacks brightness. Short on mint? Extra cilantro or parsley bridges the gap. The turmeric gives that iconic golden color, so don't skip it—Everest brand is widely available and potent. For oil, vegetable or canola are budget-friendly, but avocado oil has a higher smoke point for safer frying. The batter should be thick but pourable; add water gradually if needed. Pre-mix your spices and herbs in a small bowl first to avoid clumps in the batter—trust me, it makes all the difference when frying.
Prep ahead by mixing the batter and refrigerating it for up to 2 hours—it thickens slightly and crisps better. The fried pakoras stay crispy for 20 minutes at room temperature, but reheat in a 200°F oven for 5 minutes to restore crunch. Store leftovers in an airtight container for 2 days—they're perfect for quick snacks or appetizers. Freezing isn't recommended as they lose crispness, but you can reheat the batter and fry fresh portions whenever cravings strike.
Why You'll Love This Recipe
- Five-Ingredient Magic: I swear by this—just bread, chickpea flour, water, and two spices. That’s it. No chopping, no fancy prep, just mix, dip, and fry. The turmeric and chili give it that golden, spicy crunch without needing a pantry haul.
- Crispy-Creamy Obsession: The outside gets perfectly crispy while the inside stays soft—like a hug for your taste buds. Honestly, the first time I bit into one still warm from the oil, I nearly dropped the pan. That’s the power of a thin chickpea batter and hot oil.
- Party in a Fryer: Between us, this is my go-to for game day, movie nights, or when friends drop by unannounced. Serve with mint chutney or tamarind sauce, and suddenly you’re hosting a snack spread without stress. (Yes, even on a Tuesday night.)
- Budget Crunch-Saver: A whole loaf of bread and a bag of chickpea flour stretch for weeks—I’ve fed four people for under $5 with this. Freeze extras too; reheating in the air fryer brings them back to life like nothing happened. My wallet thanks me every time.
Step-by-step instructions for bread pakora recipe
Here's how to achieve perfectly crispy, golden-brown pakoras with a fragrant herbed center.
Prepare the Spiced Chickpea Flour Batter
In a mixing bowl, combine the 1 cup chickpea flour, 0.75 cup water, 1 tsp turmeric powder, 1.5 tsp red chili powder, 0.5 tsp cumin seeds, 0.5 tsp salt, 4 minced garlic cloves, 0.25 cup chopped fresh cilantro, and 0.25 cup chopped fresh mint leaves. Mix thoroughly with a whisk until you achieve a smooth, lump-free batter with a thick, pancake-like consistency.
Let the batter rest for 10 minutes at room temperature. This resting period allows the chickpea flour to fully hydrate and develop its binding properties, which is essential for maintaining the pakora's structure during frying. The batter should be thick enough to coat the back of a spoon but still flow easily when poured.
Cut and Prepare the Bread Slices
Cut the 4 whole bread slices into 1-inch squares, ensuring each piece is uniform in size. This consistency is crucial for even cooking and crisping. Place the bread pieces in a shallow bowl and pour the 1 tbsp lemon juice over them, tossing gently to coat evenly. The acidity from the lemon juice helps tenderize the bread slightly and prevents it from absorbing too much oil during frying.
Let the bread squares soak in the lemon juice for 5 minutes, then drain any excess liquid. The bread should be moist but not dripping. This preparation step ensures your pakoras will have a delightful texture—crispy on the outside with a soft, flavorful interior.
Heat the Oil for Frying
Fill a deep, heavy-bottomed pot or Dutch oven with the 2 cups vegetable oil and heat it over medium-high heat until it reaches 350°F. Use a deep-fry thermometer to monitor the temperature—this precision is key to achieving crispy pakoras. If you don't have a thermometer, test the oil by dropping a small piece of bread into it. It's ready when small bubbles form around the bread and it floats to the surface within 10 seconds.
Maintain the oil temperature at 350°F throughout the frying process. Fluctuations in temperature can lead to greasy pakoras instead of crispy ones. Keep the heat steady and avoid overcrowding the pot, as this will lower the oil temperature and result in uneven cooking.
Fry the Pakoras in Batches
Working in batches of 4-5 pieces at a time, carefully place the lemon-coated bread squares into the hot oil using a slotted spoon. Fry for 2-3 minutes per side, turning occasionally, until they turn a deep golden brown color and are fully crispy. The pakoras should puff up slightly and develop a fragrant aroma as they cook. Avoid overcrowding the pot, as this will cause the oil temperature to drop and result in soggy pakoras.
Once golden brown, remove the pakoras with a slotted spoon and drain them on a paper towel-lined plate. The pakoras should be crispy to the touch and maintain their shape. If any pieces are undercooked, return them to the oil for an additional 30 seconds until fully crispy. The key to success here is patience—rushing the frying process will compromise the texture.
Serve Immediately with Dipping Sauce
Serve the pakoras immediately while they are still hot and crispy. Transfer them to a serving platter and sprinkle with an additional pinch of salt if desired. For an authentic touch, serve with a side of mint chutney or tamarind sauce for dipping. The contrast between the crispy exterior and the soft, herbed bread inside, combined with the tangy dipping sauce, creates a truly satisfying bite.
These pakoras are best enjoyed fresh, as they lose their crispiness as they cool. If you need to keep them warm, place them in a 200°F oven for no more than 10 minutes, covered with a clean kitchen towel to maintain their texture. The aromatic blend of cumin, chili, and fresh herbs will make these pakoras a standout appetizer or snack.
Pro Tips For Making Bread Pakora
- CRISP THE BREAD FIRST: Tear the bread into rough chunks and fry them in oil at 350°F (175°C) for 2-3 minutes until golden and slightly crisp—this prevents a soggy batter later. I learned this the hard way after making pakoras that turned into mushy dumplings.
- USE COLD WATER FOR BATTER: Mix chickpea flour with ice-cold water instead of room temp—it keeps the batter thick and prevents the bread from absorbing too much liquid. Trust me, your pakoras will hold their shape better.
- DON’T OVERCROWD THE PAN: Fry in small batches (3-4 pieces at a time) or the oil temp drops, and you’ll end up with greasy, undercooked pakoras. I used to rush this and wondered why my first batch always tasted flat.
- ADD A PINCH OF BAKING SODA: Toss the fried bread chunks with a tiny pinch of baking soda (½ tsp) before mixing into the batter—it lightens the pakoras without altering the flavor. Sounds weird, but it works.
Make-ahead tips for this recipe
Batter Prep Ahead
Mix your chickpea flour batter the night before and store it in an airtight container in the fridge. The flavors meld beautifully overnight, and the batter thickens slightly, making it easier to coat the bread.
I like to add an extra ½ tsp salt if prepping ahead—it balances any moisture loss. The batter stays good for 24 hours, so you're ready to fry whenever cravings hit. 💫
Bread Prep Shortcut
Save time by cutting your bread into triangles the night before and storing them in a ziplock bag with a paper towel to absorb moisture. When ready to fry, simply toss them in lemon juice for 5 minutes before dipping.
For extra crispiness, I sometimes lightly toast the bread slices for 2 minutes before cutting—this prevents them from getting soggy during frying. 🔥
Oil Management Tips
Keep your frying oil hot and ready by preheating it in a heavy-bottomed pot (like a Lodge cast iron) while you prep the batter. I like to maintain the oil at 350°F using a Thermoworks thermometer—it's a game-changer for consistent results.
If you're frying in batches, keep the oil covered between uses to prevent temperature drops. 🌡️
Make-Ahead Serving
For parties or gatherings, fry all your pakoras ahead of time and store them in a 200°F oven on a wire rack (covered loosely with foil) for up to 30 minutes
This keeps them warm and crispy. I also like to pre-make a batch of mint chutney and store it in the fridge—it pairs perfectly with the pakoras. Just reheat the pakoras in the oven for 5 minutes before serving. ✨ While pakoras don't freeze well, you can freeze the unfried batter for up to 1 month. Thaw it in the fridge overnight, then fry as usual. For a quick snack, I sometimes freeze individual portions of batter in ice cube trays, then transfer to a bag. Fry straight from frozen—just add 1 extra minute to the cooking time. 💡 Double the recipe and fry in two batches to avoid overcrowding. Store the extra pakoras in a paper bag at room temperature for 2 days—they stay crispy longer than in containers. I like to portion them into single-serving bags for easy grab-and-go snacks. For a restaurant-style presentation, arrange them on a platter with fresh cilantro and serve with warm chutney. 🍽️Freezer-Friendly Hack
Batch Cooking Strategy
Nutrition facts
Frequently asked questions
Can I use any type of bread for this recipe?
While white bread works perfectly, you can experiment with gluten-free bread, naan, or even pita for variety. The key is using slightly stale or lightly toasted slices—they hold up better during frying. Avoid soft breads like brioche, as they'll absorb too much oil and become greasy.
Why does my batter look too thin or too thick?
The batter should be thick enough to coat the back of a spoon but still flow smoothly. If too thin, add 1 tablespoon chickpea flour at a time. Too thick? Stir in 1 teaspoon water until pourable. The resting time (10 minutes) helps adjust consistency naturally.
How do I keep my pakoras crispy when serving?
Serve immediately after frying while hot and crispy. For parties, keep them warm in a 200°F oven on a wire rack (covered loosely with foil) for up to 30 minutes. Reheat individual pieces in the oven for 5 minutes to restore crunch.
Can I make this recipe without deep-frying?
For a lighter version, try air-frying at 375°F for 4-5 minutes, shaking halfway. The texture will be less crispy but still delicious. Alternatively, bake at 425°F for 12-15 minutes on a wire rack for a healthier option.
What's the best way to store leftovers?
Store in an airtight container at room temperature for 2 days—they lose crispness faster than other fried foods. For longer storage, freeze the batter only (not fried pakoras) for up to 1 month. Thaw overnight before frying fresh portions.