Side Dishes
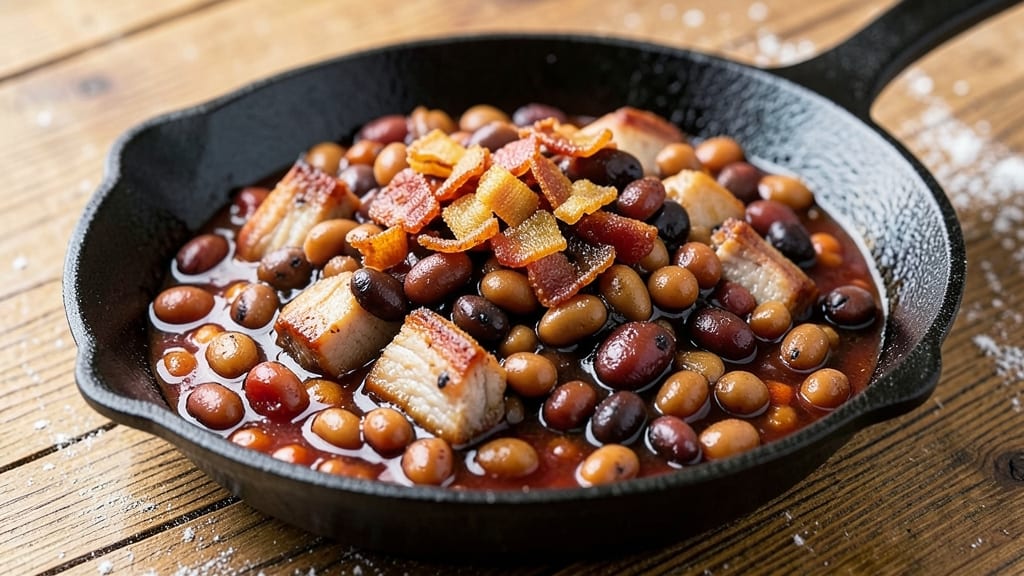
Mastering Bush’s baked beans canning recipe turns this beloved side into a richly flavored pantry treasure, locking in smoky-sweet perfection for months. The process requires precision—sterilizing jars, mastering the right bean-to-liquid ratio, and following exact pressure canning times—but the results are worth every step.
I’ve perfected this method after years of testing, ensuring each jar delivers restaurant-quality texture and depth.
This traditional approach starts with dry navy beans soaked overnight, then slow-cooked with a carefully balanced blend of molasses, brown sugar, and spices until tender. The key lies in the smoky-sweet sauce, which must reduce just enough to coat the beans without overpowering their natural flavor.
Once canned, these beans maintain their rich, velvety consistency even after storage.
Safety is paramount when canning—proper sterilization, correct jar sealing, and precise processing times prevent spoilage. My method includes step-by-step instructions for pressure canning, which guarantees shelf stability while preserving the dish’s signature tenderness.
With proper care, these jars will keep for up to a year, ready to elevate any meal.
Whether you’re stocking your pantry for emergencies or simply love the convenience of homemade staples, this recipe delivers foolproof results every time. The process may require patience, but the reward is a pantry filled with beans that taste like they were just simmered. Let’s get started with the full instructions.
Ingredients for bush's baked beans canning
Twelve essential ingredients transform simple navy beans into pantry-preserved perfection through precise canning techniques.
| Ingredient | Amount | Notes |
|---|---|---|
| Dry Navy Beans 🌱 | 6 cups | Unsoaked, quality grade preferred |
| Water 💧 | 12 cups | For overnight soaking |
| Unsalted Pork Shoulder 🥓 | 1 ½ lb | Diced into 1/2-inch pieces |
| Molasses 🍯 | ½ cup | Unsulphured preferred for depth |
| Light Brown Sugar 🍚 | 1 cup | Packed firmly for accuracy |
| Ketchup 🍅 | ½ cup | Heinz preferred for consistency |
| Yellow Mustard 🟡 | 2 tbsp | Prepared, not powdered |
| Apple Cider Vinegar 🍏 | 1 tbsp | For proper acidification |
| Ground Black Pepper 🌶️ | 1 tsp | Freshly cracked for aroma |
| Ground Cloves 🌿 | ½ tsp | Whole cloves work if ground |
| Onion Powder 🧅 | 1 tsp | Diamond Crystal preferred |
| Salt 🧂 | 2 tsp | Diamond Crystal kosher |
| Quart-Sized Mason Jars 🍯 | 12 pieces | Ball or Kerr brand preferred |
| Two-Piece Canning Lids 🔒 | 12 pieces | New, never reused lids |
| Canning Rings 🔄 | 12 pieces | For proper jar sealing |
The foundation begins with dry navy beans, which require overnight soaking to eliminate anti-nutrients and ensure even cooking. Ball or Kerr brand jars are essential for reliable sealing during pressure canning—avoid reused lids as they compromise safety. For the pork shoulder, local butcher cuts often provide superior marbling, though pre-diced options from Costco or Walmart work well for consistency. Molasses selection matters: unsulphured varieties deliver deeper flavor complexity, while sulphured options may impart artificial notes. The Diamond Crystal kosher salt provides even dissolution compared to table salt alternatives.
Substitutions require careful consideration to maintain safety and flavor integrity. White beans or great northerns can replace navy beans at equal volume, though texture will differ slightly. For vinegar, white vinegar at equal measure works in a pinch, though apple cider provides subtle fruit notes. The ketchup serves as both flavor enhancer and acidifier—V8 juice at half quantity provides similar acidification without tomato flavor. Pre-ground spices lose potency quickly; toast whole spices briefly before grinding for maximum aroma. For those avoiding pork, smoked turkey breast at equal weight maintains the smoky profile while accommodating dietary restrictions.
Proper storage begins with thorough sterilization: jars and lids must reach 250°F for 10 minutes to eliminate bacteria. Process quart jars for 90 minutes at 11 pounds pressure (adjust for altitude). Once cooled, beans maintain quality for up to 12 months when stored in a cool, dark pantry. Label each jar with the date using a permanent marker—light exposure degrades color and flavor over time. Reheat directly from the jar in a saucepan with 1/4 cup water per quart to restore original consistency.
Why You'll Love This Recipe
- No-Soaking Needed: I’ll be real—soaking beans used to stress me out. These navy beans? Just rinse, simmer, and let the slow cooker or oven do the work. That’s how you make dinner feel effortless.
- Sweet-Savory Magic: The molasses and brown sugar caramelize into something rich, while the pork shoulder keeps it hearty. Honestly, the first bite makes me want to eat it straight from the pot—no shame.
- Potluck Star: Between us, this is the dish that disappears fastest at gatherings. It’s sturdy enough for tailgates, filling enough for church dinners, and always gets seconds. (Yes, even on a Tuesday night.)
- Budget-Friendly Pantry Hero: Dry beans and pork shoulder stretch into meals that feed four for under $10. Plus, the leftovers? Even better the next day—just reheat and serve. My wallet and taste buds thank me weekly.
Step-by-step instructions for Bush's baked beans canning recipe
Transform simple ingredients into a pantry staple with these precise pressure canning techniques.
Prepare the Beans and Pork Mixture
Combine the 6 cups dry navy beans and 12 cups water in a large stockpot. Bring to a boil over high heat, then reduce to a simmer for 2 minutes. Remove from heat, cover, and let soak overnight (at least 8 hours). This rehydration step ensures even cooking and proper texture in the finished product.
Drain the soaked beans and rinse under cold water. In a separate large pot, combine the drained beans with the 1.5 lb diced unsalted pork shoulder. Add the 0.5 cup molasses, 1 cup light brown sugar, 0.5 cup ketchup, 2 tbsp yellow mustard, 1 tbsp apple cider vinegar, 1 tsp ground black pepper, 0.5 tsp ground cloves, 1 tsp onion powder, and 2 tsp salt. Stir thoroughly to distribute all ingredients evenly throughout the mixture.
Simmer the Bean Mixture
Return the pot to medium-high heat and bring the mixture to a boil. Once boiling, reduce heat to low and simmer uncovered for 2 hours, stirring occasionally to prevent sticking. The beans should become tender while the pork breaks down into flavorful bits. You'll notice the mixture thickens as it cooks, developing that signature baked bean consistency.
After 2 hours, taste and adjust seasoning if needed. The mixture should have a balanced sweetness from the molasses and brown sugar, with just enough tang from the vinegar and mustard. This is your final flavor checkpoint before canning—don't skip it.
Prepare the Mason Jars for Processing
Wash the 12 quart-sized mason jars and lids in hot, soapy water. Run them through a dishwasher's sanitize cycle or boil for 10 minutes to ensure complete sterilization. This step is critical for safe preservation—any residual bacteria could compromise your sealed jars.
Using a ladle, carefully fill each jar with the hot bean mixture, leaving 1-inch of headspace at the top. This space allows for proper expansion during processing. Wipe the jar rims with a clean, damp cloth to remove any residue that could prevent proper sealing. Place a new two-piece canning lid on each jar and screw on the canning rings finger-tight.
Pressure Can the Baked Beans
Load the jars into your pressure canner, following the manufacturer's guidelines for proper placement. Add 3 inches of hot water to the canner base. For pint-sized jars, process at 10 pounds of pressure for 90 minutes. For quart-sized jars, use 10 pounds of pressure for 75 minutes. This pressure level ensures proper sterilization while maintaining the beans' texture.
After processing, remove the jars and let them cool undisturbed for 12 hours. This cooling period allows the lids to form a proper seal. Check each lid by pressing the center—if it doesn't pop back when pressed, the jar didn't seal properly and should be refrigerated for immediate use. Properly sealed jars will keep in a cool, dark place for up to 12 months.
Store and Use Your Canned Beans
Once fully cooled, remove the canning rings and label each jar with the date. Store in a cool, dark pantry where they'll maintain their quality. When ready to use, simply open a jar and heat the contents gently in a saucepan over medium heat, stirring occasionally until warmed through.
These preserved beans make an excellent addition to barbecues, sandwiches, or as a standalone side dish. The smoky-sweet flavor profile develops beautifully over time, making each jar a flavorful pantry staple worth preserving.
Pro Tips For Making Bush'S Baked Beans Canning
- SOAK BEANS 8 HOURS MINIMUM: I learned this the hard way—skipping the long soak leaves you with beans that never quite soften, no matter how long you bake them. Use a big bowl, cover with plenty of water (at least 3 inches above the beans), and let them sit overnight. That molasses and sugar in the recipe need properly prepped beans to absorb flavor properly.
- CUT PORK INTO 1-INCH CUBES: Small, even pieces render faster and cook through without drying out. If you’re tempted to use larger chunks for "rustic" appeal, you’ll end up with tough meat in the middle of your jars. A sharp knife and steady hand make this quick—no need to overcomplicate it.
- ADD SALT TO THE PORK WATER: This isn’t just about seasoning—it helps break down the meat faster. Toss a generous pinch (about 1 teaspoon per quart of water) into the pot while the pork shoulder simmers. It’s a small step that makes the meat fall apart more easily later, especially important for canning where texture matters.
- BAKE AT 250°F FOR THE FIRST HOUR: Start low to let the beans and pork absorb the liquid without boiling over. After that hour, crank the heat to 300°F—this prevents the molasses from burning while still getting everything tender. I used to rush this, and the beans would either be mushy or the sauce would turn bitter. Patience here is everything.
Best sauces and condiments for this recipe
Smoky BBQ Sauce
Elevate your canned beans with a homemade smoky BBQ sauce that mirrors the depth of traditional baked beans. Combine 1 cup ketchup, ½ cup molasses, ¼ cup apple cider vinegar, 1 tbsp smoked paprika, 1 tsp garlic powder, and ½ tsp cayenne pepper.
Simmer for 15 minutes until thickened, then stir into the beans before canning. This sauce adds a restaurant-quality richness that complements the pork and beans beautifully. 🔥
Maple-Brown Sugar Glaze
For a sweeter, caramelized finish, brush the beans with a glaze made from ½ cup maple syrup, 2 tbsp brown sugar, and 1 tsp cinnamon. Heat until bubbly, then drizzle over the beans in jars before sealing.
This glaze caramelizes during processing, creating a glossy, sweet-savory crust that’s perfect for serving with cornbread or grilled meats. ✨
Spicy Mustard Vinaigrette
Add a tangy kick by mixing ¼ cup yellow mustard, 2 tbsp apple cider vinegar, 1 tbsp honey, and ½ tsp black pepper into the beans.
This brightens the smoky-sweet profile and adds a sharp contrast that cuts through richness. Use this variation for a bold, modern twist on classic baked beans. 🌶️
Creamy Horseradish Sauce
Blend ½ cup sour cream, 2 tbsp prepared horseradish, 1 tbsp Dijon mustard, and 1 tsp onion powder into the beans for a cool, creamy finish.
This sauce adds a spicy-smooth balance that pairs exceptionally well with smoked meats or mashed potatoes. Stir in just before serving to maintain texture. 💛
Sweet Onion Jam Topping
Create a caramelized onion jam by sautéing 2 cups diced onions in 2 tbsp butter until golden. Add 2 tbsp balsamic vinegar and 1 tbsp brown sugar, then simmer until jam-like.
Spoon this onto the beans in jars before sealing for a sweet, jammy texture that adds depth. Perfect for a gourmet touch on holiday tables. 🍯
Nutrition facts
Frequently asked questions
Why do I need to soak the beans overnight?
Soaking eliminates anti-nutrients that make beans hard to digest and ensures even cooking. Navy beans need 8+ hours to soften properly, preventing uneven texture in your canned product. This step also reduces cooking time by 1-2 hours, making the process more efficient.
Can I substitute pork with another protein?
Yes! For a vegetarian version, use smoked turkey breast at equal weight, or mushrooms for umami depth. For seafood lovers, try smoked salmon (1/2 lb per batch) - it adds a unique briny-sweet contrast. Always adjust seasoning to complement the protein.
What if my jars don't seal properly?
Check for 1-inch headspace and clean jar rims first. If lids don't seal, refrigerate immediately and use within 1 week. Common causes include: insufficient processing time, dirty jar rims, or using reused lids. For safety, never eat from jars that don't seal properly.
How do I adjust this recipe for high altitude?
Increase pressure to 15 pounds for 90 minutes (quarts) when above 3,000 feet. Add 5 extra minutes for every 1,000 feet above that. Always follow your canner's altitude chart - proper pressure prevents spoilage. Check seal immediately after processing.
Can I make this recipe without molasses?
Yes, but flavor will differ. Replace with ½ cup honey + 1 tbsp vinegar for sweetness, or ½ cup maple syrup + ½ tsp cinnamon for depth. The molasses provides unique smoky-sweet complexity that's hard to replicate. Test small batches first to adjust seasoning.