
Soups & Stews
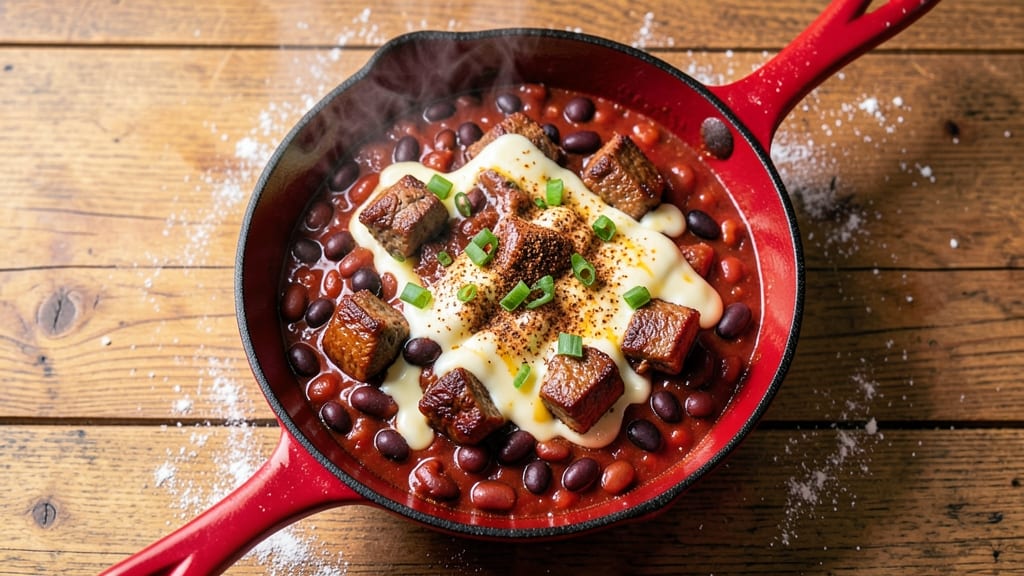
Bush's Homestyle Chili recipe delivers that deep, rich flavor that only comes from slow-simmered beef, hearty beans, and a blend of spices that develop as they cook. The secret lies in layering flavors—browning the meat first to build depth, then letting everything meld together over time.
My version stays true to the classic while adding a few professional touches that make it stand out, like a touch of cocoa powder for complexity and a precise spice balance that never overpowers.
What sets this chili apart is its foolproof method that works every time, even for beginners. With just 10 ingredients and 3 hours of hands-off cooking (mostly simmering), you get a pot of chili that tastes even better the next day.
The beef becomes tender, the beans soak up all the flavor, and the spices create a perfect harmony of smoky, slightly sweet, and savory notes. This is the kind of chili that disappears from the pot faster than you can say "second helping."
The result is a deeply flavorful, hearty chili with a thick, velvety texture that clings to every spoonful. The aroma alone will have everyone gathering around the table, and the taste—rich, satisfying, and full of character—is exactly what makes this a comfort food classic.
Whether you're feeding a crowd or saving leftovers for tomorrow, this recipe delivers restaurant-quality results at home.
Serve it with cornbread, crusty bread, or over rice to soak up every last drop of that flavorful broth. The beauty of this recipe is its versatility—it works as a main dish, a potluck favorite, or even a meal prep staple.
Let's get started on creating your own pot of homestyle perfection.
Ingredients for bush's homestyle chili
Ten simple ingredients that transform into chili so rich it gets better the next day.
| Ingredient | Amount | Notes |
|---|---|---|
| Chuck Roast Beef 🥩 | 2 lb | Cut into 1-inch cubes, boneless |
| Kidney Beans 🌱 | 1 ½ cups | Dried or canned, drained |
| Black Beans 🌱 | 1 cup | Canned, drained and rinsed |
| Tomato Paste 🍅 | ½ cup | Smooth texture preferred |
| Chili Powder 🌶️ | 2 tbsp | Medium heat, not hot |
| Ground Cumin 🌿 | 1 tbsp | Toasted for deeper flavor |
| Dried Oregano 🍃 | 1 tbsp | Mexican oregano if available |
| Unsweetened Cocoa Powder 🍫 | 1 tbsp | Dutch-processed for smoothness |
| Garlic Cloves 🧄 | 4 cloves | Minced, fresh preferred |
| Yellow Onion 🧅 | 1 whole | Medium, diced |
| Beef Broth 💧 | 2 cups | Low-sodium preferred |
| Water 💧 | 1 cup | For thinning consistency |
| Salt 🧂 | 1 ½ tsp | Adjust to taste |
| Black Pepper 🌶️ | ½ tsp | Freshly ground preferred |
The beef is everything here—chuck roast gives you that melt-in-your-mouth texture after hours of simmering. Grab the pre-cubed kind from Costco or your local butcher to save time, but if you're buying a whole roast, cube it yourself. Look for good marbling—it keeps the meat juicy. For the beans, dried takes longer but tastes better, but canned works in a pinch (just rinse them well). The tomato paste? Squeeze tubes from Trader Joe's are perfect—no waste, and they keep forever. Toast your spices in a dry pan for 30 seconds before adding to the pot—that extra step makes all the difference.
No cocoa powder? Dark chocolate chips (60% or higher) work too—use half the amount. Short on kidney beans? Pinto or navy beans swap one-for-one. The chili powder can be swapped for 1 tbsp each smoked paprika and regular chili powder if you want more depth. For the broth, homemade is ideal, but even bouillon cubes in a pinch will work. The garlic and onion? Fresh is best, but powdered spices can cut it if you're in a rush. Just remember: the longer you cook it, the more the flavors meld together—that's when the magic happens.
This chili tastes even better the next day—plan ahead. Store in an airtight container for 4-5 days in the fridge or freeze for up to 3 months. I like to portion it into individual containers so I can grab a bowl straight from the freezer. The flavors only get richer over time, so don't skip the leftovers. Serve it with cornbread or crusty bread to soak up every last bit of that velvety broth. Trust me, the second day is when it really shines.
Why You'll Love This Recipe
- One-Pot Magic: I swear by this—just dump everything in one pot, stir, and let it do its thing. No chopping, no fussing, and that chuck roast practically melts into tender perfection while you’re watching TV.
- Deep, Rich Heat: The chili powder and tomato paste work together like a dream, creating that just-right smoky warmth without overpowering. Kidney and black beans add texture, but it’s the beef that makes it feel like a hug in a bowl.
- Weeknight Hero: Between us, this is my go-to when I need something hearty but don’t want to slave over the stove. Tastes even better the next day (yes, I’ve tested this), so it’s perfect for meal prep or feeding a crowd.
- Budget-Friendly Powerhouse: Chuck roast stretches for miles, and beans keep it affordable without sacrificing flavor. Honestly, I make a double batch just to have leftovers—because who wants to cook twice?
Step-by-step instructions for Bush's homestyle chili
Here's how to build a chili so rich and flavorful it improves overnight—just like Bush's famous version.
Brown the Chuck Roast for Deep Flavor
Heat a large Dutch oven over medium-high heat and add the 2 lb chuck roast beef cut into 1-inch cubes. Don't crowd the pan—work in batches if needed. Let the beef brown for 5-6 minutes per side until it develops a deep caramelization. This step is non-negotiable for that authentic meaty depth.
Once browned, transfer the beef to a plate and set aside. You'll notice the pan has beautiful browned bits—those are pure flavor. Don't wipe them out. This is where the magic happens when we add the aromatics later.
Sauté Aromatics Until Fragrant
In the same Dutch oven, add the 1 whole yellow onion (diced) and 4 cloves garlic (minced). Cook for 4-5 minutes until the onions soften and turn translucent. The garlic should smell incredible—this is when it's ready to be incorporated.
Stir in the 2 tbsp chili powder, 1 tbsp ground cumin, 1 tbsp dried oregano, and 1 tbsp unsweetened cocoa powder. Cook for another 1 minute to toast the spices slightly. This blooms their flavors and removes any raw taste. Don't skip this—it makes all the difference.
Build the Chili Base
Add the 0.5 cup tomato paste and stir to combine with the spices. Cook for 2 minutes until it darkens slightly. Pour in the 2 cups beef broth and 1 cup water, scraping up any browned bits from the bottom of the pan. This ensures you capture all that meaty flavor.
Return the beef to the pot and bring everything to a gentle simmer. Partially cover and let it cook for 1.5 hours on low heat. This long, slow cook allows the flavors to meld perfectly and the beef to become fork-tender.
Add Beans and Season
After 1.5 hours, stir in the 1.5 cups kidney beans and 1 cup black beans. Add the 1.5 tsp salt and 0.5 tsp black pepper. Taste the chili and adjust the seasoning if needed—this is where you can really customize it to your preference.
Continue simmering for another 30-45 minutes until the chili reaches your desired consistency. The longer it simmers, the deeper the flavors become. This is why it gets better with time—just like Bush's famous recipe.
Rest and Serve
Once the chili is fully cooked, remove it from heat and let it rest for 10-15 minutes. This allows the flavors to settle and the chili to thicken slightly. Serve it hot with your favorite toppings like shredded cheese, sour cream, or chopped green onions.
The chili should be rich, hearty, and full of that deep, smoky flavor that comes from slow cooking. Each bite should deliver a perfect balance of tender beef, spiced beans, and that unmistakable Bush's homestyle taste. Enjoy it with family and friends—it's a crowd-pleaser!
Pro Tips For Making Bush'S Homestyle Chili
- CRUST THE CHUCK: Brown that roast beef in two batches if your pan’s too crowded—golden edges make all the difference. I learned this after a batch tasted bland; the Maillard reaction isn’t optional here.
- SOAK BEANS OVERNIGHT: Skip the quick-soak shortcut—kidney and black beans need 8+ hours in water to break down properly. I used to rush this, and the chili always ended up gummy.
- STIR THE TOMATO PASTE: Don’t just dump it in—whisk it with a splash of broth first to prevent clumping. My first attempt had globs of paste floating like alien eggs, and it ruined the texture.
- SIMMER LOW AND LONG: After the initial sear, drop the heat to a bare simmer (180°F/82°C) and let it cook for 2.5–3 hours. I used to walk away too soon, and the beans stayed hard—patience here is non-negotiable.
Perfect pairings for this bush's homestyle chili
Classic Toppings
Start with shredded sharp cheddar cheese—it melts beautifully into the chili and adds a tangy contrast to the smoky spices. I like to use Kraft 2% Mexican blend for that perfect balance of sharpness and creaminess.
For extra richness, top with a dollop of sour cream (I prefer Breakstone's for its thick, tangy texture) or a spoonful of crème fraîche for a lighter option. Freshly chopped green onions or cilantro add a bright, herby finish that cuts through the richness. 🧀
Bread Pairings
Serve this chili with warm cornbread—the slightly sweet, crumbly texture soaks up the thick broth perfectly. My go-to recipe uses Jiffy mix for convenience, but I always add a pinch of cayenne pepper and a splash of buttermilk for extra moisture.
For a heartier option, try crusty sourdough bread or fresh tortilla chips on the side. The crust helps scrape up every last bit of that flavorful chili. 🍞
Drink Recommendations
A cold Mexican lager like Modelo Especial or Pacifico cleanses the palate between bites and complements the chili’s smoky depth. For a non-alcoholic option, sparkling limeade (I love Jarritos for its bright, citrusy flavor) adds a refreshing contrast.
If you prefer wine, a bold Zinfandel or Cabernet Sauvignon stands up to the rich, spiced flavors without overpowering them. 🍺
Unexpected Twists
Add a squeeze of fresh lime juice just before serving—it brightens the flavors and adds a zesty kick. For a smoky touch, sprinkle with crumbled blue cheese (like Maytag Blue) or a dash of smoked paprika.
A handful of pickled jalapeños or red onions introduces a tangy crunch that elevates the dish. These toppings turn a classic chili into something special. 🌶️
Make-Ahead Serving
If you're prepping ahead, store the chili in an airtight container and let it cool completely before refrigerating. The next day, reheat it gently on the stove with a splash of beef broth to restore its velvety texture.
Serve with warm tortillas or rice to stretch the meal further. The flavors deepen overnight, making leftovers even more delicious. ⏳
Nutrition facts
Frequently asked questions
Can I use ground beef instead of chuck roast?
Yes, but the texture will be different. Ground beef works in a pinch, but chuck roast stays tender and flavorful after hours of simmering. For a compromise, try 80/20 ground chuck—it has enough fat to stay juicy while still breaking down nicely. Just brown it well first to build deep flavor.
Why does this chili taste better the next day?
The flavors deepen through a process called flavor melding. As the chili cools, the spices and meat absorb the broth, creating a richer, more complex taste. The starches in the beans also thicken slightly, making each spoonful more satisfying. Always plan for leftovers!
Can I make this chili in a slow cooker?
Brown the beef first in a skillet, then transfer everything to your slow cooker. Cook on low for 6-7 hours or high for 3-4 hours. The slow cooker's gentle heat helps tenderize the beef and blend flavors perfectly. Just add the beans and broth at the beginning and let it work its magic.
What if my chili is too thin?
Simmer uncovered for 10-15 minutes to reduce the liquid. If it's still too thin, mash 1/2 cup of the beans against the pot's side to thicken naturally. For an instant fix, stir in 1 tablespoon of cornstarch mixed with 1 tablespoon water and simmer for 2 minutes. Never add flour—it can make the chili taste raw.
How do I adjust the spice level?
Start with the 2 tbsp chili powder as written, then taste and adjust. For milder heat, reduce to 1 tbsp and add 1/2 tsp smoked paprika for depth. For extra kick, stir in 1/2 tsp cayenne pepper or a dash of hot sauce. Always taste as you go—you can't overdo it with more beans or broth later!