
Soups & Stews
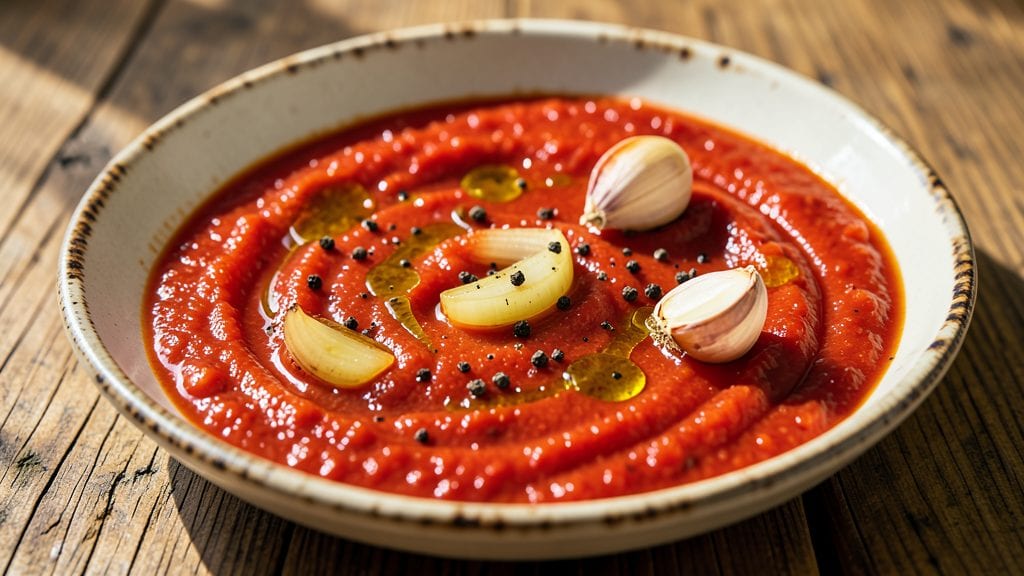
This canned tomato puree recipe transforms fresh tomatoes into silky smooth puree—your secret weapon for sauces, soups, and stews that beat store-bought versions. This method preserves the natural sweetness and depth of tomatoes while creating a concentrated, flavorful paste that elevates everything from marinara to chili.
I developed this recipe after realizing how much richer homemade puree tastes compared to commercial options—it's the secret weapon behind restaurant-quality dishes.
The process is straightforward: ripe tomatoes are blended, strained, and simmered with aromatics before being canned or refrigerated for long-term use. You'll need just a few simple ingredients—tomatoes, onion, garlic, olive oil, and basic seasonings—to create a puree that's smoother than blended tomatoes but more flavorful than store-bought.
The key lies in proper straining and simmering to remove skins and seeds while intensifying the tomato flavor.
What you'll end up with is a velvety, rich tomato puree that forms the foundation for countless recipes—think velvety soups, rich sauces, or hearty stews. This puree keeps for months when canned or lasts up to a week refrigerated, making it perfect for meal prep and seasonal cooking.
The texture is silky and smooth, with no lumps or skins, while the flavor is deeply concentrated and full-bodied.
Use this puree as a base for homemade pasta sauce, thicken soups, or enhance braised dishes with its rich tomato essence. The possibilities are endless, and having this on hand means you're always ready to create restaurant-quality meals at home.
Let's get started on making your own versatile tomato puree today.
Ingredients for canned tomato puree
Fresh tomatoes, simple aromatics, and a few pantry staples transform into restaurant-quality puree.
| Ingredient | Amount | Notes |
|---|---|---|
| Fresh Ripe Tomatoes 🍅 | 10 lb | Vine-ripened, skins removed |
| Yellow Onion 🧅 | 2 whole | Medium, roughly chopped |
| Garlic Cloves 🧄 | 6 cloves | Peeled, whole for simmering |
| Extra-Virgin Olive Oil 🫒 | ½ cup | High-quality, fruity |
| Salt 🧂 | 1 tsp | Diamond Crystal preferred |
| Black Peppercorns 🌶️ | ½ tsp | Freshly cracked |
| Lemon Juice 🍋 | 2 tbsp | Freshly squeezed |
| Canning Salt 🧂 | 1 tsp | For processing jars |
| Pint-Sized Mason Jars 🥫 | 8 jars | With screw bands |
| Canning Lids 🔒 | 8 pieces | New, unopened lids |
The tomatoes are everything here. Heirloom or vine-ripened tomatoes have the best flavor, but any ripe variety works—just avoid bruised ones. I usually grab local market tomatoes when they're in season, but grocery store tomatoes (like Roma) work fine too. The onion and garlic add depth, so don't skip them—Trader Joe's sells pre-minced garlic that saves time, but fresh is better. For olive oil, California Extra Virgin brands like Corto or Lucini make a noticeable difference. The key is using ripe tomatoes—if they're green, they won't develop that sweet, jammy flavor you want in the puree.
No fresh tomatoes? Canned crushed tomatoes work in a pinch, but you'll lose some of that fresh flavor. Short on garlic? Garlic powder at half the amount gets you close, but fresh is ideal. The lemon juice brightens everything, so if you're out, white wine vinegar works too. For canning, Mason jars with new lids are a must—never reuse old lids. The puree will keep for 12-18 months in the pantry if canned properly, but it's also delicious refrigerated for up to a week. If you're not canning, freeze portions in ice cube trays for easy use later.
This puree is incredibly versatile—use it as a base for marinara, thicken soups, or even enhance braised dishes. The texture is silky smooth, with no lumps or skins, thanks to the straining process. Store jars upright in a cool, dark place for best results. If you're making a big batch, double the recipe—it freezes beautifully too. The puree tastes even better after a few days as the flavors meld together. Trust me, once you try homemade, store-bought will never compare again.
Why You'll Love This Recipe
- No-Chop Necessary: I swear by this—just toss whole tomatoes into boiling water, peel them, and crush. No knife skills required. The onions and garlic soften right into the puree, so you’re not left with a pile of scraps.
- Umami Bomb: That slow simmer with olive oil and garlic? It turns simple tomatoes into something rich and layered. Honestly, the first time I tasted it, I thought, "Wait, I’m making sauce?"—and it’s just five ingredients.
- Pantry Staple: Freeze half for when you’re too tired to cook. Toss it into pasta, braise with meat, or blend into soups. I keep a jar in my fridge for those nights when I need flavor fast—no fancy shopping, just puree magic.
- Budget Magic: A single can of tomatoes stretches into meals for days. Between us, this is how I feed my family for under $5. The salt and oil are the only extras, and you control how much you use—no waste, just savings.
Step-by-step instructions for silky smooth tomato puree
Transforming fresh tomatoes into velvety puree requires patience and precision—here's how to achieve flawless results every time.
Prepare and Simmer the Tomato Base
In a large, heavy-bottomed pot, combine the 10 lb fresh ripe tomatoes, 2 whole yellow onion (roughly chopped), and 6 cloves garlic cloves (peeled and whole). The tomatoes should be cut into even pieces about 1-inch thick to ensure consistent cooking. Add the 0.5 cup extra-virgin olive oil and 1 tsp salt, stirring gently to distribute the oil over the tomatoes.
Bring the mixture to a boil over medium-high heat, then immediately reduce to medium-low. Let it simmer uncovered for 45-60 minutes, stirring occasionally. You're looking for the tomatoes to break down completely and the mixture to reduce by about half. The onions should soften and the garlic should infuse its flavor without burning. The puree should develop a deep, rich color and a thick, syrupy consistency—this is your signal that the base is ready for the next stage.
Blend Until Silky Smooth
Carefully transfer the simmered tomato mixture to a food processor or high-powered blender, working in batches if necessary. I prefer using a food processor for this step because it handles larger volumes more efficiently. Add the 0.5 tsp freshly cracked black peppercorns and 2 tbsp freshly squeezed lemon juice to each batch before blending. The lemon juice brightens the flavor and balances the acidity, while the pepper adds a subtle depth.
Blend each batch until completely smooth, scraping down the sides as needed. You should end up with a velvety puree that coats the back of a spoon with no visible texture. If the mixture is too thick to blend smoothly, add a small amount of water (about 2 tablespoons at a time) until it reaches a pourable consistency. The final texture should be thick but still flow easily—this ensures your puree will work perfectly in sauces and soups without altering their consistency.
Sterilize Jars and Prepare for Canning
While the puree cools slightly, prepare your canning setup. Wash the 8 pint-sized mason jars and screw bands in hot, soapy water, then rinse thoroughly. Place the jars in a large pot and cover with water. Bring to a gentle boil for 10 minutes to sterilize. Meanwhile, keep the 8 new canning lids and screw bands hot by placing them in a separate small pot of simmering water.
Using a ladle or large spoon, carefully ladle the hot puree into the sterilized jars, leaving about ½-inch headspace at the top. Remove air bubbles by gently tapping the jars on the counter or using a bubble-free tool. Wipe the rims of the jars with a clean, damp cloth to ensure a proper seal. This step is critical—any residue can prevent the lids from sealing correctly.
Process and Seal the Jars
Place the lids on the jars and screw on the screw bands until they're fingertip-tight (not overly tight). Transfer the jars to a canning pot or large stockpot filled with about 2 inches of water. Bring the water to a gentle boil and process the jars for 75 minutes. The water should cover the jars by at least 1 inch to ensure even heat distribution.
After processing, carefully remove the jars using tongs and place them on a clean towel. Let them cool undisturbed for 12-24 hours. You'll know they've sealed properly when the lids pop or click slightly as they cool and create a vacuum seal. Once cooled, check each lid by pressing in the center—if it doesn't pop back up, the jar is sealed. Store the sealed jars in a cool, dark place for up to 1 year. The puree will keep its rich flavor and smooth texture, ready to elevate any dish from soups to sauces.
Pro Tips For Making Canned Tomato Puree
- CHAR THE ONION FIRST: Sauté the diced onion in olive oil until it’s deep golden—almost caramelized—before adding tomatoes. I learned this the hard way: skipping this step leaves your puree with a raw onion aftertaste that even long simmering can’t fix.
- SALT THE TOMATOES: Sprinkle a generous pinch of salt directly over the raw tomatoes before cooking. This draws out moisture and intensifies their flavor—like pre-seasoning your puree. (Yes, even if you’re using salted tomatoes later.)
- SIMMER LOW AND LONG: Reduce heat to the lowest setting after the tomatoes break down, and let it bubble gently for at least 45 minutes. Rushing this step leaves your puree watery and underdeveloped—patience here makes all the difference.
- SKIP THE PEELING: Leave the tomato skins on unless you’re obsessed with ultra-smooth texture. They add depth and fiber, and peeling hundreds of tomatoes is a waste of time. (Your blender will handle the rest.)
Common mistakes when making this dish
Skipping the Straining Step
One of the most common mistakes is blending tomatoes without straining them first. The skins and seeds add bitterness and grit to your puree, ruining its silky texture. I always use a fine-mesh sieve or cheesecloth to strain the simmered tomatoes before blending.
If you skip this step, your puree will taste uneven and look cloudy. For best results, strain the mixture twice—once after simmering and again after blending. 🌶️
Using Underripe Tomatoes
Green or underripe tomatoes lack the natural sweetness and depth that makes homemade puree shine. They’ll turn your puree sour and bland. Always choose fully ripe tomatoes—look for vibrant color, slight softness, and a sweet aroma at the stem.
If you’re working with mixed ripeness, remove any green tomatoes before processing. I’ve learned this the hard way: a batch of underripe tomatoes can turn your entire project into a flavor disaster.
Overfilling Jars
When canning, leaving too little headspace (less than ½-inch) or overfilling jars creates a vacuum seal failure. The puree expands during processing, causing jars to leak or fail to seal properly. Always use a headspace tool or jar funnel to measure accurately.
I mark my jars with a permanent marker at the ½-inch point to avoid guesswork. This simple step prevents wasted jars and ensures long-term storage.
Not Sterilizing Equipment
Failing to sterilize jars, lids, or tools introduces bacteria that can spoil your puree. Even a single unsterilized jar can ruin an entire batch. I always boil jars and lids for 10 minutes and keep tools hot in simmering water.
For extra safety, I wipe jar rims with vinegar-soaked paper towels before sealing. This step is non-negotiable—it’s the difference between a shelf-stable puree and a food safety risk.
Rushing the Simmering Time
Simmering tomatoes for less than 45 minutes leaves them watery and underflavored. The longer they cook, the more concentrated and rich the puree becomes. I’ve seen beginners rush this step, resulting in a thin, weak puree that lacks depth.
Patience here is key—let the tomatoes break down completely and reduce by at least half before blending. The reward is a puree so smooth and flavorful, it’ll make store-bought versions look inferior. ⏰
Ignoring Acidification
Tomato puree is naturally low in acid, which can lead to botulism if canned improperly. Always add lemon juice or vinegar (as in the recipe) to boost acidity. For extra safety, I add ½ tsp citric acid per quart of puree when canning.
This step is critical—never skip it, even if you’re refrigerating the puree. Proper acidification ensures your puree stays safe to eat for months. 💡
Nutrition facts
Frequently asked questions
Can I use canned tomatoes instead of fresh for this puree?
Yes, you can substitute 2 (28 oz) cans of crushed tomatoes for fresh tomatoes, but the flavor won't be as vibrant. For best results, add 1 extra tablespoon of lemon juice and ½ teaspoon of sugar to compensate for the lack of fresh tomato sweetness. Simmer for 30 minutes instead of 45-60 minutes since canned tomatoes are already cooked.
How do I adjust this recipe for a smaller batch?
For a half-batch, use 5 lb tomatoes, 1 onion, 3 garlic cloves, and ¼ cup olive oil. Process 4 pint jars instead of 8. The key is maintaining the same tomato-to-aromatic ratio (about 1 lb tomatoes per ½ onion) to preserve flavor balance. This works perfectly for meal prep or small households.
What's the best way to use this puree in recipes?
This silky puree is perfect for homemade marinara (simmer with herbs and crushed tomatoes), creamy soups (like minestrone), or braised dishes (deglaze pans for extra depth). For sauces, use ¼ cup per 1 lb pasta. The concentrated flavor means you need less than store-bought versions—it's the secret to restaurant-quality dishes at home.
Can I make this puree without canning?
Skip the canning process and store the puree in airtight containers in the fridge for up to 1 week or freeze in ice cube trays for 3 months. For freezing, portion into 1-tablespoon cubes for easy measurement in recipes. Thaw overnight in the fridge before using—never microwave directly from frozen.
Why does my puree look cloudy or have bits?
Cloudiness or bits usually mean you skipped the straining step or didn't simmer long enough. For a smoother result, strain through a fine-mesh sieve after simmering, then blend again. If you see skins, add 1 extra tablespoon of lemon juice and simmer 10 more minutes to break them down completely. Proper straining is key to that restaurant-quality texture!