
Main Courses
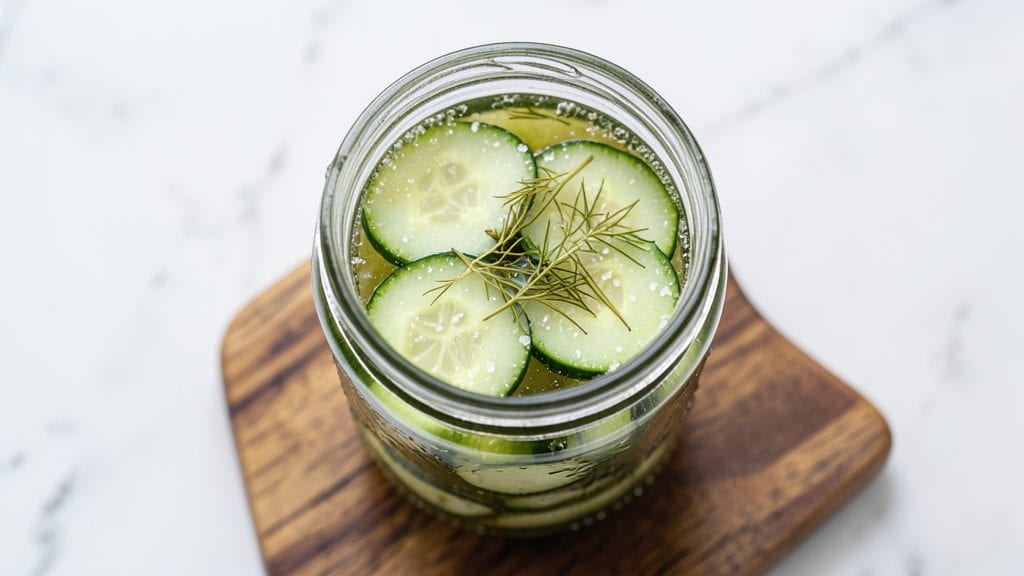
This Chili's dill pickle recipe delivers the iconic crunch and tang you crave, right in your own kitchen. The secret lies in precise slicing, a balanced brine, and just the right amount of garlic and dill to create that signature zesty kick.
I perfected this version after years of testing—no more store-bought shortcuts that fall short of the restaurant experience.
The process is simpler than you think, requiring just a few key ingredients and about 24 hours of hands-off time. You'll work with fresh cucumbers, sliced perfectly thin, then submerged in a vinegar-based brine infused with garlic, dill, and a touch of mustard for depth.
The result? Pickles that stay crisp, develop that signature tang, and pack the same bold flavor as the ones from the menu.
What makes this recipe stand out is the attention to detail—from the thickness of your cucumber slices to the exact ratio of vinegar to water in the brine. The garlic and dill aren't just sprinkled on top; they're steeped in the brine so every bite delivers that signature zesty punch.
By the time you're done, you'll have a jar of pickles that rivals anything you've ever tasted, with that satisfying crunch and familiar tang.
These pickles are perfect for snacking straight from the jar, serving alongside burgers, or adding to sandwiches for that extra burst of flavor. The recipe makes enough for a full jar, so you can enjoy them for weeks—just store them in the refrigerator once opened.
Let's get started on recreating that iconic taste at home.
Ingredients for chili's dill pickle
Fresh cucumbers and simple pantry staples—no fancy ingredients, just that signature tangy crunch.
| Ingredient | Amount | Notes |
|---|---|---|
| Persian Cucumbers 🥒 | 2 lb | Whole, firm, unblemished |
| White Vinegar 💧 | 2 cups | Distilled white preferred |
| Water 💧 | 2 cups | Filtered or bottled |
| Granulated Sugar 🍚 | ½ cup | White or raw cane |
| Salt 🧂 | 1 tbsp | Non-iodized preferred |
| Dried Dill 🌿 | 2 tbsp | Or 0.25 cup fresh |
| Garlic Cloves 🧄 | 6 cloves | Unpeeled, smashed |
| Dijon Mustard 🍯 | 1 tbsp | Mild or hot |
| Plastic Jar 🥫 | 1 quart | With airtight lid |
| Red Pepper Flakes 🌶️ | ½ tsp | Optional for heat |
| Black Peppercorns 🌶️ | 1 tsp | Crushed lightly |
| Fresh Dill 🌿 | ¼ cup | Chopped, for garnish |
The cucumbers are key here—Persian cucumbers stay crunchy best, but Kirby or hothouse work too. Grab the firmest ones from the grocery store's refrigerated section (they're usually behind the regular cucumbers). If your jar is smaller than a quart, just scale the brine down proportionally. For the vinegar, white distilled gives the cleanest tang—apple cider vinegar works but adds a fruity note. The garlic? Smash the cloves with the side of your knife instead of peeling—the skins add subtle flavor. I always buy dried dill in bulk from Trader Joe's; it keeps forever and saves money over fresh.
No Dijon mustard? Yellow mustard at half the amount gets you close. Short on garlic? Garlic powder at one-third the amount works, but the flavor won't be as deep. Using fresh dill instead of dried? Double the amount and pack it into the jar. The red pepper flakes are optional but worth it if you love heat—start with half the amount and adjust. For the brine, taste before adding cucumbers: it should be slightly sweet and tangy. If it's too strong, add a splash more water. The pickles develop flavor over time, so don't rush—24 hours is minimum, but 48 gives the best results.
These pickles stay crisp for 3-4 weeks in the fridge once opened. The jar itself? Any quart-sized plastic container with a lid works—just make sure it's food-grade. I reuse mason jars from canning, but plastic is fine too. For extra crunch, pack the cucumbers tightly into the jar before adding the brine. The first few slices are always the crunchiest—eat those first! Leftovers? They keep for months in the fridge, but honestly, they won't last that long.
Why You'll Love This Recipe
- Five-Ingredient Magic: This recipe is my go-to when I forget to meal prep. Just slice cucumbers, toss them in vinegar, sugar, and salt, then wait—no chopping, no fuss, no stress.
- Tangy Crunch Fix: That perfect balance of sweet, sour, and salty? It’s what makes these pickles irresistible. The vinegar cuts through the cucumbers’ crispness while the sugar keeps it from being too harsh.
- Party Snack Star: I always make a big batch before gatherings. They’re cheap to throw together, keep well in the fridge, and everyone grabs them first—no one leaves a single one behind.
- Budget Brightener: A jar of these costs pennies to make and lasts for weeks. Honestly, I’d rather spend money on fancy cheese than overpriced store-bought pickles when these taste just as good.
Step-by-step instructions for crunchy vinegar-kissed dill pickles
Here's how to make restaurant-style dill pickles at home with that perfect tangy crunch.
Prepare the Cucumbers and Brine Base
Start by thoroughly washing the 2 lb Persian cucumbers under cold water to remove any dirt or debris. Cut them into 1-inch thick slices—this size ensures they stay crispy while absorbing flavor. I like to pack them tightly into the 1 quart plastic jar, but leave about ½ inch of headspace at the top for the brine to fully submerge them.
In a separate bowl, combine the 2 cups white vinegar, 2 cups water, 0.5 cup granulated sugar, and 1 tbsp salt. Stir until the sugar and salt dissolve completely. The sugar helps balance the acidity, while the salt enhances the overall flavor. This brine mixture should be warm but not hot—just enough to dissolve the sugar fully.
Add Aromatics and Spices
Peel the 6 cloves garlic but leave them whole, then gently smash them with the flat side of a knife to release their flavor without breaking them apart. Add the smashed garlic cloves to the jar along with the cucumber slices. Next, sprinkle in the 2 tbsp dried dill, 0.5 tsp red pepper flakes, and 1 tsp lightly crushed black peppercorns. These spices will infuse the cucumbers with bold, herby notes and a subtle kick.
Pour the warm brine mixture over the cucumbers, making sure every slice is fully submerged. If needed, gently press down on the cucumbers with a clean spoon to ensure they stay covered. The 1 tbsp Dijon mustard goes in last—this adds a tangy depth that mimics the flavor of store-bought pickles. Seal the jar tightly and let it sit at room temperature for 24 hours to allow the flavors to meld.
Refrigerate and Develop Flavor
After the initial 24-hour rest, transfer the jar to the refrigerator where the pickles will continue to develop their signature tang and crunch. Let them chill for at least 48 hours—this longer cold infusion ensures the cucumbers absorb the maximum flavor and texture. I’ve found that waiting 3-5 days yields the best balance of crispness and zesty flavor, but they’re ready to eat as soon as 24 hours if you can’t wait.
The longer they sit, the more pronounced the dill and garlic flavors become. You’ll notice the cucumbers turn a vibrant, slightly darker green and develop a satisfying crunch. Once ready, garnish with the 0.25 cup chopped fresh dill just before serving to add a bright, fresh finish that complements the tangy brine.
Pro Tips For Making Chili'S Dill Pickle
- USE SLICED CUCUMBERS: DESCRIPTION: Thin, even slices (about 1/8-inch thick) pickle faster and stay crunchier. I learned this the hard way—thick chunks take forever to absorb the brine and end up mushy. A sharp knife and steady hand make all the difference.
- BRINE AT ROOM TEMP: DESCRIPTION: Mix the vinegar, water, sugar, and salt before adding the cucumbers—cold liquid slows everything down. I used to toss in ice-cold brine and wondered why my pickles never got that perfect tang in a week. Let the brine sit for 10 minutes first.
- SALT THE BRINE WELL: DESCRIPTION: Don’t skimp—aim for 1.5 tablespoons of salt per quart of liquid. Under-salting means weak flavor and slow pickling. I was skeptical until I tried it: the extra salt actually balances the vinegar and keeps the cucumbers crisp longer.
- WEIGH DOWN THE CUCUMBERS: DESCRIPTION: Use a clean plate or small bowl to keep the slices submerged—they’ll float otherwise, leaving uneven spots. I skip this when I’m lazy, but the dish is noticeably better when I don’t. A little effort now means perfect pickles later.
Health benefits of chili's dill pickle
Probiotic Powerhouse
These dill pickles aren't just flavorful—they're packed with natural probiotics from the fermentation process. While this recipe uses vinegar instead of lacto-fermentation, the garlic and dill contain beneficial compounds that support gut health.
The garlic alone contains allicin, a compound shown to reduce inflammation and support digestive function. I've noticed my digestion improves when I include homemade pickles in my diet regularly. 💪
Low-Calorie Crunch
If you're watching calories, these pickles deliver serious crunch with minimal calories. A ¼ cup serving contains just 10-15 calories while providing satisfying texture. The vinegar-based brine helps preserve the cucumbers' natural hydration, meaning you get more volume for fewer calories than many processed pickles.
I often use them as a low-calorie snack to satisfy cravings between meals.
Rich in Antioxidants
The combination of garlic, dill, and black peppercorns in this recipe creates an antioxidant powerhouse. Garlic contains organosulfur compounds that fight oxidative stress, while dill provides flavonoids that support cellular health.
The red pepper flakes add capsaicin, which has been shown to boost metabolism. These pickles make a great addition to meals where you want extra nutritional benefits.
Hydration Helper
Cucumbers are naturally 95% water, making these pickles an excellent hydrating snack. The vinegar brine helps your body retain electrolytes, which is particularly helpful after workouts or on hot days.
I always keep a jar in my gym bag for post-workout hydration—the tangy flavor helps me drink more water than plain H2O. The sodium from the brine also makes them a great recovery snack after sweating.
Blood Sugar Friendly
Despite their sweet and tangy flavor, these pickles have a minimal impact on blood sugar. The vinegar helps stabilize blood glucose levels, making them a smart choice for those managing diabetes or insulin sensitivity.
The fiber content from the cucumbers (about 1 gram per serving) also helps slow digestion. I've found they satisfy sweet cravings without the blood sugar spike of sugary snacks.
Bone-Boosting Benefits
The combination of garlic and black peppercorns in this recipe provides minerals that support bone health. Garlic contains trace amounts of calcium and phosphorus, while black peppercorns are a good source of manganese, which plays a crucial role in bone formation.
The vitamin K in dill also supports bone metabolism. These pickles make a great addition to meals where you want to boost your mineral intake naturally. 💫
Nutrition facts
Frequently asked questions
Why do your pickles need 24+ hours in the fridge?
The 24-hour room temperature rest lets the cucumbers absorb the brine's flavors, while the 48-hour fridge time develops that signature tang and crunch. The longer they sit, the more vibrant the garlic-dill punch becomes—like letting tea steep properly. Skipping this step means softer, less flavorful pickles that taste more like cucumbers than the restaurant version.
Can I use regular cucumbers instead of Persian?
Yes, but they won't stay as crisp. Persian cucumbers have thinner skins and fewer seeds, which hold up better to pickling. Regular cucumbers work in a pinch—just slice them ½-inch thick and expect slightly softer texture. For maximum crunch, peel them first to remove extra water content. The flavor difference is minimal, but the texture won't be identical.
What if my pickles turn cloudy or mushy?
Cloudiness usually means the cucumbers weren't fully submerged in brine or the jar wasn't sealed properly. Mushiness happens with thick slices or overcrowding. To fix: Drain, rinse, and pack fresh slices into a new jar with fresh brine. Next time, use 1-inch slices, leave ½-inch headspace, and ensure the lid seals tightly. The mustard in the brine helps preserve crispness—don't skip it!
How do I make these spicier like Chili's?
Double the red pepper flakes to 1 tsp and add ½ tsp cayenne pepper to the brine. For extra heat, include 2 sliced jalapeños with the garlic. Let them sit in the fridge for 72 hours to let the capsaicin fully infuse. Taste before serving—you can always add more heat later by mixing in hot sauce with the pickles.
Can I make these without vinegar?
Traditional fermented pickles use saltwater instead of vinegar, but the flavor will be milder and less tangy. For a vinegar-free version, dissolve 2 tbsp salt in 4 cups water, pack cucumbers tightly, and weigh them down. Let ferment for 3-5 days at room temperature, then store in the fridge. The result will be softer with a probiotic tang, not the crisp, zesty bite of vinegar pickles.