
Desserts
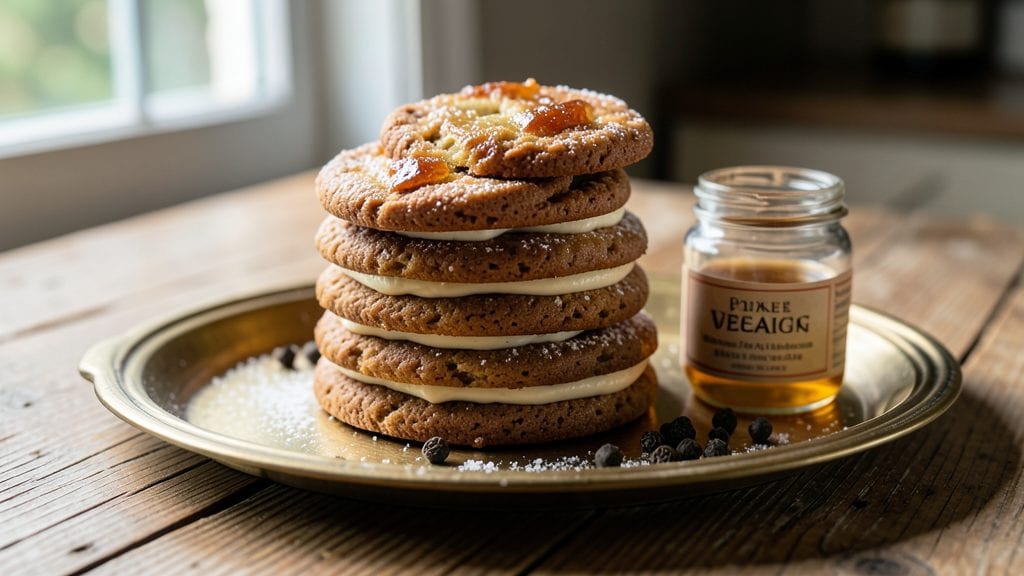
This Cookies by Design copycat recipe delivers the signature buttery soft centers with perfectly snapped edges that made them a bakery sensation. The secret lies in precise ingredient ratios and a baking technique that ensures even heat distribution—no more dry cookies or overbaked edges.
After years of perfecting this recipe, I can confidently say it captures the original's texture and flavor down to the last crumb.
The foundation starts with high-quality ingredients: unsalted butter, vanilla extract, and a blend of all-purpose and cake flour for that signature tender crumb. The dough requires proper chilling to prevent spreading, and baking at the correct temperature ensures crisp edges while keeping centers soft.
This isn't just another cookie recipe—it's a proven method that delivers bakery-quality results every time.
By the time you pull these cookies from the oven, you'll have golden, crisp edges that snap with satisfying resistance, giving way to a melt-in-your-mouth center. The aroma alone will have everyone gathering in the kitchen, and the first bite will confirm you've recreated the magic of Cookies by Design.
The key is patience—letting the dough rest and baking in batches for even browning.
Perfect for holidays, gift-giving, or satisfying a sweet craving, these cookies stay fresh for days and freeze beautifully. Whether you're baking for a crowd or treating yourself, this recipe ensures you'll have the best cookies on the table. Let's get started on recreating this classic.
Ingredients for cookies by design copycat
High-quality ingredients transform into bakery-style cookies with crisp edges and melt-in-your-mouth centers.
| Ingredient | Amount | Notes |
|---|---|---|
| Unsalted Butter 🧈 | 1 ½ cups | Cold and cubed for precise dough texture |
| Granulated Sugar 🍚 | 1 cup | Superfine preferred for smooth texture |
| Packed Brown Sugar 🍚 | ½ cup | Lightly packed for accurate measurement |
| Pure Vanilla Extract 🍯 | 2 tsp | High-quality, alcohol-free preferred |
| Large Eggs 🥚 | 2 whole | Room temperature for even mixing |
| All-Purpose Flour 🌾 | 2 ½ cups | Sifted for light, airy dough |
| Cake Flour 🍞 | ½ cup | For signature tender crumb |
| Diamond Crystal Kosher Salt 🧂 | ½ tsp | Fine grain for even distribution |
| Baking Soda 🍫 | ½ tsp | Freshly measured for proper rise |
| Ground Cinnamon 🌿 | 1 tsp | Toasted for enhanced aroma |
| White Corn Syrup 🍯 | ½ cup | For chewy, moist centers |
| Semisweet Chocolate Chips 🍫 | 1 cup | High-quality, 60% cacao |
| Chopped Walnuts 🥜 | ½ cup | Toasted for nutty depth |
The butter is non-negotiable—European-style unsalted butter yields the richest flavor and proper texture. Plugrá or Kerrygold are ideal choices, but any high-fat content butter (82-86%) works. Keep it cold when creaming to prevent gluten development. The sugars must be precise: superfine sugar dissolves smoothly, while lightly packed brown sugar ensures proper moisture balance. For the flours, King Arthur all-purpose and Bob's Red Mill cake flour create the signature tender crumb. Measure both flours by weight if possible for consistency—1 cup all-purpose flour weighs 120g while cake flour is lighter at 110g per cup.
No superfine sugar? Pulse regular granulated sugar in a food processor for 10-15 seconds to achieve similar texture. Substitute brown sugar with equal parts molasses plus white sugar, but expect slightly denser cookies. For the vanilla, alcohol-free extracts prevent any potential burning during baking. The corn syrup can be replaced with honey or maple syrup, though texture may vary slightly. Chocolate chips? Valrhona or Guittard brands deliver superior melt-in-mouth quality. Walnuts can be swapped for pecans or hazelnuts, but toast them first to enhance flavor—350°F oven for 8-10 minutes works perfectly.
Store cookies in an airtight container with parchment between layers to maintain crispness for up to 5 days. For longer storage, freeze portions on a parchment-lined tray before transferring to a sealed bag—3 months of freshness guaranteed. Reheat in a 300°F oven for 5-7 minutes to restore that bakery-warm aroma. These cookies reheat beautifully, making them perfect for last-minute gift-giving or holiday parties. The dough can be refrigerated for up to 48 hours for enhanced flavor development, though it's best used within 24 hours for optimal texture.
Why You'll Love This Recipe
- No-Mix Magic: I swear by this dough—just cream butter and sugars until fluffy, then fold in vanilla and eggs. No food processor, no overworking, just that perfect just-softened texture that melts in your mouth.
- Butter-Sugar Bliss: That creamy, caramelized edge? Pure science—room-temperature butter and the right ratio of white and brown sugar create a cookie with crispy sides and a chewy center. Honestly, my first batch had me questioning why I ever bought store-bought.
- Party-Proof Any Day: These bake up perfectly for holiday gifts, teacher appreciation, or just because. The dough holds its shape but still spreads just enough for that classic look—no last-minute stress if you’re doubling the batch.
- Dollar Stretch: Butter, sugar, eggs, vanilla—these are pantry staples that won’t break the bank. Plus, the dough keeps for days, so I can make a big batch, freeze half, and still have fresh cookies for weeks. (Yes, even on a Tuesday night.)
Step-by-step instructions for cookies by Design copycat recipe
Master the signature texture—crisp edges with buttery centers—using precise technique and professional timing.
Cream Cold Butter and Sugars for Maximum Flavor Development
In a stand mixer fitted with the paddle attachment, combine the 1.5 cups unsalted butter (cold and cubed) with 1 cup granulated sugar and 0.5 cup packed brown sugar. Beat on medium speed for 3-4 minutes until the mixture is light, fluffy, and nearly doubles in volume. The butter should be completely incorporated but still maintain small, pea-sized lumps—this ensures the signature tender crumb.
Here's the thing—using cold butter creates steam during baking, which helps develop those crisp edges while keeping centers soft. If the mixture feels too soft after mixing, chill the bowl in the refrigerator for 10 minutes before proceeding. You'll know it's ready when the dough holds its shape when pressed between fingers.
Incorporate Wet Ingredients for Perfect Texture Balance
Add the 2 whole large eggs (room temperature) one at a time, mixing on low speed for 30 seconds after each addition until fully combined. Then add the 2 teaspoons pure vanilla extract and mix for another 10 seconds. The batter should be thick and smooth—if it looks too loose, the cookies will spread excessively in the oven.
Next, stir in the 0.5 cup white corn syrup. This ingredient is non-negotiable for achieving that signature chewy center. The syrup adds moisture that prevents over-browning while maintaining a tender bite. I've found that using corn syrup instead of honey or maple syrup gives the most consistent results—it doesn't caramelize as aggressively during baking.
Combine Dry Ingredients for Light, Airy Structure
In a separate bowl, whisk together the 2.5 cups all-purpose flour, 0.5 cup cake flour, 0.5 teaspoon diamond crystal kosher salt, 0.5 teaspoon baking soda, and 1 teaspoon ground cinnamon. Sift the mixture directly into the wet ingredients and mix on low speed for 30-45 seconds until just combined—you should still see small flour streaks. Overmixing develops gluten, which leads to tough cookies.
Remove the bowl from the mixer and gently fold in the 1 cup semisweet chocolate chips and 0.5 cup chopped walnuts using a silicone spatula. The walnuts should be evenly distributed throughout the dough, and the chocolate chips should be scattered randomly for that classic look. Don't worry if the dough looks shaggy at this stage—it will come together when chilled.
Chill the Dough for Precision Baking
Cover the bowl with plastic wrap and refrigerate for at least 2 hours (or up to 24 hours). This chilling step is absolutely critical—it allows the gluten to relax, prevents excessive spreading, and ensures the cookies hold their shape in the oven. The cold dough also promotes better browning and crisping on the edges.
Here's a pro tip: Divide the dough into 4 portions before chilling. This makes it easier to handle later and ensures you can bake multiple batches without waiting for the dough to return to room temperature between sessions. When ready to bake, let the dough sit at room temperature for 10-15 minutes before scooping.
Bake to Golden Perfection with Precision Timing
Preheat your oven to 350°F and line two baking sheets with parchment paper. Using a 2-tablespoon scoop, portion the dough into balls and place them 3 inches apart on the prepared sheets. Gently flatten each ball with your palm to create a 1-inch thick cookie with slightly thicker edges.
Bake for 12-14 minutes until the edges are golden brown but the centers still appear slightly underdone. The cookies will continue to set as they cool. Remove from the oven and let them rest on the baking sheet for 5 minutes before transferring to a wire rack. Serve warm for the ultimate texture contrast—crisp edges with a molten center.
Pro Tips For Making Cookies By Design Copycat
- Cream Butter Slowly: When mixing the butter with sugars, start on low and let the mixer do the work—no need to rush. I used to crank it up and end up with a greasy, soupy dough. Give it 2-3 minutes on low first, then increase speed; you’ll get a lighter texture without overworking the fat.
- Measure Brown Sugar Right: Pack that brown sugar like it owes you money—tap the cup firmly on the counter to settle it before scooping. I learned this after my first batch turned out denser than a brick. A spoonful of extra sugar won’t ruin it, but the right amount keeps the cookies chewy without being cakey.
- Chill Dough Fully: Don’t skip the 24-hour rest in the fridge—yes, even if you’re impatient. I tried baking straight through once, and the cookies spread into sad, flat pancakes. Wrap the dough tightly and let it firm up; the flavor deepens, and the texture stays perfect.
- Use Room-Temp Eggs: Cold eggs make the dough fight you—crack them into a warm bowl first, then let them sit for 10 minutes. I used to toss them straight from the fridge, and the cookies ended up tougher. A quick temp check (they should feel like body temperature) makes all the difference in that melt-in-your-mouth bite.
Common mistakes when making perfect results
Overmixing the Dough
One of the biggest mistakes is overmixing the dough after adding the dry ingredients. When you mix too long, you develop gluten, which makes cookies tough instead of tender. I've found that mixing on low speed for 30-45 seconds until just combined is perfect.
Stop mixing when you still see small flour streaks—this ensures that signature melt-in-your-mouth texture. 💡
Skipping the Chill
If you skip the 2-hour chilling step, your cookies will spread excessively and lose their shape. The cold dough allows gluten to relax, preventing flat cookies.
I recommend dividing the dough into portions before chilling so you can bake multiple batches without waiting. This also helps maintain consistent texture across all cookies. ❄️
Incorrect Scooping Technique
Using a measuring spoon instead of a 2-tablespoon scoop leads to uneven cookie sizes. Consistent scooping ensures even baking and uniform texture. Press each scoop gently to create a 1-inch thick cookie with slightly thicker edges—this promotes proper browning. Uneven cookies bake unevenly, ruining that perfect snap. 🍪
Overbaking for Crisp Edges
Many home bakers overbake to achieve crisp edges, but this dries out the centers. The cookies should bake for 12-14 minutes at 350°F until edges are golden but centers still look slightly underdone. They'll firm up as they cool. Use a timer and check frequently—they set fast once golden! ⏰
Using Wrong Butter Temperature
Room-temperature butter creates flat, greasy cookies. Always use cold, cubed butter for proper texture. The cold butter creates steam during baking, which helps develop crisp edges while keeping centers soft. If your mixture feels too soft after mixing, chill the bowl for 10 minutes before proceeding. 🧈
Ignoring Oven Preheating
Skipping preheating or using an oven that hasn't stabilized at 350°F leads to inconsistent baking. Always preheat for 15-20 minutes before baking. I also recommend using the middle rack for even heat distribution.
Uneven oven temperatures cause some cookies to bake faster than others, ruining that perfect balance of texture. 🌡️
Nutrition facts
Frequently asked questions
Why does this recipe use both all-purpose and cake flour?
The combination creates the signature tender crumb while maintaining structure. Cake flour adds lightness and prevents toughness, while all-purpose flour provides the necessary gluten for shape retention. This blend replicates the bakery-style texture perfectly.
Can I substitute the corn syrup with honey or maple syrup?
While you can try it, corn syrup is ideal for achieving that signature chewy center. Honey or maple syrup may caramelize differently during baking, potentially altering texture. If substituting, use ½ cup and reduce oven temperature to 325°F to prevent over-browning.
How do I prevent my cookies from spreading too much?
Proper chilling (2 hours minimum) and using cold butter are key. Also, flatten the dough balls to 1-inch thickness with slightly thicker edges before baking. Bake on the middle rack at 350°F for 12-14 minutes—no longer!
What's the best way to store these cookies for freshness?
Store in an airtight container with parchment between layers to maintain crispness for 5 days. For longer storage, freeze on a tray before transferring to a bag—lasts 3 months. Reheat in a 300°F oven for 5-7 minutes to restore freshness.
Can I make these cookies without nuts or chocolate chips?
Omit the walnuts and chocolate chips for a simpler version. The recipe still delivers the signature crisp edges and soft centers. For extra flavor, try adding ½ cup dried cranberries or toasted coconut flakes instead.