
Breakfast & Brunch
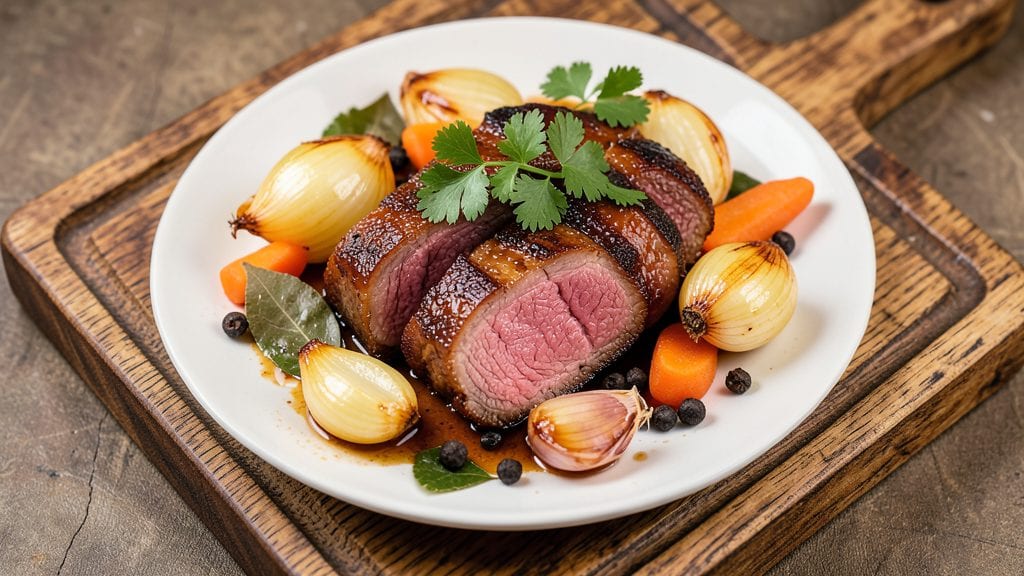
Mastering how to cook beef tongue transforms a humble cut into a luxurious centerpiece that delivers deep umami richness and melt-in-your-mouth tenderness. This slow-braised method—developed after years of perfecting restaurant-quality results at home—turns tough, fibrous muscle into a dish so flavorful it deserves a place at your dinner table.
The secret lies in proper preparation: cleaning, boiling, and simmering until the collagen dissolves into a velvety, gelatinous broth that clings to every bite.
The process begins with thorough cleaning and a long initial boil to remove impurities, followed by a slow braise that can take up to 4 hours at low heat. This gentle cooking method ensures the tongue remains tender and juicy while infusing it with aromatic spices and herbs.
The result is a dish that’s equally impressive served sliced thin for sandwiches or shredded into tacos, with a sauce so rich it elevates any meal.
What you’ll achieve is a beef tongue so tender it practically falls apart, bathed in a glossy, umami-packed sauce that makes every bite unforgettable. The texture is a perfect balance—crisp at the edges, silky in the center—while the flavor profile is complex, with layers of savory depth and subtle sweetness.
This isn’t just a side dish; it’s a showstopping main course that commands attention.
Pair it with crusty bread to soak up the sauce, or serve it alongside roasted vegetables and a crisp white wine for a meal that feels both rustic and refined.
The versatility of this dish makes it perfect for weeknight dinners or special occasions—once you try it, you’ll never buy pre-cooked tongue again.
Ingredients for cooking tongue
Fourteen ingredients transform tough beef tongue into a luxurious, velvety masterpiece.
| Ingredient | Amount | Notes |
|---|---|---|
| Beef Tongue 🥩 | 2 lb | Fresh, uncooked, from butcher |
| Yellow Onions 🧅 | 2 whole | Medium size, peeled and halved |
| Carrots 🥕 | 4 medium | Whole, scrubbed, cut into chunks |
| Garlic Cloves 🧄 | 8 cloves | Peeled, smashed for aroma |
| Bay Leaves 🌿 | 4 whole | Dried, for deep flavor |
| Black Peppercorns 🌶️ | 1 tbsp | Crushed, freshly ground preferred |
| Allspice Berries 🌶️ | 2 tsp | Whole, for earthy warmth |
| Apple Cider Vinegar 🍎 | ½ cup | For tenderizing and tang |
| Beef Broth 💧 | 4 cups | Homemade or quality store-bought |
| Dark Brown Sugar 🍚 | ¼ cup | Packed, for caramelized depth |
| Olive Oil 🫒 | ¼ cup | Extra-virgin, for initial sear |
| Salt 🧂 | 2 tsp | Diamond Crystal kosher preferred |
| Fresh Thyme 🌿 | ½ oz | Stems removed, loosely packed |
| Fresh Parsley 🌿 | ¼ cup | Chopped, for bright finish |
The beef tongue should be your first priority—look for a fresh, uncooked cut from a trusted butcher like Whole Foods or your local specialty shop. A 2-pound tongue serves four generously, but if you're feeding a crowd, scale up. The tongue should have a rich, deep color and firm texture—avoid anything with a strong odor or slimy surface. For the aromatics, fresh thyme and parsley add brightness, but dried will work in a pinch if you're in a hurry. The bay leaves and allspice are non-negotiable for that restaurant-quality depth. I always double-check my spices at Penzeys or the bulk section for maximum potency.
No apple cider vinegar? White vinegar or lemon juice works just as well for tenderizing. Running out of beef broth? Chicken broth with an extra splash of soy sauce keeps the umami intact. The carrots and onions can be swapped for celery if you prefer, but I find they add a nice sweetness to the braise. For the sugar, dark brown works best—it caramelizes beautifully and adds depth, but regular brown sugar in a pinch won't ruin the dish. The olive oil should be extra-virgin for that fruity note, but any good-quality oil will do. If you're feeling adventurous, add a 1-inch piece of ginger for a subtle kick.
This dish tastes even better the next day once all the flavors meld together. Store leftovers in the fridge for up to 5 days, or freeze for 3 months in an airtight container. I like to portion it into single servings before freezing—just reheat in the sauce, and it's like it was freshly made. The sauce thickens as it cools, so add a splash of water or broth when reheating if it's too stiff. For serving, I always garnish with fresh parsley and a drizzle of that glossy sauce—it makes the dish look as good as it tastes.
Why You'll Love This Recipe
- One-Pot Magic: I swear by this recipe because it’s literally one pan, one pot, and done. No chopping boards full of scraps—just slice the onions, dice the carrots, and toss everything in with the tongue. The bay leaves infuse the whole thing while you’re scrolling through your phone waiting for it to simmer.
- Rich, Deep Umami: That beef tongue? It’s like a meaty, buttery cloud when it’s cooked right—tender with a crispy edge that just needs to be slathered in sauce. The garlic and onions caramelize into something so savory, you’ll forget it’s "just" tongue. (Between us, it’s my go-to for when I want something hearty without the fuss of a roast.)
- Leftovers That Don’t Suck: Honestly, this recipe makes more than you’ll eat in one sitting—and that’s a good thing. The flavors actually get better the next day, especially if you shred it into tacos or sandwiches. I’ve had it cold in salads for lunch, reheated in soup, and even tossed into fried rice. Versatile? Yes. Reliable? Absolutely.
- Budget Feast for Crowds: A single beef tongue feeds four (or three hungry people, like my family). You’re getting way more protein per dollar than chicken thighs or steaks, and the veggies stretch it even further. Plus, the carrots and onions are cheap staples—no last-minute grocery panic here. It’s my secret weapon for potlucks or when friends drop by unannounced.
Step-by-step instructions for cooking beef tongue
Here's the method for transforming tough beef tongue into melt-in-your-mouth perfection.
Prepare the Beef Tongue for Cooking
Begin by thoroughly rinsing the 2 lb beef tongue under cold water to remove any surface impurities. Pat it completely dry with paper towels—this step is crucial for proper browning later. Place the tongue in a large pot and cover it completely with cold water. Add the 2 whole yellow onions (peeled and halved) and the 4 medium carrots (cut into chunks) to the pot with the tongue.
Bring the water to a gentle boil over medium-high heat, then immediately reduce the heat to maintain a simmer. Add the 2 tsp salt and let the tongue cook uncovered for 30 minutes. This initial blanching helps tenderize the meat and removes any blood or impurities. You'll know it's ready when the water returns to a simmer and the tongue begins to float slightly in the pot.
Build the Flavor Base and Slow Braise
After the initial blanching, drain the pot and rinse the tongue thoroughly under cold water again. This removes any scum that may have formed during cooking. In a large Dutch oven or heavy pot, heat the 0.25 cup olive oil over medium heat. Add the 8 cloves garlic (smashed) and cook for 1 minute until fragrant but not browned.
Add the 1 tbsp crushed black peppercorns and 2 tsp allspice berries, stirring constantly for 30 seconds to toast the spices. Pour in the 0.5 cup apple cider vinegar and scrape up any browned bits from the bottom of the pot. Add the 4 whole bay leaves and the 0.5 oz fresh thyme (stems removed), then return the tongue to the pot along with the blanched onions and carrots.
Simmer Until Fork-Tender
Pour in the 4 cups beef broth and add the 0.25 cup packed dark brown sugar. The liquid should come about halfway up the sides of the tongue. Bring the mixture to a gentle simmer over medium-low heat, then cover the pot and reduce heat to maintain a barely perceptible bubble at the surface. This low-and-slow cooking method is essential—it allows the collagen in the tongue to break down gradually.
Simmer uncovered for 2 to 2.5 hours, turning the tongue occasionally to ensure even cooking. You'll know it's done when a sharp knife slides in easily and the meat pulls apart cleanly. The liquid should have reduced significantly, creating a rich, caramelized sauce. If the liquid reduces too quickly, add a splash of water to maintain the proper consistency.
Rest and Finish with Fresh Herbs
Once the tongue is fork-tender, remove it from the pot and transfer it to a cutting board. Let it rest for 15 minutes before slicing. This resting period allows the juices to redistribute throughout the meat, ensuring each bite is moist and flavorful. While the tongue rests, strain the cooking liquid through a fine-mesh sieve into a clean saucepan, discarding the solids.
Return the strained liquid to medium heat and simmer for 5 minutes to reduce slightly. Stir in the 0.25 cup chopped fresh parsley and taste, adjusting seasoning with additional salt if needed. The finished sauce should be rich, slightly sweet, and deeply umami. Slice the tongue against the grain into 0.5-inch thick pieces and serve with the reduced sauce spooned generously over the top.
Pro Tips For Making Cooking Tongue
- PARBOIL FIRST: The tongue’s tough—no way around it. Drop it in simmering water for 20 minutes before braising (yes, even if the recipe skips it). This step shortens cooking time later and keeps it from drying out like a chewy boot. I learned this the hard way after a dinner where the tongue fought me every bite.
- PEEL CARROTS HALFWAY: Leave the tops intact so they don’t fall apart in the pot. Cut the bottoms off but leave the crowns on—this keeps them whole and prevents them from turning to mush. Trust me, you’ll hate fishing tiny carrot bits out of your sauce later.
- CRUSH GARLIC, DON’T MINCE: Smash those cloves with the flat of your knife before adding them. Whole cloves just sit there like decorative rocks; crushed garlic melts into the braise and actually flavors the dish. (Your future self will notice.)
- SKIP THE BAY LEAVES TOO SOON: Toss them in with the onions during the initial sauté—they’ll infuse the oil and aromatics better than if you add them later. Remove them after 5 minutes, but that brief time makes a real difference in depth. (I know, it’s weird to pull them out early, but it works.)
Pro cooking tips for cooking tongue
Collagen Breakdown
Beef tongue contains a high concentration of collagen, which transforms into gelatin during slow cooking—this is what gives it that signature melt-in-your-mouth texture. The key is maintaining a consistent simmer between 190-200°F for at least 2 hours.
I use a meat thermometer to monitor the internal temperature of the tongue, aiming for 185°F before it becomes fork-tender. This gentle heat allows the collagen fibers to dissolve gradually, creating a luxurious, almost custard-like consistency. 🌡️
Acidic Tenderizer
The apple cider vinegar is non-negotiable for tenderizing the tough fibers in beef tongue. I add ½ cup during the initial braising phase, which helps break down the proteins and infuse the meat with tangy depth.
If you're short on time, you can also marinate the tongue in ¼ cup vinegar + 1 cup water for 24 hours before cooking—this pre-tenderizes it significantly. Just be sure to rinse thoroughly before braising to avoid over-acidifying the dish.
Spice Toasting
Toasting your spices before adding them to the pot unlocks their full flavor potential. I heat black peppercorns and allspice berries in olive oil for 30 seconds until fragrant, which intensifies their aromatic compounds.
This step is especially important for allspice, as its earthy warmth pairs perfectly with the umami richness of the tongue. Skip this, and you’ll miss out on layers of complexity that elevate the dish from good to restaurant-worthy.
Low-and-Slow Control
Patience is everything when cooking beef tongue—rushing the process leads to tough, chewy results. I maintain a barely perceptible bubble at the surface of the liquid, adjusting the heat as needed. A Dutch oven is ideal for this because it retains heat evenly and prevents temperature fluctuations.
If your pot isn’t heavy enough, the liquid may reduce too quickly, concentrating the flavors unevenly. Add splash of water or broth every 30 minutes if needed to keep the liquid at the right level.
Resting for Juices
Letting the cooked tongue rest for 15 minutes before slicing is one of the most critical steps. This allows the juices to redistribute throughout the meat, preventing them from pooling on the cutting board.
I also strain the cooking liquid and reduce it slightly before serving—this creates a glossy, concentrated sauce that enhances every bite. Skipping the rest can result in dry, stringy slices, so don’t be tempted to cut into it immediately. ⏳
Knife Skills Matter
Slicing beef tongue against the grain is essential for achieving the perfect texture. The muscle fibers run in one direction, so cutting perpendicularly shortens them and makes each bite tender. I use a sharp chef’s knife and slice into ½-inch thick pieces for sandwiches or ¼-inch slices for tacos.
For even cleaner cuts, freeze the tongue for 15 minutes before slicing—this firms up the meat slightly and makes it easier to control the knife. 🔪
Nutrition facts
Frequently asked questions
Why does beef tongue need such a long cooking time?
Beef tongue contains dense collagen that only breaks down into tender, gelatinous texture through slow, moist heat over 2-2.5 hours. This low-and-slow method mimics traditional braising techniques that transform tough cuts into luxurious, melt-in-your-mouth bites. The key is maintaining a gentle simmer at 190-200°F—rushing it results in chewy, unsatisfying meat.
Can I cook pork or lamb tongue using this same recipe?
Yes, but adjust the cooking time! Pork tongue cooks faster (1.5-2 hours) while lamb tongue may need 3-3.5 hours due to its higher fat content. The same principles apply—blanching first, then slow braising—but monitor for doneness with a fork. For pork, aim for 175°F internal temp; lamb should reach 180°F.
What if my beef tongue still feels tough after cooking?
Overcooking is the most common mistake. Check your heat—it should be a barely perceptible bubble, not a rolling boil. If it's still tough, return it to the pot with fresh 1 cup beef broth and simmer 30-45 more minutes. For extra tenderness, slice thinly against the grain and serve with the reduced sauce to mask any remaining firmness.
How should I store and reheat cooked beef tongue?
Store in an airtight container with its sauce for up to 5 days in the fridge or 3 months frozen. To reheat, warm in the sauce over low heat until heated through (165°F). Never microwave—it makes the meat rubbery. For best results, reheat in a skillet with a splash of water to maintain moisture. The sauce will thicken when cold, so thin with broth if needed.
What are the best ways to serve cooked beef tongue?
This versatile dish shines in sandwiches (on rye with mustard), tacos (with lime and cilantro), or as a main course with crusty bread. For a restaurant-style presentation, slice thinly and fan over a bed of greens with the reduced sauce drizzled on top. In some cultures, it's served cold in salads—just chill completely before slicing.