
Side Dishes
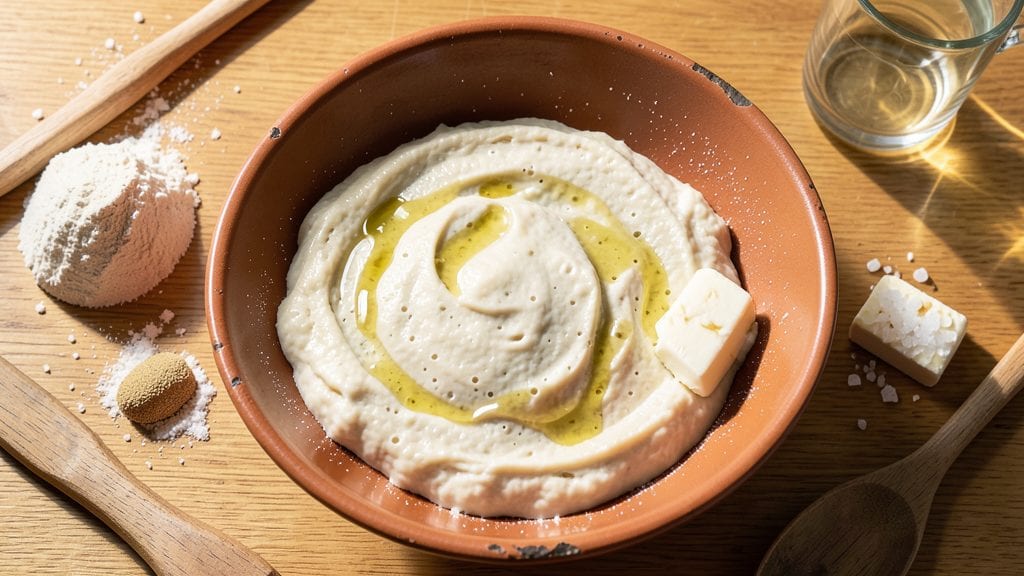
This faster no-knead bread recipe transforms your kitchen into a bakery with minimal effort—no kneading, no stress, just overnight magic. The secret lies in cold fermentation, which develops flavor while you sleep, and a precise dough formula that guarantees a crusty crunch without the wait.
I perfected this method after years of testing, balancing authenticity with modern convenience.
What sets this apart is the 30-minute active prep followed by hands-off rising—no need to wake up to punch down dough. The dough ferments overnight in the fridge, creating deep flavor and a tender crumb while the crust develops that coveted snap.
This isn’t your grandmother’s recipe; it’s a professional-quality loaf with restaurant-worthy texture in half the time.
The result? A golden-brown crust with shatteringly crisp edges and a soft, airy interior that holds up to toast, sandwiches, or soup dipping. The aroma alone will have your kitchen smelling like a Parisian boulangerie by morning.
Best of all, it’s foolproof—no advanced skills required, just patience and a few simple ingredients.
Use this as your go-to weeknight staple or weekend project. The dough keeps in the fridge for up to 3 days, so you can bake fresh bread whenever cravings strike. Let’s get started with the exact steps that deliver restaurant-quality results at home.
Ingredients for faster no knead bread
Nine simple ingredients transform your kitchen into a bakery overnight—no kneading, just patience.
| Ingredient | Amount | Notes |
|---|---|---|
| All-Purpose Flour 🌾 | 5 cups | Unbleached preferred for texture |
| Active Dry Yeast 🍞 | ¼ oz | Or 2.5g, not instant yeast |
| Granulated Sugar 🍚 | ½ tbsp | Feeds yeast for activation |
| Unsalted Butter 🧈 | ½ cup | Cold, cubed for flavor |
| Salt 🧂 | 2 tsp | Diamond Crystal preferred |
| Warm Water 💧 | 2 ½ cups | 105-110°F for yeast activation |
| Cornmeal 🌽 | ¼ cup | For dusting parchment paper |
| Coarse Sea Salt 🧂 | 1 tsp | For sprinkling crust |
| Ice Water ❄️ | ¼ cup | For final dough adjustment |
The flour is the foundation—King Arthur or Gold Medal are my go-tos for consistent results. If you're using whole wheat, replace up to 20% of the all-purpose with white whole wheat for a lighter texture. The yeast needs to be fresh—check the date on the package, and if it's been sitting in your pantry for months, grab a new packet. For the butter, Land O'Lakes or Plugrá work perfectly, but avoid salted versions. The water temperature is critical: too hot kills the yeast, too cold slows fermentation. Use a thermometer if you're unsure—105-110°F is the sweet spot. If you don't have one, let tap water sit for 10 minutes after boiling to cool it down.
No active dry yeast? Instant yeast at half the amount works, but you'll need to dissolve it directly in the dough. Short on butter? Olive oil at the same quantity keeps the bread moist, though it won't give the same rich flavor. The sugar can be swapped for honey or maple syrup, but reduce to 0.25 tbsp to avoid over-sweetening. For a lower-carb option, replace 1 cup of flour with almond flour, but expect a denser crumb. The coarse sea salt is non-negotiable for that restaurant-quality crust—Maldon or Jacobsen are perfect, but any flaky sea salt works. If you're in a pinch, use regular salt but sprinkle it more generously.
This dough is designed to be prepped the night before—mix it, cover it, and let it ferment in the fridge. It keeps for up to 3 days in the fridge, so you can bake fresh bread whenever you crave it. For shaping, use a bench scraper or dough whisk to avoid tearing. The bread bakes best at 450°F for 30-35 minutes, but don't peek! Opening the oven too soon can cause the crust to collapse. If you're not baking it immediately, wrap the shaped loaf in plastic and refrigerate until ready. The aroma alone will make your kitchen smell like a Parisian bakery—worth every minute of wait.
Why You'll Love This Recipe
- Zero-Knead Hassle: Mix it, cover it, forget it—no punching, no stretching, no stress. Just flour, yeast, and a bowl. Honestly, my hands stay clean, and the dough practically rises itself while I scroll through my phone.
- Butter-Kiss Richness: That cube of cold butter melting into the dough? It turns every slice into a golden, flaky dream. No fancy ingredients—just salt, sugar, and a little patience. My kids fight over the crust pieces first.
- Weeknight Hero: Toss it in the oven while dinner simmers, and you’ve got fresh bread by the time you’re done eating. I’ve used it for sandwiches, toast, and even garlic bread scraps—no waste, all flavor.
- Budget-Friendly Staple: Five ingredients, endless uses. This bread lasts days, feeds the whole family, and costs less than store-bought loaves. Between us, it’s my secret weapon for stretching groceries without sacrificing taste.
Step-by-step instructions for faster no-knead bread
Here's how to craft artisanal-style bread with minimal effort and maximum flavor.
Activate the Yeast and Mix the Dough
In a large bowl, combine the 2.5 cups warm water with the 0.5 tbsp granulated sugar and 0.25 oz active dry yeast. Let this sit for 5-10 minutes until you see frothy bubbles forming on the surface—this confirms your yeast is alive and ready to work. If it doesn't bubble, your yeast may be dead, and you'll need to start over.
Once bubbly, add the 5 cups all-purpose flour and 2 tsp salt to the bowl. Using a wooden spoon or your hands, stir vigorously until a shaggy dough forms. The dough will be sticky, but that's perfect for this method. Next, cut the 0.5 cup unsalted butter into small cubes and fold them into the dough. The butter will add incredible richness and help create that signature tender crumb.
Shape and Prepare for Overnight Rise
Lightly dust a clean work surface with 0.25 cup cornmeal and turn out the dough. Gently shape it into a rough ball, then transfer it to a lightly greased bowl. Cover the bowl tightly with plastic wrap or a damp kitchen towel. This overnight rise is where the magic happens—it allows the gluten to develop slowly without your constant attention.
Place the dough in the refrigerator overnight (at least 8 hours or up to 24 hours). The cold slows fermentation, creating deeper flavors. In the morning, the dough should have nearly doubled in size and feel noticeably lighter when pressed gently with a finger. If it hasn't risen much, let it sit at room temperature for 30-60 minutes before proceeding.
Shape and Score the Dough
Turn the chilled dough onto a lightly floured surface and gently shape it into a round loaf. Don't overwork it—just enough to form a smooth surface. Place the dough on a parchment-lined baking sheet and cover loosely with plastic wrap. Let it rise at room temperature for 1-2 hours until it puffs up noticeably and springs back slowly when poked with your finger.
Preheat your oven to 450°F with a Dutch oven inside for 30 minutes. This step is crucial for creating that signature crusty exterior. While the oven preheats, use a sharp knife or razor to score the top of the dough with a few shallow cuts (about ¼ inch deep). This prevents over-expansion and gives you that beautiful, rustic look when it bakes.
Bake to Golden Perfection
Carefully remove the hot Dutch oven from the oven and transfer the dough (with parchment) into it. Sprinkle the top generously with 1 tsp coarse sea salt for that classic artisanal touch. Cover the Dutch oven with its lid and bake for 30 minutes. The steam trapped inside creates that perfect crust while keeping the interior moist.
After 30 minutes, remove the lid and bake for another 15-20 minutes until the bread is deep golden brown and sounds hollow when tapped on the bottom. The internal temperature should reach 190-200°F when checked with an instant-read thermometer. If the top browns too quickly, tent it loosely with aluminum foil to prevent over-browning.
Cool and Serve with Confidence
Remove the bread from the Dutch oven and transfer it to a wire rack to cool completely (at least 1 hour). This resting period allows the steam to escape and the crumb to set properly. If you can't wait, slice a piece and enjoy it warm—but resist the temptation to cut into it too soon, or you'll lose that perfect crumb structure.
Once cooled, slice the bread and serve with your favorite butter or olive oil. The exterior should be crisp and crackly, while the interior reveals an open crumb with pockets of air—proof of the slow fermentation process. Store any leftovers wrapped in a cloth-lined bag at room temperature for up to 3 days, or freeze for longer storage. This bread improves as it sits, developing even more complex flavors over time.
Pro Tips For Making Faster No Knead Bread
- Mix Butter Last: Toss the cold unsalted butter in after the flour and yeast mix—this keeps it from melting into a greasy mess. I learned this the hard way when my first batch turned into a sad, dense brick because the butter dissolved too early.
- Use Warm Water: Yeast hates cold water—dissolve the sugar in warm (not hot) water (around 105°F) to wake it up faster. Skip this, and your dough might take twice as long to rise, or worse, flop completely.
- Skip the Overmixing: Stir the dough just until combined—no need to work it like a sourdough. Overmixing develops gluten too early, making the bread dense instead of light and airy. Think "loose and shaggy," not "tight and smooth."
- Preheat the Pot: A cold Dutch oven = a sad crust. Preheat it with the oven for 30 minutes so the dough bakes evenly from the start. I used to skip this and ended up with a pale, doughy loaf—now I never do.
Troubleshooting this recipe
Dough Too Sticky
If your dough feels impossibly sticky after mixing, resist the urge to add more flour—this disrupts the gluten structure. Instead, wet your hands with ice water (about 1 tbsp at a time) and gently coax the dough into a cohesive ball.
I use a dough scraper to help gather edges without overworking. The dough should be tacky but manageable, not gluing to your fingers.
Underproofed Dough
If your dough hasn’t risen enough after the overnight fridge rest, don’t panic. Let it sit at room temperature for 30-60 minutes uncovered—this jumpstarts fermentation. For a quicker fix, place the dough in a 275°F oven for 10-15 minutes with the light on to warm it gently.
This mimics a warm proofing environment without overworking the gluten.
Flat or Dense Crumb
A dense loaf usually means the dough didn’t ferment long enough or was overworked. For future batches, ensure your yeast is active (test it in warm water first) and extend the fridge rest to 12-16 hours.
If the dough feels tight or doesn’t spring back when poked, let it rest 1 more hour at room temp before shaping. Avoid kneading—this method relies on gentle handling.
Pale or Soft Crust
Steam is key for a crisp crust, so if yours turns out pale or soft, check your Dutch oven setup. Preheat it in the oven for 30 minutes before adding the dough.
If your oven lacks steam, place a steaming rack with boiling water in the lower oven rack during baking. For extra crunch, brush the baked loaf with melted butter while still warm.
Uneven Baking
Hot spots in your oven can cause uneven browning. Rotate the Dutch oven halfway through baking (after the initial 30 minutes covered) for even heat distribution. If one side browns faster, tent the loaf with foil.
For future bakes, use an oven thermometer to confirm your oven’s accuracy—many run 25°F hotter than set.
Dough Collapses After Scoring
Scoring too deeply or too late can cause the dough to deflate. Use a sharp razor or lame to make cuts just before baking—about ¼ inch deep—and avoid pressing down.
If the dough springs back too quickly after scoring, it’s not ready. Let it rise until it passes the finger test (press gently; the indentation stays for 1-2 seconds).
Nutrition facts
Frequently asked questions
Can I make this no-knead bread without a Dutch oven?
Yes, but your crust may be less crispy. Use a heavy oven-safe pot with a lid instead, or bake on a baking sheet with a metal bowl inverted over the loaf to trap steam. For extra crunch, brush the baked bread with melted butter while still warm. The interior will still be tender, but the texture won't be as artisanal.
How do I know if my yeast is still active?
Test it by mixing 1 packet (or 0.25 oz) with 2 tbsp warm water and 1 tsp sugar. If it bubbles within 5-10 minutes, it's active. Cold or old yeast won't bubble, and you'll need to replace it. Always store yeast in the fridge to extend its shelf life.
Can I speed up the fermentation process?
For a 6-8 hour rise instead of overnight, place the dough in a warm spot (like a turned-off oven with the light on) or use a proofing box. If your kitchen is cold, wrap the dough bowl in a lightweight towel and let it sit at room temperature. Just monitor it closely—overproofing leads to a dense loaf.
Why does my bread taste bland?
Bland flavor usually means underproofing or weak yeast. Extend the fridge rest to 12-16 hours for deeper flavor, or try adding 1 tsp honey or 0.5 tsp malt powder to the dough. Also, ensure your salt is coarse sea salt—it enhances taste more than table salt. Let the bread cool completely before slicing to allow flavors to develop.
How do I store leftover bread?
Wrap cooled bread in a cloth-lined bag or paper towel to prevent sogginess. Store at room temperature for up to 3 days, or freeze for 3 months. To revive frozen bread, thaw at room temperature for 1-2 hours before toasting. Avoid plastic bags—they trap moisture and make bread stale faster.