
Soups & Stews
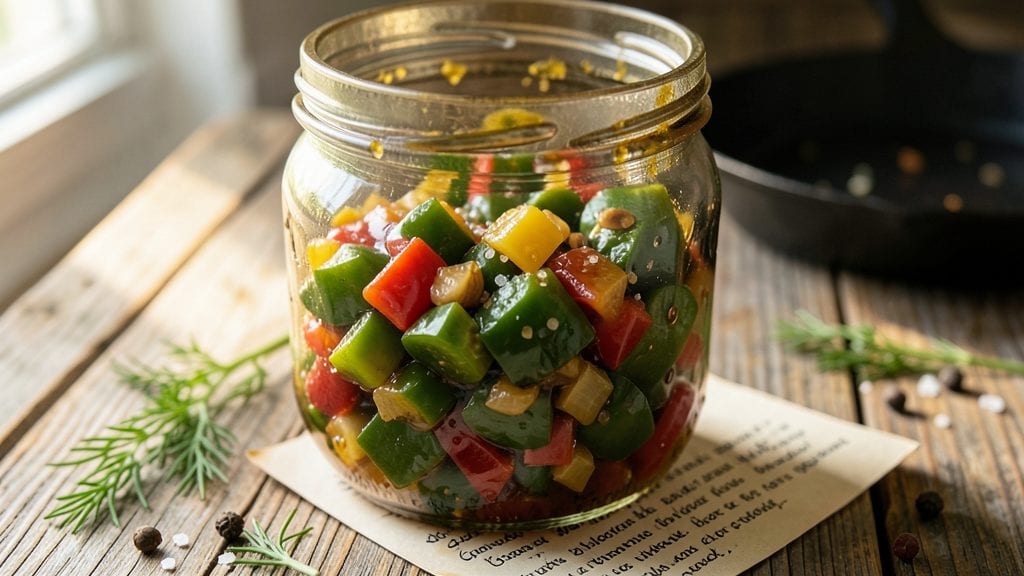
Grandma's old-fashioned green tomato relish brings that nostalgic vinegar-bright zing we all crave, preserving summer's harvest in a jar. This time-honored recipe transforms firm green tomatoes into a tangy, crunchy condiment that shines on sandwiches or elevates charcuterie boards.
The secret lies in proper vinegar ratios and slow simmering—no modern shortcuts here, just the traditional method that's stood the test of time.
What makes this relish special is its balance of sweet, sour, and crunchy textures, achieved through precise chopping and vinegar-brine preservation. Unlike store-bought versions, this recipe delivers authentic flavor with fresh ingredients and careful technique.
The process is straightforward but requires patience—letting the relish develop its signature tang over several hours of simmering.
By the time you're done, you'll have jars of vibrant green relish with just the right balance of sweetness and acidity, perfect for sandwiches, burgers, or pairing with cured meats.
The bright flavor keeps well when properly canned, making it a pantry staple for months to come. This is the kind of condiment that transforms simple meals into something special.
Whether you're preserving your garden harvest or recreating a childhood favorite, this relish delivers authentic old-fashioned flavor. The recipe yields enough for canning or immediate use, so you can enjoy that homemade taste all year long. Let's get started on preserving that summer zing!
Ingredients for grandma's old fashioned green tomato relish
Ten simple ingredients transform summer's green tomatoes into nostalgic, vinegar-bright relish.
| Ingredient | Amount | Notes |
|---|---|---|
| Green Tomatoes 🍅 | 4 lbs | Firm, unripe, seedless preferred |
| Yellow Onion 🧅 | 1 whole | Medium size, finely chopped |
| Red Bell Pepper 🌶️ | 1 whole | Medium size, diced small |
| White Vinegar 💧 | 2 cups | White or apple cider vinegar |
| Granulated Sugar 🍚 | 2 cups | White sugar preferred |
| Salt 🧂 | 1 ½ tsp | Diamond Crystal kosher salt |
| Celery Stalks 🥬 | 3 whole | Medium size, finely chopped |
| Mustard Seeds 🌿 | 1 tsp | Yellow or brown preferred |
| Black Peppercorns 🌶️ | ½ tsp | Crushed lightly |
| Fresh Dill 🌿 | 2 tbsp | Chopped, or 1 tsp dried |
Green tomatoes are the star—pick firm ones, baby heirlooms if possible, but any unripe variety works. Local farmers markets often have perfect ones in late summer, but the grocery store produce section usually has them too. Look for tomatoes that are solid to the touch with no soft spots. The onion and bell pepper should be vibrant, not wilted. For the vinegar, white vinegar delivers classic tang, but apple cider adds subtle sweetness. Store-bought vinegar works fine, but homemade cider vinegar takes this to the next level if you've got it.
No yellow onion? Red or white onion works just as well. Skip the bell pepper? Extra celery or a pinch of smoked paprika adds depth. Mustard seeds giving you trouble? Substitute 1/4 tsp ground mustard, but the whole seeds give that classic crunch. Sugar too sweet? Reduce by 1/4 cup—this relish needs that vinegar bite to shine. Fresh dill is ideal, but dried dill at one-third the amount works in a pinch. The relish's magic comes from the vinegar ratio, so don't skimp there—2 cups minimum for proper preservation.
This relish keeps beautifully when canned—1 year unopened if processed correctly. For short-term use, store in the fridge for up to 3 months in airtight jars. I always double the batch because it disappears fast. The flavor actually improves after a few weeks as the vinegar works its magic. Freeze extras in ice cube trays for single-serving portions—perfect for sandwiches or charcuterie boards.
Why You'll Love This Recipe
- I swear by this trick: slice the green tomatoes into thick half-moons instead of tiny dice. The onions and bell peppers stay in big chunks too—no food processor, no fuss. Honestly, my hands stay clean while the flavors still shine through.
- No-Chop Shortcuts: I swear by this trick: slice the green tomatoes into thick half-moons instead of tiny dice. The onions and bell peppers stay in big chunks too—no food processor, no fuss. Honestly, my hands stay clean while the flavors still shine through.
- Sweet-Tart Magic: That vinegar-sugar balance? It’s the kind of thing that makes you go back for seconds without thinking. The green tomatoes stay crisp, the red bell pepper adds a bright punch, and the onions caramelize just enough to make every bite feel like a little celebration.
- Pantry Stash Ready: This relish lasts for weeks in the fridge, so I always have it on hand. Slather it on sandwiches, mix it into deviled eggs, or just eat it straight with chips. My kids grab it for lunchboxes, and I sneak it into burgers when company comes over.
Step-by-step instructions for grandma's old fashioned green tomato relish
Here's the classic method that delivers that perfect balance of tangy, sweet, and herby goodness.
Prepare and Chop the Vegetables
Start by washing and cutting the 4 lbs green tomatoes into ¼-inch dice. I use a sharp chef's knife for this—it gives you clean, even pieces that'll cook uniformly. You want to remove the stems and any blemished spots, but leave the skin on for texture and color.
Next, peel and finely chop the 1 whole yellow onion and the 1 whole red bell pepper. For the onion, I like to slice it in half first, then remove the stem and seeds before dicing. The bell pepper should be diced into small, even pieces—about ¼-inch cubes—so it cooks through without becoming mushy. The 3 whole celery stalks should be chopped into ¼-inch pieces as well, including the leaves.
Cook the Vegetable Mixture
In a large, heavy-bottomed pot, combine all the chopped vegetables. Add the 2 cups white vinegar, 2 cups granulated sugar, 1.5 tsp salt, 1 tsp mustard seeds, and 0.5 tsp black peppercorns. Stir everything together until the sugar and salt are fully dissolved and all the ingredients are well combined.
Place the pot over medium-high heat and bring the mixture to a boil. Once boiling, reduce the heat to medium-low and let it simmer uncovered for 45-50 minutes. You'll know it's ready when the vegetables are tender but still hold their shape—no mushiness here. Stir occasionally to prevent sticking, and taste as you go. The relish should be sweet, tangy, and just slightly spicy from the mustard seeds.
Add the Fresh Dill and Finish Cooking
After the vegetables are tender, stir in the 2 tbsp fresh dill. This is where the relish gets its bright, herby flavor. Let the mixture simmer for another 10-15 minutes to allow the dill to infuse its flavor. The relish should thicken slightly as it cooks, but it shouldn't reduce to a syrup—you want it to coat the back of a spoon with a slight gloss.
Taste again and adjust the seasoning if needed. If it's not sweet enough, add a little more sugar. If it needs more tang, add a splash of vinegar. The goal is that perfect balance of sweet, tangy, and herby that makes this relish so addictive.
Can or Store the Relish
If you're canning the relish, ladle it into sterilized pint or half-pint jars, leaving ½-inch headspace at the top. Wipe the rims with a clean, damp cloth, then seal with lids and rings. Process in a boiling water bath for 15 minutes for half-pints or 20 minutes for pints. This ensures your relish stays safe and flavorful for months.
For short-term storage, let the relish cool completely, then transfer it to airtight containers. It'll keep in the refrigerator for up to 3 months, though I usually go through it much faster. The flavor actually improves as it sits, so the longer it ages, the better it gets. Serve it on sandwiches, with cheese, or just spoon it straight from the jar—it's that good.
Pro Tips For Making Grandma'S Old Fashioned Green Tomato Relish
- Cut Tomatoes Small: I learned this the hard way—big chunks make for a chewy relish. Dice the green tomatoes, onion, and bell pepper into ¼-inch pieces or smaller. The smaller the better, especially if you’re using tougher green tomatoes. No one wants to bite into a whole tomato in their relish.
- Sweat, Don’t Burn: After burning three batches, I finally figured out the onion and bell pepper need gentle heat—low and slow for 8-10 minutes. If you rush it, you’ll get bitter flavors that vinegar can’t fix. Stir often, and resist the urge to crank the heat.
- Balance Vinegar First: My grandmother swore by this, and she was right: taste the vinegar-sugar mix before adding tomatoes. Start with a 1:1 ratio (vinegar to sugar) and adjust—too much vinegar makes it sharp, not tangy. You can always add more sugar, but you can’t take out vinegar.
- Simmer Hard for 30 Minutes: Skimping on cooking time means a watery, underdeveloped relish. Bring it to a rolling boil, then reduce to a gentle simmer and cook uncovered for at least 30 minutes. This thickens it properly and lets the flavors meld. (Yes, even if you’re impatient like me.)
Common mistakes when making your grandma's old fashioned green tomato relish
Overcooking Vegetables
One of the biggest mistakes is letting the vegetables turn mushy during the 45-50 minute simmer. I’ve seen relish go from perfect to sad when people walk away from the stove or don’t stir occasionally.
Use a large, heavy-bottomed pot to prevent scorching, and stir every 5-10 minutes to keep everything even. The tomatoes should stay firm but tender—like al dente pasta, not a soup. 🥬
Skipping the Vinegar Ratio
Some recipes skimp on vinegar to cut costs, but that’s a recipe for disaster. This relish relies on 2 cups of white vinegar for both flavor and preservation. Too little vinegar means the relish won’t keep well, and the tangy brightness will be dull.
If you’re worried about the sharpness, remember: the sugar balances it out. Trust the recipe—vinegar is non-negotiable for that classic old-fashioned zing. 💧
Using Ripe or Soft Tomatoes
Green tomatoes must be firm and unripe—no exceptions. Overripe or soft tomatoes will turn to mush during cooking, ruining the texture. Look for tomatoes that are solid to the touch, with no wrinkles or bruises.
If you’re unsure, cut one open: it should be pale green inside with no yellow or brown spots. Baby heirloom tomatoes are ideal, but any firm green variety will work. 🍅
Ignoring the Simmer Time
Rushing the 45-50 minute simmer is a common mistake. This step isn’t just about cooking—it’s about letting the flavors meld and the vinegar work its magic. Cutting it short leaves the relish tasting raw and unbalanced.
If you’re in a hurry, at least simmer for 30 minutes, but I promise the extra time is worth it for that deep, developed flavor. ⏰
Not Sterilizing Jars Properly
If you’re canning, sterilization is critical to prevent spoilage. I’ve seen jars of relish go bad because people skipped this step. Wash jars and lids in hot, soapy water, then boil them in water for 10 minutes before filling.
Use a boiling water bath for processing—15 minutes for half-pints, 20 for pints. This ensures your relish stays safe and delicious for months. ❄️
Adding Dill Too Early
Fresh dill should be added after the vegetables are tender, not at the start. Adding it too soon means the heat will turn it bitter. Stir it in during the final 10-15 minutes of cooking to preserve its bright, fresh flavor.
If you’re using dried dill, reduce the amount to ⅓ of the fresh measurement and add it with the other spices at the beginning. 🌿
Nutrition facts
Frequently asked questions
Can I substitute white vinegar with apple cider vinegar?
Apple cider vinegar works beautifully and adds a subtle sweetness that complements the relish. Use the same 2 cups measurement, but taste after simmering—you may want to reduce sugar slightly since apple cider vinegar is milder. The old-fashioned tang remains intact while gaining a hint of complexity.
How do I know when the green tomatoes are ready to pick?
Look for firm, unripe tomatoes that are solid to the touch with no soft spots or wrinkles. Cut one open—it should be pale green inside with no yellow or brown spots. Baby heirloom tomatoes are ideal, but any firm green variety works. Avoid tomatoes that feel mushy or have begun to ripen.
Can I make this relish without canning?
Yes! For short-term storage, let the relish cool completely, then transfer it to airtight containers. It’ll keep in the refrigerator for up to 3 months. The flavor actually improves as it sits, so don’t rush—let it develop its signature tang. Just ensure the vinegar ratio stays at 2 cups for safety.
What’s the best way to use up extra relish?
Spread it on sandwiches, slather it on burgers, or pair it with cured meats on charcuterie boards. For a quick snack, try it with cheese cubes or crackers. You can also freeze extras in ice cube trays for single-serving portions—just thaw overnight in the fridge before using.
Why does my relish taste too sweet or sour?
Adjust the balance by adding a splash of vinegar for extra tang or a pinch of sugar for sweetness. Taste as you go during the final 10-15 minutes of simmering—this is when you can fine-tune the flavor. The goal is a harmonious mix of sweet, tangy, and herby notes, not one dominating the other.