
Breakfast & Brunch
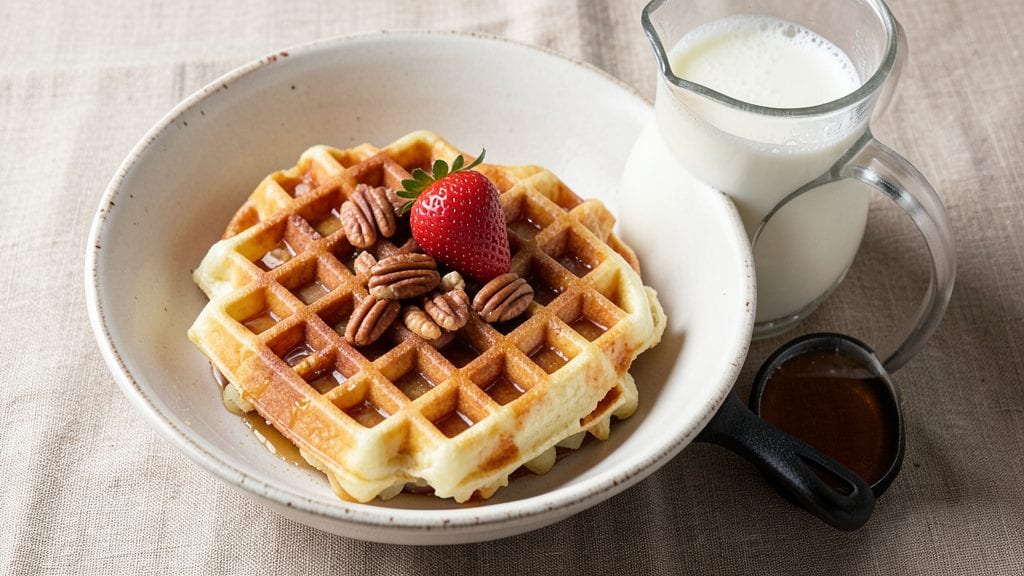
Recreating IHOP-style waffles at home means achieving that signature golden crunch and fluffy heart—something I perfected after years of trial and error. The secret lies in precise batter proportions and a well-heated griddle, ensuring every waffle emerges with crisp edges and tender pockets.
This recipe delivers the same restaurant-quality results you crave, right in your kitchen.
What sets these waffles apart is the balance of ingredients: baking powder for lift, buttermilk for tang, and a touch of corn syrup for that signature caramelized flavor.
I use a heavy griddle to maintain consistent heat, which is key for achieving that perfect golden-brown exterior while keeping the interior light and airy. The batter is thick but pourable—never too runny or stiff.
By the time you flip that first waffle, you’ll see those telltale deep pockets and crispy grid lines, just like at IHOP. The aroma alone will make your kitchen smell like a breakfast haven, and the texture is impossible to resist—crunchy on the outside, soft and fluffy inside.
This is the kind of waffle that pairs perfectly with butter, syrup, or even a stack of pancakes for a hearty brunch.
Serve them fresh with your favorite toppings, or save a batch for later—they reheat beautifully in the toaster. Whether you're feeding a crowd or treating yourself to a weekend indulgence, this recipe is your ticket to homemade waffles that rival the best restaurant versions.
Ingredients for ihop waffle
Six simple ingredients transform into waffles with that signature IHOP golden crunch and fluffy heart.
| Ingredient | Amount | Notes |
|---|---|---|
| All-Purpose Flour 🌾 | 2 cups | Sifted for smooth batter |
| Granulated Sugar 🍚 | ¾ cup | Light brown sugar for depth |
| Baking Powder 🧂 | 2 tsp | Freshly opened for lift |
| Salt 🧂 | ½ tsp | Fine sea salt preferred |
| Buttermilk 🥛 | 2 cups | Fresh, not powdered |
| Large Eggs 🥚 | 2 whole | Room temperature for blending |
| Unsalted Butter 🧈 | ½ cup | Melted, cooled slightly |
| Corn Syrup 🍯 | ¼ cup | Light or golden variety |
| Vanilla Extract 🌸 | 1 tsp | Pure, not imitation |
| Vegetable Oil 🫒 | ½ cup | For greasing griddle |
The buttermilk is non-negotiable here—it’s what gives those waffles that signature tang and tender crumb. Store-bought is fine, but homemade (just milk + vinegar) takes it to the next level. For the flour, King Arthur or Bob’s Red Mill are my go-tos—they’re finely milled and give the best texture. The corn syrup might seem odd, but it’s what creates that caramelized flavor and crispy edges. Trader Joe’s sells it in a squeeze bottle, which is perfect for this recipe. And don’t skip the vanilla—it’s subtle but makes all the difference in that restaurant-quality taste.
No buttermilk? Substitute with 2 cups milk + 2 tbsp vinegar or lemon juice, let it sit for 5 minutes. Short on corn syrup? Honey or maple syrup at half the amount works in a pinch, though the flavor will be slightly different. The butter needs to be melted but not hot—just warm enough to blend smoothly. European-style butter has more fat, which gives an even richer texture. And if you’re using a nonstick griddle, skip the extra oil—just a light spray is enough. The key is keeping the batter thick but pourable, like heavy pancake batter.
Batter keeps for 24 hours in the fridge, covered tightly. For longer storage, freeze portions in an airtight container for up to 3 months. Reheat in the toaster or toaster oven for that perfect crisp again. I like to make a double batch on Sundays—waffles freeze beautifully and reheat like they’re fresh. The griddle gets hot fast, so have your batter ready and your toppings prepped. Trust me, the first waffle out of the oven will make your kitchen smell like a breakfast dream.
Why You'll Love This Recipe
- Five-Ingredient Magic: The pantry staples here—flour, sugar, buttermilk—are all you need. No eggs to fuss with, no melted butter to measure, just mix and cook. That’s right: zero extra shopping trips.
- Crispy-Centered Bliss: The secret’s in the buttermilk—it keeps the edges golden while the middle stays tender enough to cut with a fork. Honestly, it’s the kind of texture that makes you pause mid-bite.
- Breakfast or Brunch: Stack them for pancake-style meals or serve as a toasty base for cinnamon rolls. I’ve even used them as a crispy vessel for fried chicken—because why not? They’re that adaptable.
- Budget Breakfast: A batch costs less than takeout and feeds four for under $3. Freeze extras in a bag, and you’ve got weekend waffles without the effort. My college student self would’ve cried happy tears.
Step-by-step instructions for IHOP-style waffles
Here's how to make waffles with that signature IHOP golden crunch and fluffy interior.
Melt the Butter and Mix Wet Ingredients
In a small microwave-safe bowl, melt the 0.5 cup unsalted butter in 30-second bursts, stirring between each, until completely liquid but not hot to the touch. Let it cool for 2 minutes—this prevents scrambling the eggs later.
In a large mixing bowl, whisk together the 2 cups buttermilk, 2 whole large eggs, 0.25 cup corn syrup, and 1 teaspoon vanilla extract until fully combined. Add the cooled melted butter and stir until smooth. The mixture should be slightly thicker than milk but still pourable. This step builds the foundation for that signature waffle texture—don't skip it.
Combine Dry Ingredients and Gradually Incorporate
In a separate medium bowl, sift together the 2 cups all-purpose flour, 0.75 cup granulated sugar, 2 teaspoons baking powder, and 0.5 teaspoon salt. Whisk gently to break up any lumps—this ensures light, airy waffles rather than dense ones.
With the mixer on low speed, gradually add the dry ingredients to the wet mixture. Mix just until combined—you'll still see small flour streaks, and that's perfect. Overmixing develops gluten, which leads to tough waffles. The batter should be thick but still flow smoothly when poured. If it's too thick, add 1 tablespoon buttermilk to loosen it slightly.
Preheat and Grease the Waffle Iron
Plug in your waffle iron and preheat it according to the manufacturer's instructions—most take about 5 minutes to reach the proper temperature. While it heats, lightly brush the plates with 0.5 cup vegetable oil using a paper towel. This creates that signature golden-brown crust without making the waffles greasy.
Here's the thing—don't skip the greasing step. The oil helps create that crispy exterior while keeping the interior moist. You'll know it's properly greased when a drop of water sizzles and beads up on the surface. If you're using a nonstick iron, you can reduce the oil to just a light coat.
Cook Waffles to Golden Perfection
Pour about 1 cup batter onto the center of the preheated waffle iron. Close the lid and cook for 4-6 minutes, or until the waffles are golden brown with crisp edges and steam stops bubbling from the sides. You'll see those beautiful deep pockets forming—that's your signal they're ready.
Use a waffle prong or spatula to carefully remove the waffle. Place it on a wire rack to keep it crispy, not on a plate where it'll steam and get soggy. Keep the iron hot for the next batch—consistent heat is key to that restaurant-quality crunch. If the batter starts to separate or the waffles don't brown properly, your iron might not be hot enough. Let it heat up a bit longer before trying again.
Serve Warm with Classic Toppings
Serve the waffles immediately while they're still warm and crisp. The ideal waffle should have a golden-brown exterior that gives way to a light, fluffy interior with those characteristic deep pockets. If you're making a stack, keep them warm in a 200°F oven on a wire rack for no more than 10 minutes—any longer and they'll lose their crispness.
Here's where it gets fun—top with warm maple syrup, fresh berries, whipped cream, or a sprinkle of powdered sugar. The contrast between the crispy exterior and the soft, buttery interior is what makes these waffles so special. And remember, the secret to perfect waffles lies in the details: proper greasing, consistent heat, and not overmixing the batter. You've got this!
Pro Tips For Making Ihop Waffle
- MEASURE THE BUTTERMILK RIGHT: I learned this the hard way—using a splashy "eyeball estimate" for buttermilk leads to dense, gummy waffles. Grab a measuring cup, stir the buttermilk first (it separates overnight), then scoop it straight in. No guesswork, no regret.
- STOP WHEN THE EDGES GOLDEN: Your waffle iron’s "perfect" indicator light is a lie. Pull them out when the edges are crisp and golden—not when the center’s set. Overcooking turns them dry; undercooking leaves them raw. Trust your eyes, not the machine.
- SIFT THE DRY INGREDIENTS: After burning three batches of flat waffles, I finally sifted the flour, sugar, and baking powder together. It cuts out lumps and aerates the mix, so the waffles rise higher and stay light. Skip this, and you’re fighting for texture the whole time.
- SWAP COLD BUTTERMILK FOR WARM: Sounds weird, but it works: heat the buttermilk to body temperature before mixing. The warmth activates the baking powder faster, giving you a fluffier rise. Just don’t microwave it—warm it in a bowl over hot water instead.
Essential equipment for this dish
Waffle Iron Essentials
Your waffle iron is the star of this recipe, and I can't stress enough how important it is to choose the right one. I recommend the Cuisinart W-150PBC Griddler—it’s a workhorse that delivers consistent heat and those deep pockets.
For budget-friendly options, the Hamilton Beach 26008 is a solid performer. The key is a nonstick surface that maintains even heat distribution, which is crucial for achieving that signature golden crunch. 🔥
Griddle Temperature Control
Most waffle irons have a temperature dial, but I prefer setting mine to medium-high heat (around 375°F) for the best results. Use an infrared thermometer to verify the temperature—this ensures you’re not undercooking or burning your waffles.
If your iron doesn’t have a dial, preheat it for 5-7 minutes before cooking. The goal is a surface that’s hot enough to caramelize the batter but not so hot that it burns before the center cooks through.
Batter Pouring Tools
A waffle batter pitcher with a spout is a game-changer—it helps you pour the thick batter evenly into the iron’s center. I use the OXO Good Grips Waffle Pitcher because it’s easy to grip and control.
If you don’t have one, a measuring cup with a pour spout works in a pinch. The key is to pour the batter slowly and steadily to avoid spills and ensure even cooking. A waffle prong is also essential for flipping and removing waffles without tearing them.
Heat-Resistant Accessories
Protect your counters and keep your kitchen safe with heat-resistant silicone mats or wire racks. I place a silicone baking mat under the waffle iron to catch any drips and make cleanup a breeze. For serving, a large wire rack keeps waffles crispy by allowing air to circulate underneath.
If you’re making a big batch, a second wire rack on a baking sheet lets you stack waffles while keeping them warm in a 200°F oven for up to 10 minutes.
Optional Upgrades
For the ultimate IHOP experience, consider a waffle iron with a built-in syrup warmer—it keeps your syrup at the perfect temperature for serving. The Breville Smart Oven Air Fryer also has a waffle function that mimics a traditional iron.
If you’re serious about waffle-making, a digital thermometer like the ThermoWorks Thermapen helps monitor the iron’s temperature for precision. Even a simple pastry brush comes in handy for greasing the iron between batches. 💡
Nutrition facts
Frequently asked questions
Why does my IHOP-style waffle batter look too thick or too thin?
The batter should be thick but still pourable—like heavy pancake batter. If it's too thick, add 1 tablespoon buttermilk at a time until it flows smoothly. If it's too thin, whisk in 1 tablespoon all-purpose flour to thicken. The key is consistency: your batter should coat the back of a spoon but still pour easily.
Can I make these waffles without a waffle iron?
Yes! Use a nonstick skillet on medium-high heat with a lid. Pour ¼ cup batter per waffle shape, cover, and cook for 3-4 minutes until golden and bubbly. Flip carefully with a spatula—it won't have the deep pockets, but the texture will still be crispy and fluffy.
How do I keep my waffles crispy when reheating?
Never microwave them—they'll turn soggy. Instead, pop waffles in a 350°F oven for 2-3 minutes or use a toaster on low heat for 30-45 seconds. For extra crunch, place them on a wire rack in the oven to crisp up the edges. Store leftovers in an airtight container between parchment paper to prevent sticking.
What's the secret to getting those deep pockets like IHOP's?
Use a hot waffle iron (preheat for 5-7 minutes) and pour batter slowly into the center—not the edges. The heat creates steam that pushes the batter upward, forming pockets. A well-seasoned iron also helps. If pockets are shallow, your iron might not be hot enough—let it heat longer before cooking.
Can I substitute buttermilk in this recipe?
Yes! Mix 2 cups milk + 2 tablespoons lemon juice or vinegar, then let it sit for 5 minutes to curdle. For a richer taste, use sour cream or plain yogurt (thinned with milk to match the buttermilk's consistency). Avoid powdered buttermilk—it alters the texture. The tang is crucial for that signature IHOP flavor!