
Desserts
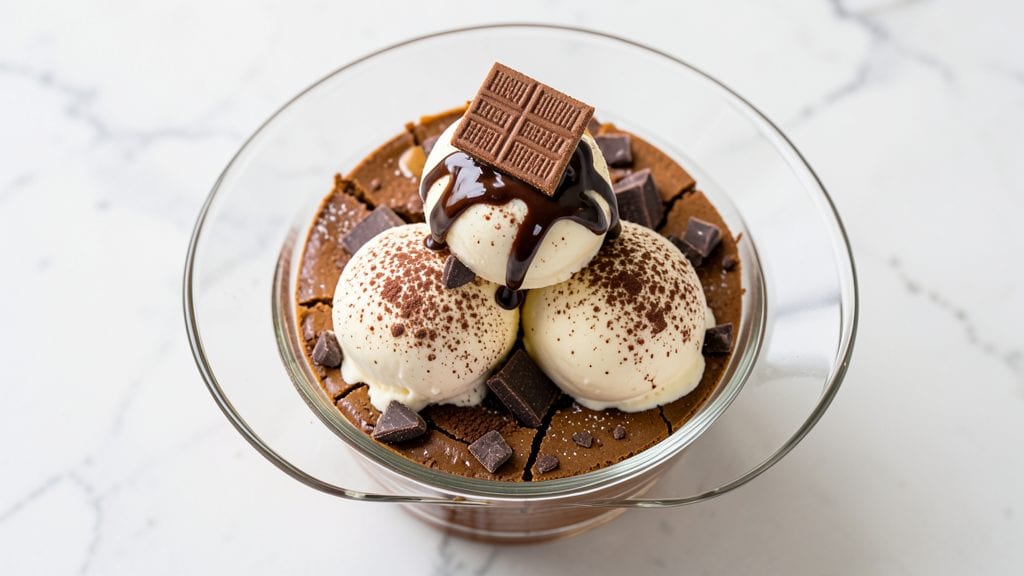
This Kit Kat candy bar ice cream cake delivers the perfect marriage of velvety chocolate cake layers and creamy ice cream, all punctuated by the signature crunch of Kit Kat pieces.
The secret lies in balancing rich chocolate flavors with the nostalgic snap of those iconic bars, creating a dessert that feels indulgent yet surprisingly stable. I developed this recipe after years of testing—no soggy layers here, just clean cuts and satisfying texture in every bite.
What makes this recipe stand out is the professional technique for layering: a sturdy chocolate cake base, perfectly chilled ice cream filling, and strategically placed Kit Kat chunks that stay crisp even after baking.
The cake itself is moist yet firm enough to hold its shape, while the ice cream remains creamy without melting prematurely. This isn't your average ice cream cake—it's a showstopper that combines classic flavors with modern stability tricks.
By the time you're done assembling, you'll have a cake with rich chocolate layers, pockets of creamy ice cream, and the addictive crunch of Kit Kat bars throughout. The final drizzle of melted chocolate adds that restaurant-quality finish, making it look as impressive as it tastes.
Whether you're serving this for a celebration or just treating yourself, it's a dessert that delivers every time.
For those looking for variations, this recipe works beautifully with vegan ice cream or dairy-free chocolate—just adjust the chilling times slightly. The key is patience in layering and proper chilling between each step, which ensures clean slices and maximum crunch. Let's build this decadent dessert step by step.
Ingredients for kit kat candy bar ice cream cake
Twelve ingredients balance rich chocolate cake, creamy ice cream, and iconic Kit Kat crunch.
| Ingredient | Amount | Notes |
|---|---|---|
| Kit Kat Candy Bars 🍫 | 12 whole | Original or wafer variety, chopped |
| All-Purpose Flour 🌾 | 2 ½ cups | Sifted, for cake layers |
| Unsalted Butter 🧈 | 1 ½ cups | Cold, cubed for cake |
| Granulated Sugar 🍚 | 2 ½ cups | For cake and filling |
| Dark Chocolate Chips 🍫 | 1 ½ cups | 70% cocoa, semi-sweet |
| Large Eggs 🥚 | 6 whole | Room temperature |
| Baking Powder 🧂 | 1 ½ tsp | Double-acting preferred |
| Salt 🧂 | ½ tsp | Fine sea salt |
| Vanilla Extract 🌿 | 2 tsp | Pure, high-quality |
| Vanilla Ice Cream 🍦 | 3 cups | Premium brand, fully frozen |
| Heavy Whipping Cream 🥛 | 1 cup | Cold, for filling |
| Powdered Sugar 🍚 | ¼ cup | For whipped cream |
| White Chocolate Chips 🍫 | ½ cup | For drizzle finish |
The Kit Kats make or break this cake. Original or wafer bars work best—their crunch stays crisp when baked at low temps. Grab the family-size bars from Costco or Trader Joe's for better value. Chop them into 1/2-inch pieces before baking, and don't skip the extra 10 minutes in the oven after assembling—this ensures they stay crunchy. The dark chocolate chips? Ghirardelli or Guittard brands melt perfectly for the cake layers. If you're using vegan chocolate, look for Enjoy Life brand—it behaves just like dairy chocolate in baking.
No Kit Kats? Crushed Oreos or butterscotch chips add a similar crunch, though they won't have that signature wafer texture. Running low on vanilla ice cream? Coffee or mint ice cream works too—just adjust the vanilla extract in the cake to match. The heavy whipping cream needs to be cold and full-fat (none of that light stuff)—it's what keeps the ice cream filling stable. For the cake batter, if you're at high altitude, reduce the baking powder by 1/4 tsp to prevent doming. And if you're making this ahead, freeze the assembled cake (without the final drizzle) for up to 1 month—it thaws beautifully.
This cake keeps 3 days in the fridge once assembled, but the ice cream filling will soften slightly after day 2. For maximum crunch, serve it within 24 hours of baking. Store any leftover Kit Kat pieces in an airtight container at room temp—they'll stay fresh for 2 weeks. The white chocolate drizzle? Melt it gently in 30-second bursts in the microwave—overheating makes it grainy. And if you're feeling fancy, add a sprinkle of crushed pistachios to the drizzle for extra texture.
Why You'll Love This Recipe
- No-Bake Magic: I swear by this recipe when I’m too tired to bake—just mix crushed Kit Kats into softened butter and sugar, fold in store-bought ice cream, and freeze. The texture is chef’s kiss: creamy layers with those little wafer crunch pockets everywhere.
- Crunchy Creamy Obsession: Honestly, it’s the contrast that sells me—warm, buttery Kit Kat shards melting into cold vanilla ice cream, then that final sprinkle of dark chocolate chips for a grown-up touch. (Yes, even on a Tuesday night.)
- Party in a Box: This is my go-to for birthdays or game nights because it’s ridiculously easy to assemble ahead. Pop it in the freezer while you set up, and by the time guests arrive, it’s ready—no last-minute stress, just dessert perfection.
- Budget-Friendly Luxury: Between us, this tastes like a gourmet dessert but costs pennies. A few candy bars, a bag of chocolate chips, and a tub of ice cream stretch farther than you’d think. Plus, leftovers? They disappear faster than I can say “second slice.”
Step-by-step instructions for Kit Kat candy bar ice cream cake
Here's how to build layers of rich chocolate cake with Kit Kat crunch and velvety ice cream filling.
Prepare the Chocolate Cake Layers
Preheat your oven to 350°F. In a large mixing bowl, cream together the 1.5 cups unsalted butter and 2.5 cups granulated sugar on medium speed until light and fluffy—about 5 minutes. This step ensures proper aeration for tender layers.
Add the 6 whole large eggs one at a time, beating well after each addition. Mix in the 2 tsp vanilla extract and 0.5 tsp salt, then sift in the 2.5 cups all-purpose flour and 1.5 tsp baking powder. Fold in the 1.5 cups dark chocolate chips and 12 chopped Kit Kat candy bars (wafer variety works best for texture).
Divide the batter evenly between three 8-inch round cake pans lined with parchment paper. Bake for 25-30 minutes or until a toothpick inserted comes out clean. Let cool completely before assembling.
Create the Ice Cream Filling
Take the 3 cups vanilla ice cream out of the freezer and let it soften slightly—about 10 minutes. This makes it easier to spread between layers. I like to use a premium brand for the best texture and flavor.
In a separate bowl, whip the 1 cup heavy whipping cream and 0.25 cup powdered sugar to stiff peaks. Fold this into the softened ice cream gently to create a light, airy filling that won't be too heavy between cake layers.
Assemble the Cake Layers
Place the first cake layer on a serving plate. Spread half of the ice cream mixture evenly over the top, then add the second layer. Repeat with the remaining ice cream and final cake layer. Press down gently to ensure everything stays in place.
For extra indulgence, sprinkle the remaining 0.5 cup white chocolate chips over the top layer and let them melt slightly in a 30-second burst in the microwave. This creates a glossy, decorative finish that adds another layer of flavor.
Chill and Serve
Cover the assembled cake with plastic wrap and refrigerate for at least 4 hours (overnight is best). This allows the ice cream to firm up and the flavors to meld together perfectly. The longer it chills, the more pronounced the Kit Kat crunch becomes.
When ready to serve, run a knife around the edges to loosen, then slice into wedges. Each bite should deliver a perfect balance of rich chocolate cake, creamy ice cream, and those signature Kit Kat wafer crunches. Serve immediately for the best texture experience!
Pro Tips For Making Kit Kat Candy Bar Ice Cream Cake
- Chill the Kit Kats: Pop those candy bars in the freezer for 15 minutes before chopping—it prevents the chocolate from melting into a greasy mess. I learned this the hard way when my first batch turned into a sticky, unworkable paste.
- Melt Butter Slowly: Warm the butter for the cake base over low heat until it’s just melted but not browned—overheating makes the flour taste burnt. I used to rush this, and the whole cake had a weird, off flavor.
- Layer Ice Cream Fast: Spread the ice cream thinly between Kit Kat layers, then freeze for 30 minutes before adding the next—thick layers crack when sliced. My first attempt looked like a failed science experiment.
- Use Extra Chocolate: Toss chopped Kit Kats in melted dark chocolate before assembling the cake—it adds richness and keeps the layers from drying out. Skip this, and the texture turns crumbly after freezing.
Serving suggestions for this recipe
Presentation Plating
Serve this cake on a chocolate-dusted cake stand or a gold-rimmed platter to elevate its visual appeal. Dust the top lightly with powdered cocoa or matcha powder for a sophisticated contrast against the creamy layers.
I like to use a large offset spatula to smooth any uneven edges before serving—it makes all the difference for that restaurant-quality finish. 💫
Garnish Ideas
Add crushed Kit Kat pieces around the base for extra crunch and visual interest. A dark chocolate ganache drizzle (melt ½ cup dark chocolate with ¼ cup heavy cream) adds a glossy, decadent touch.
For a pop of color, sprinkle freeze-dried strawberries or edible gold leaf on top—just before serving to keep them crisp.
Serving Tools
Use a serrated knife dipped in hot water and wiped clean between slices for clean cuts. A small offset spatula helps lift each slice neatly from the plate. For a dramatic presentation, serve slices on mini dessert plates with a side of whipped cream or caramel sauce for dipping. 🍴
Temperature Tips
Let the cake sit at room temperature for 10-15 minutes before serving to soften the ice cream slightly—this prevents it from being too hard. If your kitchen is warm, chill the cake for 10 extra minutes before slicing to maintain stability.
Always serve with a chilled spoon to scoop any melted ice cream back into the slice.
Pairing Drinks
Pair this rich dessert with a bold espresso or chocolate martini to cut through the sweetness. For a lighter option, a chilled glass of milk or vanilla chai latte complements the flavors beautifully.
I love serving it with a small scoop of vanilla bean ice cream on the side for guests who want extra creaminess.
Make-Ahead Serving
Assemble the cake 24 hours ahead and store it in the fridge. Before serving, let it sit at room temperature for 30 minutes to bring out the Kit Kat crunch.
If you're freezing it, wrap each layer in plastic wrap and aluminum foil to prevent freezer burn. Thaw overnight in the fridge before serving for the best texture. ❄️
Nutrition facts
Frequently asked questions
Can I use store-bought cake layers instead of baking my own?
For a quicker version, use three 8-inch chocolate layer cakes from your favorite bakery. Just make sure they're sturdy enough to hold the ice cream filling—avoid overly moist or crumbly cakes. Chill the store-bought layers for 1 hour before assembling to prevent them from becoming soggy.
How do I keep the Kit Kat pieces from getting soggy?
The secret is baking them at 350°F for 10 extra minutes after assembling the cake. This lightly toasts the Kit Kat pieces, keeping them crisp. For even better results, spread them evenly on a baking sheet and bake for 5 minutes before adding them to the cake batter.
What's the best way to melt the white chocolate for the drizzle?
Use 30-second bursts in the microwave, stirring between each burst, until smooth. Never microwave for more than 1 minute total—overheating makes it grainy. For a glossy finish, add 1 teaspoon coconut oil to the melted chocolate before drizzling.
Can I make this recipe gluten-free or vegan?
Yes! Swap the all-purpose flour for a 1:1 gluten-free baking flour blend and use vegan chocolate chips (like Enjoy Life brand). For vegan ice cream, choose a premium brand like Ben & Jerry's Non-Dairy or So Delicious. Adjust chilling time to 6 hours since plant-based fillings firm up slower.
Why did my ice cream filling melt too fast?
This usually happens if the cake wasn't chilled long enough or if the kitchen was too warm. Always refrigerate for at least 4 hours (overnight is best). For extra stability, freeze the assembled cake (without the drizzle) for 1 hour before serving.