Side Dishes
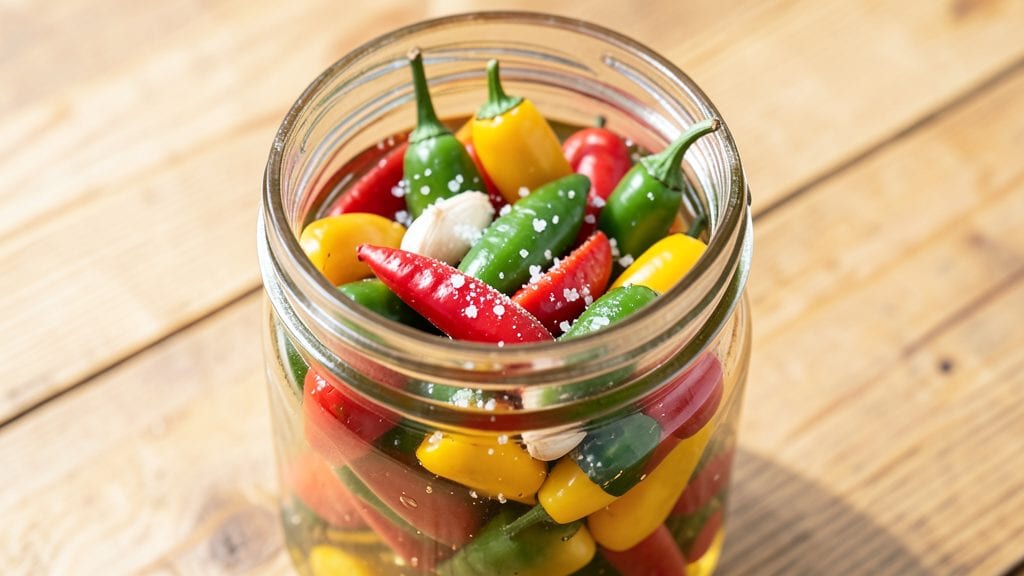
This pickled mini sweet peppers recipe transforms their bright crunch into tangy, vinegar-kissed bites in just 15 minutes of active time—and the results elevate any dish from ordinary to extraordinary.
The secret lies in balancing sharp vinegar with just enough sweetness to create a crunchy, flavor-packed condiment that pairs perfectly with charcuterie boards, sandwiches, or grilled meats. I developed this recipe after realizing how versatile pickled peppers could be, turning a simple pantry staple into a restaurant-worthy addition.
The process is straightforward: combine white vinegar, water, and salt with optional garlic, mustard seeds, and sugar for depth. Pack the mini peppers into a jar, pour the hot brine over them, and let them sit for at least 24 hours to develop that signature tangy crunch.
The key is patience—this isn’t something you can rush, but the wait is worth it for that bright, complex flavor that lingers on the palate. No special equipment is needed, just a jar and a little time.
What you’ll end up with is a jar of vibrant, crisp mini peppers that add a bright, tangy punch to any dish. Their crisp texture holds up beautifully, making them perfect as a garnish for tacos, a snack for parties, or a topping for burgers and salads.
The flavor profile is versatile enough to complement rich meats or cut through creamy cheeses, yet simple enough to enjoy straight from the jar. This recipe is a game-changer for anyone who loves bold, flavorful sides without the fuss.
Once pickled, these peppers stay fresh in the refrigerator for up to 3 months, making them an ideal make-ahead condiment. Double the batch—they disappear faster than you’d expect. Ready to add a tangy crunch to your meals? Here’s how to make them.
Ingredients for pickled mini sweet peppers
Eight ingredients, one jar of tangy crunch—simple enough to make tonight.
| Ingredient | Amount | Notes |
|---|---|---|
| Mini Sweet Peppers 🌶️ | 2 cups | Whole, firm and vibrant |
| White Vinegar 💧 | 2 cups | Distilled or apple cider |
| Water 💧 | 1 cup | Filtered preferred |
| Granulated Sugar 🍯 | ½ cup | White or raw cane |
| Sea Salt 🧂 | 1 ½ tbsp | Fine grain preferred |
| Garlic Cloves 🧄 | 3 cloves | Thinly sliced, optional |
| Mustard Seeds 🌶️ | 1 tsp | Whole, yellow preferred |
| Black Peppercorns 🌶️ | ½ tsp | Crushed lightly |
The peppers are the star here, so grab the brightest, firmest ones you can find. Trader Joe's and Whole Foods often carry the best mini sweet peppers—they're usually labeled as 'snack peppers' or 'baby bell peppers'. If you can't find them fresh, frozen mini peppers work too, just thaw and pat dry before pickling. The vinegar is non-negotiable for that signature tang—stick with white or apple cider. Sugar balances the sharpness, so don't skip it even if you're not sweet-toothed. For the garlic, fresh is best, but if you're in a pinch, jarred minced garlic (not the stuff with oil) works in a squeeze.
No mustard seeds? Dried mustard powder at half the amount gives a similar kick. Skip the garlic if you're sensitive to its flavor—just add an extra pinch of salt for depth. The black peppercorns add subtle heat, but if you don't have them, a pinch of red pepper flakes does the trick. For a smoky twist, swap half the vinegar for smoked apple cider vinegar. And if you're feeling adventurous, add a 1-inch piece of fresh ginger to the brine for a zesty kick. The key is keeping the ratio balanced—2 parts vinegar to 1 part water is your golden ticket for that perfect tangy crunch.
This brine keeps for 1 month in the fridge, even after opening, so make extra. The peppers stay crisp for 3 months if stored properly—just submerge them completely in the brine. I like to portion mine into small jars (like 4-ounce mason jars) so they're ready to grab for snacks or topping. Freeze extras for up to 6 months—just thaw in the fridge overnight before using. They're perfect for gifting too—just tie a ribbon around the jar.
Why You'll Love This Recipe
- No-Fuss Pantry Staples: I swear by this recipe because it uses things I already have—vinegar, sugar, salt—plus those bright little peppers from the back of the fridge. No specialty shopping, no fancy tools, just a jar and 15 minutes of my time.
- Tangy Sweet Crunch: That first bite? The peppers stay crisp while the vinegar-sugar brine gives them a bright, almost candy-like tang. It’s the kind of flavor that makes you reach for seconds without even thinking—like a snack that’s too good to stop at one.
- Snack Attack Ready: Honestly, I make these just to keep in the fridge for when I’m craving something quick. They’re perfect on charcuterie boards, tossed in salads, or even straight from the jar with a sprinkle of flaky salt. My kids grab them for lunchboxes, and my partner sneaks them off the counter.
- Lasts for Weeks: Between us, I’ve had these peppers sitting in my fridge for three weeks and they’re still fresh. The vinegar preserves them beautifully, so I can make a big batch once and forget about it—no wilting, no spoilage, just reliable flavor whenever I need it. Budget win.
Step-by-step instructions for pickled mini sweet peppers
Here's how to create vibrant, tangy pickled peppers that stay crisp for weeks.
Sterilize and Prepare the Peppers
Rinse the 2 cups mini sweet peppers thoroughly under cold water and pat them completely dry with paper towels. This step is crucial—any moisture will prevent the vinegar from penetrating properly and can lead to mold. In a clean, dry quart-sized mason jar, gently pack the peppers tightly, standing them upright rather than nesting them.
I like to work in batches if needed, but try to keep everything moving. The peppers should fit snugly—this helps them maintain their shape during the pickling process. If you're using the optional 3 cloves garlic, slice them thinly and tuck them between the peppers as you pack them. This adds subtle flavor without overpowering the sweetness of the peppers.
Create the Pickling Brine
In a medium saucepan, combine the 2 cups white vinegar, 1 cup water, 0.5 cup granulated sugar, and 1.5 tablespoons sea salt. Stir over medium heat until the sugar and salt dissolve completely, which should take about 2-3 minutes. You'll know it's ready when you can see the bottom of the pan clearly through the liquid.
While the brine heats, lightly crush the 0.5 teaspoon black peppercorns and 1 teaspoon mustard seeds with the flat side of a knife. This releases their flavors without making the mixture gritty. Once the brine reaches a gentle simmer, remove it from heat and let it cool for 5 minutes—this prevents the peppers from becoming too soft when the hot liquid contacts them.
Pack and Seal the Peppers
Carefully pour the cooled brine over the packed peppers in the mason jar, ensuring all peppers are completely submerged. The liquid level should be at least 1 inch above the top pepper to prevent mold growth. Use a wooden spoon or clean chopsticks to gently press down on the peppers, helping them stay submerged and packed tightly.
Place the lid on the jar and tighten it securely. You'll want to process this immediately—don't wait for the jar to cool completely. The peppers will be ready to eat within 24 hours, but their flavor will continue developing for up to 2 weeks if stored in a cool, dark place.
Rest and Store for Maximum Flavor
Let the jar sit at room temperature for 1 hour before refrigerating. This initial resting period allows the flavors to begin melding. After 24 hours, transfer the jar to the refrigerator where it will keep for up to 3 months. The peppers will remain crisp and develop a perfect balance of sweetness and tang.
I like to check on them after a week—they'll be ready to use immediately, but their flavor will deepen with time. The vinegar-kissed crunch makes these perfect for snacking, charcuterie boards, or adding a bright element to salads and sandwiches. The mustard seeds add a subtle warmth that pairs beautifully with the peppers' natural sweetness.
Pro Tips For Making Pickled Mini Sweet Peppers
- STERILIZE JARS FIRST: I learned this the hard way—skipping the boiling water bath for jars left my pickles with fuzzy mold after just two weeks. Even if you’re impatient (yes, I get it), take five minutes to sterilize jars and lids in hot water or run them through the dishwasher’s sanitize cycle. Trust me, the extra effort keeps your peppers crisp and safe.
- USE HOT BRINE, NOT COLD: Dump those peppers into cold vinegar-water mix, and you’re asking for cloudy, limp pickles. Heat your brine to at least 180°F (82°C) before packing the jars—this dissolves sugar and salt faster and ensures even flavor penetration. Let the jars sit for 10 minutes after sealing to lock in that bright, tangy punch.
- SLICE PEPPERS UNIFORMLY: Ragged edges mean uneven pickling—some bits stay crunchy, others turn mushy. Use a sharp knife and cut mini peppers into ¼-inch slices, all the same thickness. If you’re lazy like me, a mandoline does the job in seconds, but a steady hand works too. Consistency is the thing that matters most here.
- ADD A SPICE LAYER: Skip the spices, and you’re missing out on depth. Tuck a garlic clove, a few black peppercorns, or a bay leaf into each jar before adding peppers—it’s the shortcut that upgrades flavor without extra effort. My grandmother swore by a pinch of mustard seeds too; it adds a subtle kick that balances the sweetness.
Perfect pairings for this recipe
Charcuterie Board Star
These pickled mini peppers are a charcuterie board MVP—their bright tang cuts through rich meats like prosciutto and salami. I arrange them in a glass bowl with aged cheddar cubes, marinated olives, and walnuts for texture contrast.
The mustard seeds in the brine add a subtle warmth that complements the salty cured meats perfectly. For extra flair, drizzle with honey and sprinkle with fresh thyme just before serving. 🧀
Burger & Sandwich Topper
Add a handful of these peppers to your burger or sandwich right before serving—they bring bright acidity that balances juicy meats and creamy condiments. I love them on smash burgers with blue cheese crumbles and caramelized onions, or in Reuben sandwiches for a tangy crunch.
For extra flavor, lightly toast the peppers in a dry skillet for 30 seconds to intensify their crunch. 🍔
Taco & Tostada Garnish
Toss a few pickled peppers onto tacos or tostadas in the final minute of cooking—their zesty crunch elevates every bite. I pair them with spiced ground beef, pickled red onions, and cotija cheese for a restaurant-worthy combo.
For a vegetarian twist, serve them with black beans, avocado, and lime crema. The mustard seeds in the brine add a subtle heat that works beautifully with spicy salsas. 🌮
Salad & Grain Bowl Boost
Toss these peppers into grain bowls or salads for an instant flavor pop. I add them to quinoa bowls with roasted sweet potatoes, avocado, and cilantro-lime dressing, or sprinkle them over kale Caesar salad for a tangy twist.
Their crisp texture holds up perfectly, even when mixed with softer ingredients like feta or grilled chicken. 🥗
Dip & Spread Pairing
Serve these peppers alongside creamy dips like hummus, tzatziki, or blue cheese dip for a crunchy contrast. I also love them with spicy mayo for a quick snack—just mix mayonnaise, sriracha, and garlic powder, then dip the peppers in.
For a savory spread, blend the peppers with some of their brine, Greek yogurt, and dill for a pickled pepper relish. 🥄
Global Flavor Fusion
These peppers shine in international dishes too. Add them to Vietnamese pho for a tangy crunch, or toss them into Italian caprese skewers with mozzarella and basil. For a Mexican-inspired twist, serve them with queso fundido or chilaquiles.
The versatility of the brine makes them adaptable to almost any cuisine—just let the peppers' natural sweetness shine. 🌍
Nutrition facts
Frequently asked questions
Can I use regular bell peppers instead of mini sweet peppers?
While you can technically use regular bell peppers, mini sweet peppers are ideal because their small size allows the vinegar to penetrate quickly, ensuring maximum tangy crunch. If you must use larger peppers, slice them into 1-inch pieces and reduce the pickling time to 12-18 hours to prevent mushiness. The flavor will still be great, but the texture won't be as crisp.
How do I know if my pickled peppers are safe to eat?
Your pickled peppers are safe if the brine is always covering them and the jar is properly sealed. If you see mold, discard the entire batch immediately. Never eat peppers floating at the top—they weren't submerged properly. The 24-hour minimum ensures proper acidification, but always store them in the fridge after opening.
Can I make this recipe without sugar?
Yes, but the flavor will be sharper and less balanced. Sugar helps mellow the vinegar's acidity and enhances the peppers' natural sweetness. For a sugar-free version, reduce the salt to 1 tablespoon and add 1 teaspoon of honey or 1 tablespoon of apple cider vinegar instead. The texture will remain crisp, but the taste will be more pronounced.
What’s the best way to store leftover brine?
After removing peppers, store the leftover brine in an airtight container in the fridge for up to 1 month. It makes an excellent marinade for meats, salad dressing base, or even a quick cocktail mixer. Just reheat gently before using to preserve its tangy punch. Never reuse brine that’s been open for more than a week.