Snacks
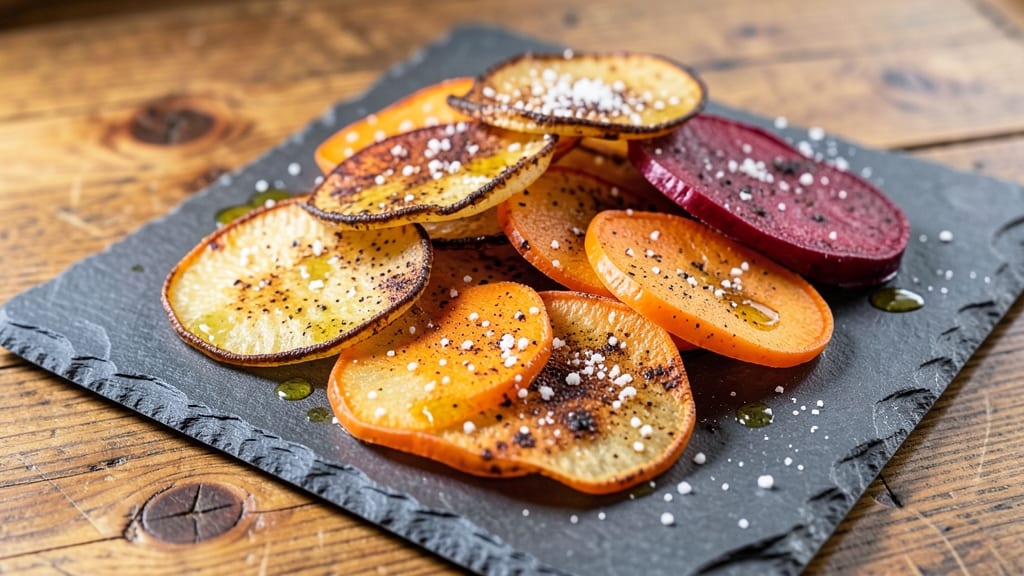
This veg crisps recipe delivers the satisfying crunch of classic potato chips without the oil overload or guilt—perfect for snack lovers who want healthier alternatives. After testing countless variations, I’ve perfected a method that creates crispy, golden edges and tender centers using minimal oil, whether you bake or air-fry.
The secret lies in thin, even slices and precise seasoning that enhances natural flavors without masking them.
What sets these veg crisps apart is their versatility—you can use sweet potatoes, regular potatoes, or even mixed vegetables like beets and carrots for vibrant colors and varied textures.
The process is straightforward: slice thinly, season generously, and bake until crispy, with no need for deep-frying. This approach ensures a lighter snack that still delivers that addictive crunch.
By the time they emerge from the oven, you’ll have a batch of crispy, flavorful chips that are ready to enjoy straight out of the bag or stored for later. The seasoning options are endless—try smoked paprika, garlic powder, or even a sprinkle of nutritional yeast for a cheesy flavor.
These crisps are ideal for parties, movie nights, or as a guilt-free alternative to store-bought chips.
Whether you’re baking a single sheet or prepping for a crowd, this recipe is designed for consistency and ease. The key is patience—thin slices and even baking are essential for achieving that perfect crunch every time. Once you try these, you’ll never go back to greasy chips again.
Ingredients for veg crisps
Simple veggie slices, bold flavors, and zero oil guilt—these crisps are game-changers.
| Ingredient | Amount | Notes |
|---|---|---|
| Russet Potatoes 🥔 | 2 lb | Thinly sliced, skin-on preferred |
| Sweet Potatoes 🍠 | 2 lb | Thinly sliced, skin-on preferred |
| Extra-Virgin Olive Oil 🫒 | 1 tbsp | Light coating only |
| Smoked Paprika 🌶️ | 2 tbsp | For smoky flavor |
| Garlic Powder 🧄 | 1 tbsp | Freshly ground preferred |
| Nutritional Yeast 🧀 | 2 tbsp | For cheesy flavor |
| Sea Salt 🧂 | 1 tsp | Fine grain preferred |
| Ground Black Pepper 🌶️ | ½ tsp | Freshly ground |
| Beets 🍠 | 1 lb | Thinly sliced, peeled |
| Carrots 🥕 | 1 lb | Thinly sliced, peeled |
| Cornstarch 🌾 | 2 tbsp | For extra crispiness |
The potatoes are the stars here. Russets are ideal for classic chip texture, while sweet potatoes add natural sweetness. Grab organic if possible—Whole Foods or Trader Joe's carry good options. For beets and carrots, pre-cut sections save time, but whole roots last longer. The key is thin, even slices—aim for 1/8-inch thickness with a mandoline for consistency. If you don’t have one, a sharp knife and steady hand work too.
No smoked paprika? Regular paprika plus a pinch of liquid smoke works in a pinch. Want extra cheesiness? Add 1 tbsp miso paste to the seasoning mix. The cornstarch is optional but makes a noticeable difference in crispiness—Bob’s Red Mill is my go-to brand. For storage, slice potatoes and beets immediately after washing and patting dry to prevent browning. Keep them in the fridge until ready to season and bake.
These crisps are best eaten fresh but keep well for 3-4 days in an airtight container. For longer storage, freeze them on a parchment-lined tray for 1 hour before transferring to a bag—prevents sticking. Reheat in the oven at 375°F for 5-7 minutes until crispy again. Double the batch and freeze half for lazy days—no one will guess they’re homemade.
Why You'll Love This Recipe
- No-Fuss Prep: I swear by this—just slice, toss, bake. No peeling, no fancy techniques, just thin cuts of russet and sweet potato tossed in olive oil until they’re golden and crisp. Honestly, it’s the kind of recipe that makes me feel like I actually cooked something when I’m really just assembling it.
- Smoky-Savory Magic: That smoked paprika and garlic powder combo? It’s what turns these into something ridiculously good. The sweet potatoes add natural sweetness that balances the earthy, slightly spicy kick—like a hug for your taste buds, but in crispy form.
- Snack Attack Ready: Between us, these are my go-to for movie nights, game days, or when I’m craving something but don’t want to fire up the oven for an hour. They hold up in the fridge for days too, so I can make a big batch and grab them whenever. (Yes, even on a Tuesday night.)
- Budget Crunch Hero: Russets and sweet potatoes are cheap, and a little olive oil goes a long way. I’ve made these for 10 people for under $10—no fancy ingredients, just pure, satisfying crunch. Plus, they’re a great way to use up odds and ends of veggies before they go bad.
Step-by-step instructions for crunchy baked vegetable crisps
Here's how to transform simple vegetables into irresistibly crispy, guilt-free chips with perfect texture every time.
Prepare the Vegetables for Even Cooking
Start by preheating your oven to 375°F - this temperature ensures crispy edges while keeping the centers tender. Wash and peel the 1 lb beets and 1 lb carrots, then slice them into ⅛-inch thick rounds using a mandoline or sharp knife. For the 2 lb russet potatoes and 2 lb sweet potatoes, slice them skin-on into ⅛-inch thick rounds - the skins add texture and nutrients.
Arrange the sliced vegetables in a single layer on paper towels and pat them completely dry. Any moisture left on the vegetables will prevent crispiness. I like to work in batches so the vegetables don't sit too long before baking. The thinner and drier the slices, the crispier your final crisps will be.
Create the Crispy Coating Mixture
In a large bowl, whisk together the 2 tbsp cornstarch, 1 tbsp extra-virgin olive oil, 2 tbsp smoked paprika, 1 tbsp garlic powder, 2 tbsp nutritional yeast, 1 tsp sea salt, and 0.5 tsp ground black pepper. The cornstarch is key here - it creates that satisfying crunch while keeping the crisps light. Nutritional yeast adds that cheesy, umami depth that makes these taste far from basic vegetables.
Toss the dried vegetable slices in this mixture until they're evenly coated. You'll notice the vegetables immediately start to look more vibrant and appetizing. For extra crispiness, I recommend letting the coated vegetables rest for 10 minutes at room temperature. This allows the coating to adhere better and creates a more even crisp when baked.
Bake in Batches for Perfect Crispiness
Line two baking sheets with parchment paper and arrange the coated vegetable slices in a single layer, leaving about ½ inch between each piece. They shouldn't touch or they'll steam instead of crisp. Bake at 375°F for 15-20 minutes, flipping each piece halfway through with tongs. You'll know they're done when the edges are deep golden brown and the centers offer slight resistance when pressed.
Here's the thing - don't overcrowd the pans. If you do, the crisps will lose their crispiness as they steam. I find that working in two batches gives me perfect results every time. The first batch will be ready first, so you can start tasting as you go. Remove them when they're golden - they'll continue crisping as they cool.
Cool and Serve Immediately
Transfer the baked crisps to a wire rack set over a baking sheet to cool completely. This cooling step is crucial - it allows the crisps to set properly and develop maximum crunch. If you serve them immediately after baking, they'll be too soft. I promise, the 10-minute wait makes all the difference in texture.
Once cooled, these crisps will be wonderfully crispy with a satisfying snap. Store any leftovers in an airtight container at room temperature for up to 3 days, though I rarely have any left that long. They make fantastic snacks, appetizers, or even a crunchy topping for salads. The flavor combinations are endless - try them with different seasonings or even a sprinkle of fresh herbs for variety.
Pro Tips For Making Veg Crisps
- PREHEAT THE OVEN: Don’t even think about skipping this—425°F (220°C) is the magic number for crispy, not soggy, crisps. I used to toss them in at 375°F (190°C) and wondered why they came out limp. Preheat for 10 minutes with the rack in the middle, and resist the urge to crowd the tray later.
- DRY THE SLICES WELL: After slicing, pat the potatoes thoroughly with a kitchen towel—especially the Russets, which hold moisture like a sponge. I learned this the hard way when my first batch turned out greasy instead of crispy. Leave them uncovered on a rack for 20-30 minutes if you’re in a rush, but don’t skip the towel step.
- SINGLE-LAYER ONLY: Stacking slices is the fastest way to ruin a batch. They’ll steam instead of crisp, and you’ll end up with a sad, uneven pile. Use two trays if needed—just make sure they’re not touching. Trust me, the extra 10 minutes rearranging saves you from throwing out a whole tray.
- TOSS WITH OIL: Drizzle the olive oil lightly over the slices, then toss them in a bowl with a pinch of salt—this helps the oil cling evenly. I was skeptical about this step at first, but it guarantees every crisp gets that perfect golden crunch. Skip the heavy hand, or you’ll end up with a greasy mess.
Serving suggestions for this veg crisps
Crunchy Dip Pairings
These veg crisps shine with bold dips that complement their savory seasoning. Try my creamy cashew sour cream—blend 1 cup soaked cashews, 2 tbsp lemon juice, 1 tbsp apple cider vinegar, and ½ tsp garlic powder until smooth.
The tangy creaminess balances the smoky paprika perfectly. For something zesty, whip up a spicy harissa yogurt by mixing ½ cup Greek yogurt with 1 tbsp harissa paste and a pinch of salt. 🥄
Party Platter Ideas
Arrange crisps on a platter with contrasting colors for visual appeal. I layer golden sweet potato crisps with deep red beet slices and orange carrot crisps for a vibrant spread.
Add pickled jalapeños and marinated olives for acidity and briny contrast. Serve with small bowls of dips for easy sharing—guests will love the mix of textures and flavors. 🎉
Salad Toppers
Use these crisps as a crunchy salad garnish to elevate any dish. Toss them into kale and quinoa salads or sprinkle over warm lentil bowls. For extra flair, lightly toast nutritional yeast and sprinkle it over the crisps before adding to salads.
The crispy texture adds a satisfying bite that contrasts beautifully with creamy dressings. 🥗
Meal Prep Hacks
Prep crisps ahead of time and store them in resealable snack bags for easy grab-and-go snacks. I portion them into individual bags with a small dip packet for a balanced meal.
These work perfectly as lunchbox additions or post-workout fuel—just reheat in the oven for 3-5 minutes at 350°F to restore crispiness. 📦
Global Flavor Twists
Transform your crisps into international-inspired bites. For a Japanese touch, toss baked crisps with 1 tsp furikake seasoning and serve with soy-glazed edamame. A Mexican vibe comes from sprinkling taco seasoning and serving with guacamole. The possibilities are endless—let your favorite cuisines inspire your next batch! 🌎
Kid-Friendly Serving
Make crispy veggies fun for picky eaters by arranging them in colorful patterns on a platter. Use cookie cutters to shape sweet potato slices into stars or hearts before baking.
Serve with yogurt-based dips** (like ranch or honey mustard) that kids love. The familiar chip shape and playful presentation often wins over even the most hesitant snackers. 🧒
Nutrition facts
Frequently asked questions
Can I make these veg crisps without an oven?
An air fryer works perfectly for crispy results. Arrange slices in a single layer and air fry at 375°F for 8-12 minutes, shaking the basket halfway. For a stovetop method, use a nonstick pan with ¼ inch of oil and cook over medium-low heat for 3-4 minutes per side until golden. The key is low heat and patience to avoid burning.
Why did my veg crisps turn out soggy instead of crispy?
Soggy crisps usually mean moisture wasn't properly removed or slices were too thick. Pat slices thoroughly dry and let them rest 10 minutes after seasoning. Use a mandoline for ⅛-inch thickness and avoid overcrowding the pan. Bake at 375°F for 15-20 minutes—they crisp up more as they cool!
What other vegetables work well for crisps?
Beyond potatoes and sweet potatoes, try parsnips, butternut squash, or radishes for unique flavors. For color, add purple cabbage or zucchini. Just ensure all veggies are firm and dry—softer varieties like tomatoes won't crisp. Thinly sliced green beans also make great crisps!
How do I store leftover veg crisps to keep them crispy?
Store in an airtight container at room temperature for 3-4 days. For longer storage, freeze crisps on a tray for 1 hour before transferring to a bag. Reheat in the oven at 350°F for 3-5 minutes until crispy again. Avoid plastic bags—they trap moisture and make crisps soft.
Can I make these gluten-free?
Yes! Simply omit the cornstarch and use arrowroot powder (2 tbsp) instead. It creates the same crispy texture without gluten. For extra crunch, toss slices in crushed gluten-free crackers or ground nuts before baking. All other ingredients in the recipe are naturally gluten-free.