
Side Dishes
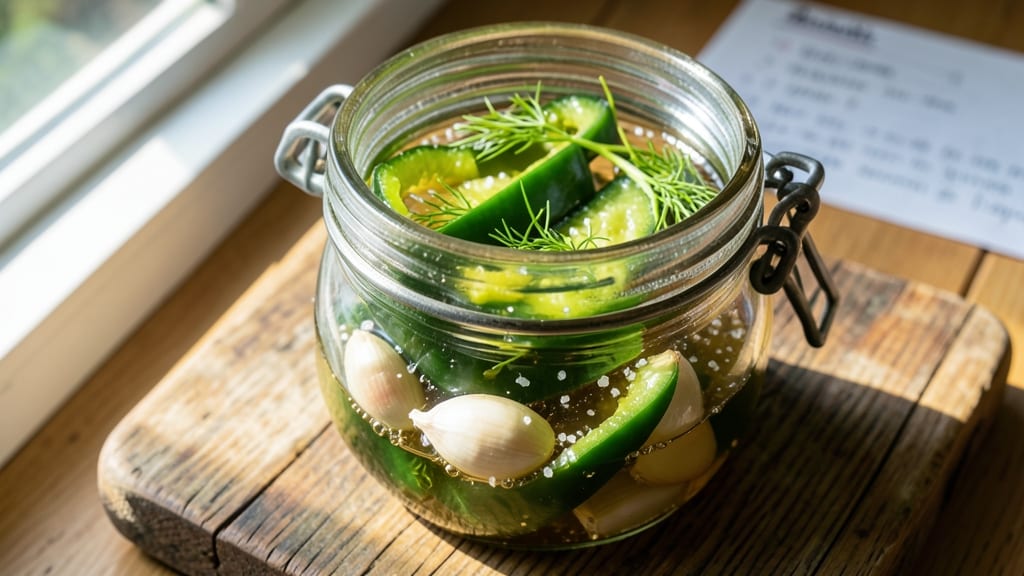
This pickled sweet bell peppers recipe transforms crunchy, vibrant peppers into a tangy, shelf-stable condiment that adds brightness to sandwiches, salads, and charcuterie boards. The vinegar-brining method preserves their natural sweetness while infusing them with bold, herby flavors in just 10 minutes of active prep—no fermentation required.
I developed this recipe after realizing how versatile pickled peppers could be, turning a simple side into a flavor-packed addition to countless meals.
The process is straightforward and safe for beginners, using white vinegar and simple spices to create a quick-pickle that stays fresh for months. Sterilized jars and precise measurements ensure no risk of spoilage, while the balance of acidity and sweetness makes these peppers irresistibly crunchy.
Perfect for vegetarians and vegans, this method skips honey or animal products entirely, relying instead on sugar and salt for preservation and flavor.
What you’ll end up with is a jar of glossy, vinegar-bright peppers that pop with every bite—sweet yet tangy, with just the right crunch. They’re ideal for topping burgers, mixing into grain bowls, or serving alongside charcuterie as a refreshing contrast.
The recipe scales easily, so you can make a single jar for personal use or batch-prep for gifting.
Once you try these pickled peppers, you’ll never buy store-bought again. The key lies in the sterilization, vinegar ratio, and proper jar sealing—details that guarantee a safe, flavorful result every time. Let’s get started on this foolproof method that delivers restaurant-quality crunch in minutes.
Ingredients for pickled sweet bell peppers
Nine essential ingredients transform crisp bell peppers into vibrant, tangy preserves perfect for sandwiches, salads, and charcuterie boards.
| Ingredient | Amount | Notes |
|---|---|---|
| Fresh Sweet Bell Peppers 🌶️ | 4 whole | Red, yellow, or orange preferred |
| White Distilled Vinegar 💧 | 2 cups | 5% acidity minimum for safety |
| Granulated Sugar 🍚 | 1 cup | White or raw preferred |
| Diamond Crystal Kosher Salt 🧂 | ½ cup | Not table salt equivalent |
| Fresh Garlic Cloves 🧄 | 4 cloves | Minced for infusion |
| Fresh Dill Sprigs 🌿 | ¼ cup | Packed, stems removed |
| Black Peppercorns 🌶️ | 1 tbsp | Crushed for texture |
| Mustard Seeds 🌿 | 1 tsp | Whole seeds preferred |
| Red Wine Vinegar 🍷 | ¼ cup | For depth of flavor |
| Water 💧 | 1 cup | Filtered preferred |
| Pint-Sized Mason Jars 🍯 | 2 jars | With airtight lids |
The quality of your vinegar and sugar establishes the foundation. White distilled vinegar at 5% acidity or higher ensures proper preservation, while granulated sugar balances the acidity for a sweet-tangy profile. For vinegar, brands like Heinz or Bragg are reliable staples, but any food-grade vinegar works. The sugar should be fine and dry—no clumps. Fresh bell peppers are non-negotiable; their natural sweetness is the star here. Opt for red, yellow, or orange varieties from local farmers' markets or high-end grocery stores like Whole Foods or Trader Joe's for vibrant color and crisp texture. The Diamond Crystal kosher salt is critical—it dissolves more easily than table salt, ensuring even distribution in the brine.
No fresh dill? Dried dill at one-third the amount works in a pinch, though fresh imparts a brighter flavor. Short on mustard seeds? Ground mustard at half the amount adds warmth but lacks texture. The red wine vinegar can be swapped for apple cider vinegar if unavailable, though it’ll alter the flavor profile slightly. For a quicker prep, use pre-minced garlic from a jar, but fresh minced garlic delivers superior depth. If you’re scaling up, maintain the 1:1 vinegar-to-water ratio—this balance guarantees safety and flavor. Sterilize jars and lids by boiling for 10 minutes to prevent spoilage, a step that cannot be skipped.
Once sealed, these pickled peppers remain crisp and flavorful for up to 6 months in a cool, dark pantry. The jars should be stored upright to prevent lid corrosion. For gifting, wrap the lids with parchment paper before tying with twine. Refrigerate after opening and consume within 2 weeks. The peppers develop more complexity over time, so the flavor actually improves with age. Label each jar with the date to track freshness. For a restaurant-quality touch, garnish the finished jars with a sprig of fresh dill before sealing.
Why You'll Love This Recipe
- No-Fuss Pantry Project: I’ll bet you already have everything—vinegar, sugar, salt—just waiting in your cabinets. No fancy tools, no last-minute grocery runs. Honestly, I’ve made this three times with whatever peppers were on sale, and it still turns out spot-on.
- Sweet Heat Balance: That first tangy bite? Chef’s kiss. The sugar softens the edges while the garlic and vinegar keep it bright—like a crunchy, slightly spicy hug for your taste buds. (Yes, even on a Tuesday night.)
- Meal Prep MVP: Toss these into tacos, pasta, or eggs all week—no reheating needed. I keep a jar in my fridge for lazy lunches, and they last forever. Between us, my kids grab them straight from the jar like candy. (Not the prettiest, but the taste makes up for it.)
- Budget Brightener: A single jar costs pennies but stretches across breakfasts, sandwiches, and snack plates. Diamond Crystal salt? A little goes a long way. This is my go-to when I need flavor without the grocery bill.
Step-by-step instructions for vinegar-bright crunch in 10 minutes
Precision is key to achieving vibrant, flavorful pickled peppers with perfect texture.
Prepare the Peppers and Sterilize the Jars
Begin by washing the 4 whole fresh sweet bell peppers thoroughly under cool water, then pat them completely dry. Using a sharp chef's knife, cut each pepper lengthwise into 4 equal wedges, ensuring you remove the core and seeds completely. This creates uniform pieces that will pickle evenly.
While you prepare the peppers, sterilize the 2 pint-sized mason jars by running them through a hot water bath for 5 minutes. This eliminates any bacteria that could compromise your pickles. You can also sterilize them in a 200°F oven for 10 minutes if preferred. Keep the jars warm until ready to use.
Create the Brine Mixture
In a medium saucepan, combine the 1 cup granulated sugar, 0.5 cup diamond crystal kosher salt, 1 cup water, and 2 cups white distilled vinegar. Bring the mixture to a gentle boil over medium-high heat, stirring constantly until the sugar and salt completely dissolve. This creates a saturated brine that ensures proper preservation.
Once boiling, immediately reduce heat to low and let the brine simmer for 3 minutes. Then remove from heat and stir in the 0.25 cup red wine vinegar, 4 minced fresh garlic cloves, 1 tbsp crushed black peppercorns, 1 tsp whole mustard seeds, and 0.25 cup packed fresh dill sprigs. Let the mixture steep for 5 minutes to infuse flavors before proceeding.
Pack the Peppers and Pour the Brine
Working quickly, pack the pepper wedges tightly into the sterilized pint-sized mason jars, leaving about ½-inch headspace at the top. Use a wooden spoon to press down gently, ensuring the peppers are submerged as you fill each jar. This prevents mold growth and ensures even pickling.
Using a funnel, carefully pour the warm brine over the peppers, filling each jar to within ½-inch of the rim. The peppers should be completely covered by the liquid. Wipe the jar rims with a clean, damp cloth to remove any residue that could prevent proper sealing.
Seal and Process for Maximum Preservation
Place the lids on the jars and tighten the bands until finger-tight—not overly tight, as this can cause the jars to crack. Set the jars on a cool countertop for 5 minutes to allow the lids to seal properly. You'll hear a distinct popping sound as the lids seal—this confirms an airtight vacuum.
For best results, store the jars in a cool, dark place for at least 48 hours before consuming. This allows the flavors to fully meld. Once sealed, these pickled peppers will keep in the refrigerator for up to 6 months, maintaining their vibrant color and crisp texture. The acidity from the vinegar ensures they're safe to eat straight from the jar.
Pro Tips For Making Pickled Sweet Bell Peppers
- STERILIZE YOUR JARS FIRST: I learned this the hard way—skipping sterilization leads to moldy peppers in weeks. Boil jars and lids in simmering water for 10 minutes (even if you’re using vinegar, bacteria still hides in tiny crevices). Cold water baths won’t cut it—this isn’t a shortcut, it’s insurance.
- USE SLICED GARLIC, NOT MINCED: Whole cloves turn into bitter sludge; minced burns into nothingness. Thinly slice garlic lengthwise into paper-thin sheets—just enough to flavor without overpowering. Toss them in last, right before sealing, so they infuse without turning the brine muddy.
- WEIGH DOWN PEPPERS PROPERLY: Peppers floating = uneven pickling. Use a sterilized weight (glass marble, jar lifter, or even a folded paper towel) to fully submerge them in brine. If they bob, the tops stay raw and the bottoms over-soften—like eating a science experiment instead of a snack.
- DILUTE SUGAR IN COOL VINEGAR: Dumping sugar straight into hot vinegar makes a pasty sludge that never dissolves. Mix it into cooled vinegar first—just stir until fully dissolved, then heat gently. This keeps your brine crystal-clear and prevents that dreaded grainy texture in the final jar.
Troubleshooting this recipe
Peppers Staying Soft
If your pickled peppers turn mushy instead of staying crisp, it’s likely due to overcrowding in the jars or insufficient acidity. Always leave ½-inch headspace between the peppers and brine to allow proper circulation. For extra crunch, add 1 tsp baking soda to each jar before sealing—this helps maintain firmness.
I also recommend using younger, firmer peppers (like those just picked from the garden) for the best texture. 💫
Brine Not Covering Peppers
Uneven brine coverage leads to spoilage or bland flavor. To fix this, pack peppers loosely at first, then pour in the brine, and press them down with a wooden spoon until fully submerged. If peppers float, add 1 tsp xanthan gum to the brine before heating—it thickens the liquid slightly.
For stubborn floaters, use a small weight like a sterilized glass bead to keep them under. 🌊
Jars Not Sealing Properly
A failed seal usually happens when jar rims aren’t clean or lids aren’t tightened correctly. Wipe the rims with a damp cloth soaked in vinegar before sealing, and ensure lids are finger-tight (not overly tight).
If a jar fails to seal, refrigerate it immediately and consume within 1 week. I’ve also found that using new lids (not reused ones) improves success rates. 🔒
Mold or Fuzz Developing
Mold appears when peppers aren’t fully submerged or the brine isn’t acidic enough. Discard any jars with mold immediately—it’s not safe to eat. To prevent this, always use 5% acidity vinegar and maintain a 1:1 vinegar-to-water ratio.
For extra safety, add ½ tsp citric acid to the brine. Store jars in a cool, dark place (like a pantry) to slow bacterial growth. ⚠️
Flavor Too Mild
Weak flavor often means the peppers weren’t infused long enough. Let the brine steep for at least 10 minutes before packing the jars, and store the pickles for 24-48 hours before eating.
For a bolder taste, increase the red wine vinegar to ½ cup and add 1 tsp smoked paprika to the brine. I also recommend using hotter vinegar (like apple cider) for extra depth. 🌶️
Peppers Turning Color
Discoloration happens when peppers oxidize or the vinegar isn’t strong enough. To preserve their vibrant hue, add ½ tsp turmeric to the brine (it also adds a subtle earthy note). For red peppers, use white vinegar**—it’s less likely to alter color than apple cider vinegar.
If peppers darken slightly, they’re still safe to eat, but the color won’t be as bright. 🎨
Nutrition facts
Frequently asked questions
Can I use green bell peppers instead of red, yellow, or orange?
Yes, but expect a slightly different flavor profile. Green bell peppers have a grassier, less sweet taste compared to their red, yellow, or orange counterparts. They’ll still pickle beautifully, though the vibrant colors of red/yellow peppers make them ideal for visual appeal. For best results, stick with the recommended colors, but green works in a pinch!
How long do these pickled peppers last once opened?
After opening, transfer the peppers and remaining brine to an airtight container and refrigerate. They’ll stay fresh for 2-3 weeks. The vinegar preserves them well, but refrigeration extends their shelf life significantly. For longer storage, consider freezing the peppers in brine for up to 3 months.
Can I make this recipe without vinegar?
No, vinegar is essential for both flavor and preservation. Without it, the peppers will spoil quickly due to bacterial growth. If you’re avoiding vinegar for dietary reasons, you could try a fermented method (like lacto-fermentation), but that requires 2-4 weeks of processing and a different set of ingredients (like salt and water only). The vinegar method here is quick, safe, and beginner-friendly.
What are the best ways to use these pickled peppers?
These peppers shine as a topping for burgers, tacos, or sandwiches, mixed into grain bowls or salads, or served alongside charcuterie boards for a tangy crunch. They also pair well with grilled meats, cheeses, or hummus. For a quick snack, eat them straight from the jar! Their bright flavor cuts through rich or fatty dishes beautifully.
Why do some recipes call for honey or maple syrup instead of sugar?
Honey or maple syrup adds a deeper, slightly floral sweetness compared to granulated sugar. However, this recipe uses sugar to keep it vegan-friendly and to ensure the peppers stay crisp. If you prefer a natural sweetener, substitute agave nectar or coconut sugar (use the same amount as granulated sugar). Just note that honey isn’t vegan, so it’s excluded here.